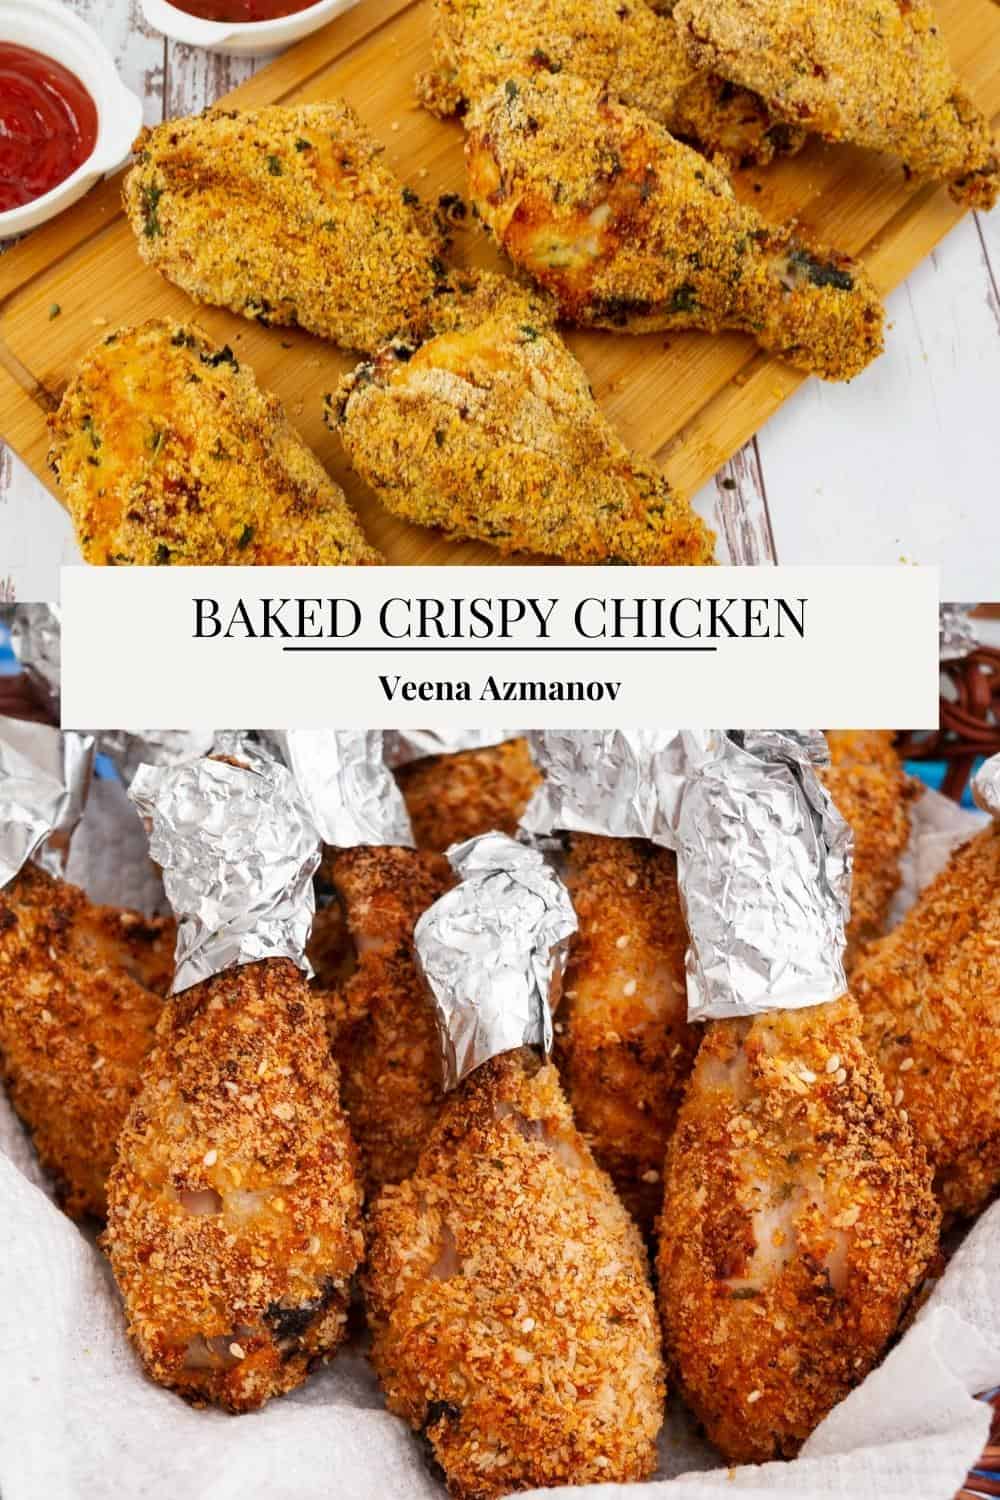
Oven Fried Chicken Recipe
 Prep Time 20 minutes Cook Time 45 minutes Total Time 1 hour 35 minutes


This oven-fried chicken recipe is so good that you’ll want to skip fast food for good. This oven-frying technique is closest to deep frying but without all that grease. Get a crunchy golden crust on your chicken with no extra fat.

My kids love fried chicken, and while I treat them to it occasionally, I prefer baking chicken to help instill the importance of healthy eating. Baking allows me to create a delicious, crispy texture without all the added oil, and it’s become a great way to offer them a healthier version of their favorite meal.
Why make this fried chicken?
- It is healthier than deep-fried chicken, so you can eat it as often as you want.
- Most of the ingredients in this recipe are easy to find or simple pantry staples.
- The secret to making these oven-fried chicken legs crispy is using rice flour, cornstarch, semolina, and breadcrumbs. Rice flour and cornstarch, when combined with the marinade, bake hard. The semolina works wonderfully in adding a nice crunch, while the breadcrumbs make sure it’s not too hard.
- These are delicious on their own, or you can serve them with a side of mashed potatoes, roast potatoes, or rice, such as turmeric rice or rice pilaf with fruit and nuts.

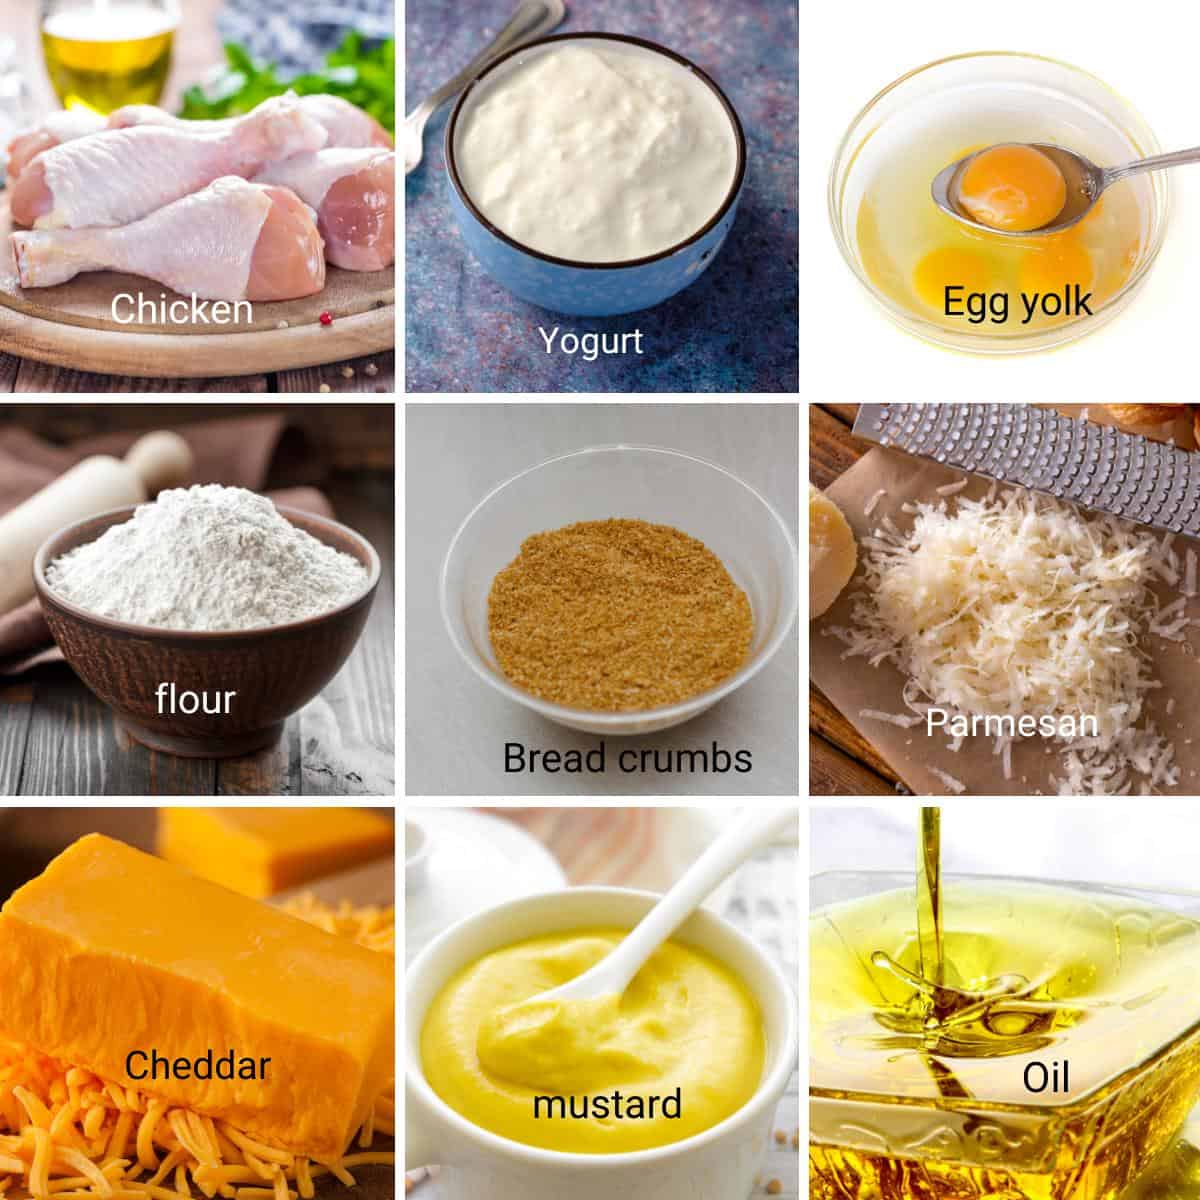
Ingredients and substitutes
- Chicken – It is best to use chicken thighs or chicken legs for this recipe, as they are the most desired cuts, but of course, other cuts work too.
- Yogurt – While buttermilk is the obvious choice, I like to use thick Greek yogurt to control the amount of liquid. It also helps tenderize the chicken.
- Egg yolk – Helps bind all the ingredients together and keeps the crust from breaking apart when baked. You can use a large whole egg if you prefer, too.
- Herbs – I like to use dried Italian herbs, which are a mix of basil, oregano, thyme, and a few others, along with some freshly chopped parsley. Do not use too many fresh herbs, or it will weaken the crust once baked.
- Flour – Helps to add body to the marinade. And, when combined with the egg yolk, it helps the marinade stick to the chicken.
- Rice and cornflour – Rice flour can make the crust crispy. So, if possible, I highly recommend using it.
- Breadcrumbs – I’ve used a mix of both coarse and thick panko bread crumbs. This helps give us that uneven texture, which gets brown and crisp.
- Spices – I like using paprika, but you can also use cayenne pepper in both the egg and flour mixtures. You can also use onion powder, lemon juice, and hot sauce to dredge the chicken for flavor.
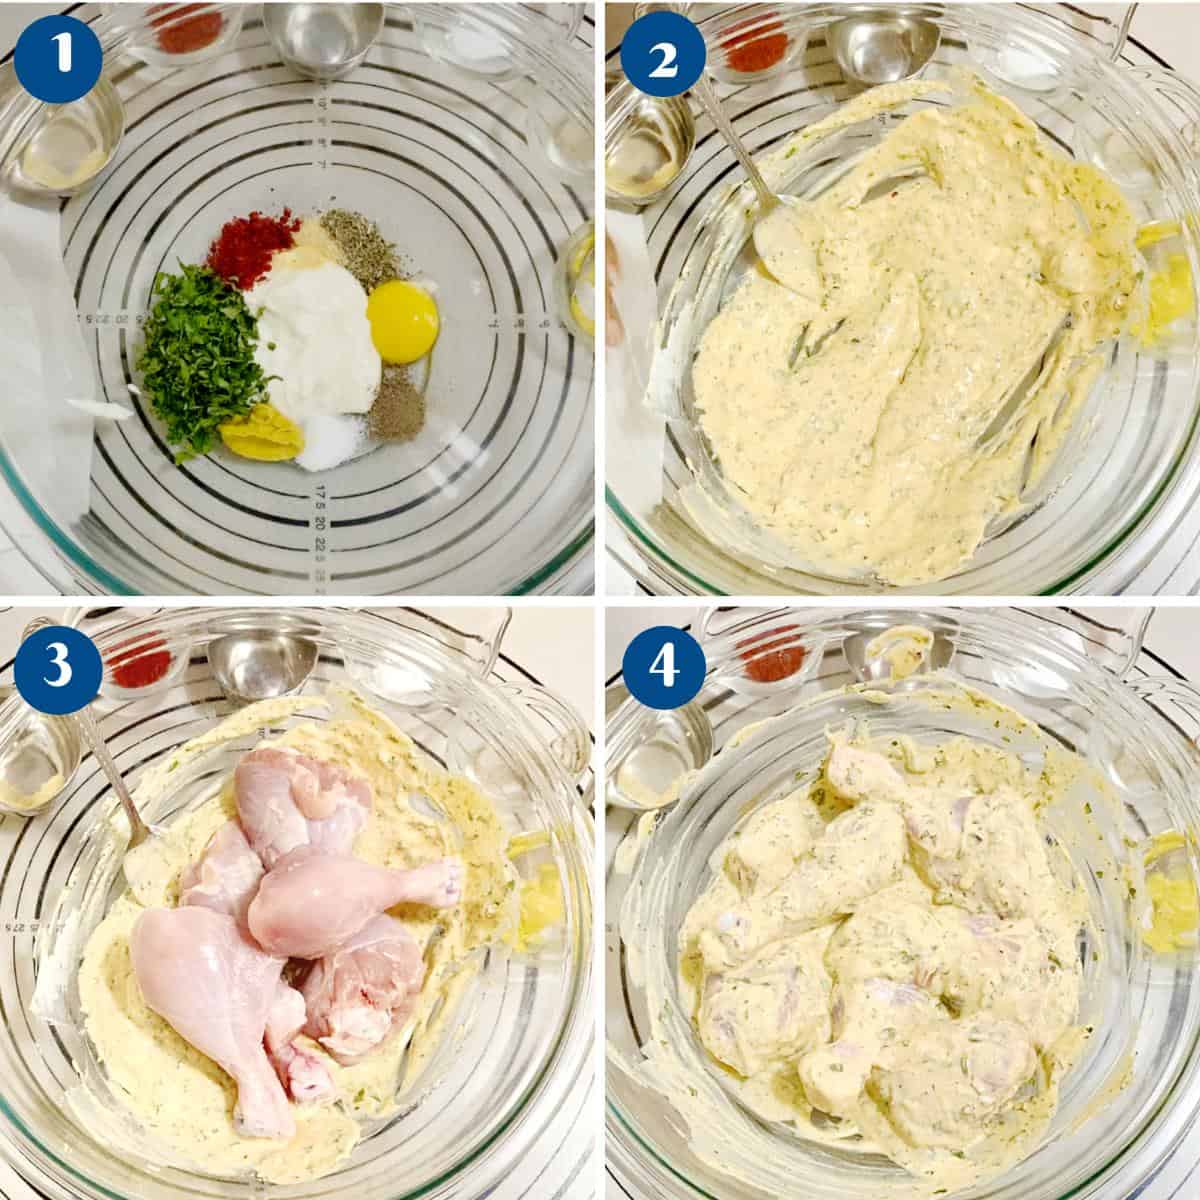
Step-by-step: Oven-fried chicken
- Marinade – Place all the marinade ingredients in a large bowl and combine well.
- Marinate – Add the chicken pieces and combine well. Cover the bowl and leave to marinate for 30 minutes on the counter or up to 12 hours in the fridge.
Pro tip – Long marination will make the chicken tender and juicy, but up to overnight only.
- Coating – In a large bowl, combine all the coating ingredients.
Pro tip – The flour tends to settle at the bottom, so keep tossing it around during coating. - Oven – Preheat the oven to 200 °C/400°F/Gas Mark 6. Line a baking tray with parchment paper for easy cleanup. Spray the parchment paper with cooking spray.
Pro tip – Spraying the parchment paper will prevent the chicken from sticking to the parchment during baking.

- Coat – Use a fork to pick the drumstick from the marinade and add it to the breadcrumb coating. Coat it generously with the breadcrumbs. Shake off excess.
- Tray – Place the chicken pieces on the baking sheet and spray generously with cooking spray.
- Bake – Transfer to the oven on the center rack and bake for 40 to 45 minutes, turning them over to cook evenly. Spray with cooking spray again, too.
Pro tip – Spraying will give the chicken a nice golden color. Otherwise, they will be baked but with a very pale breadcrumb color. - Cool – Remove the chicken from the oven and let it cool for 10 minutes before serving.
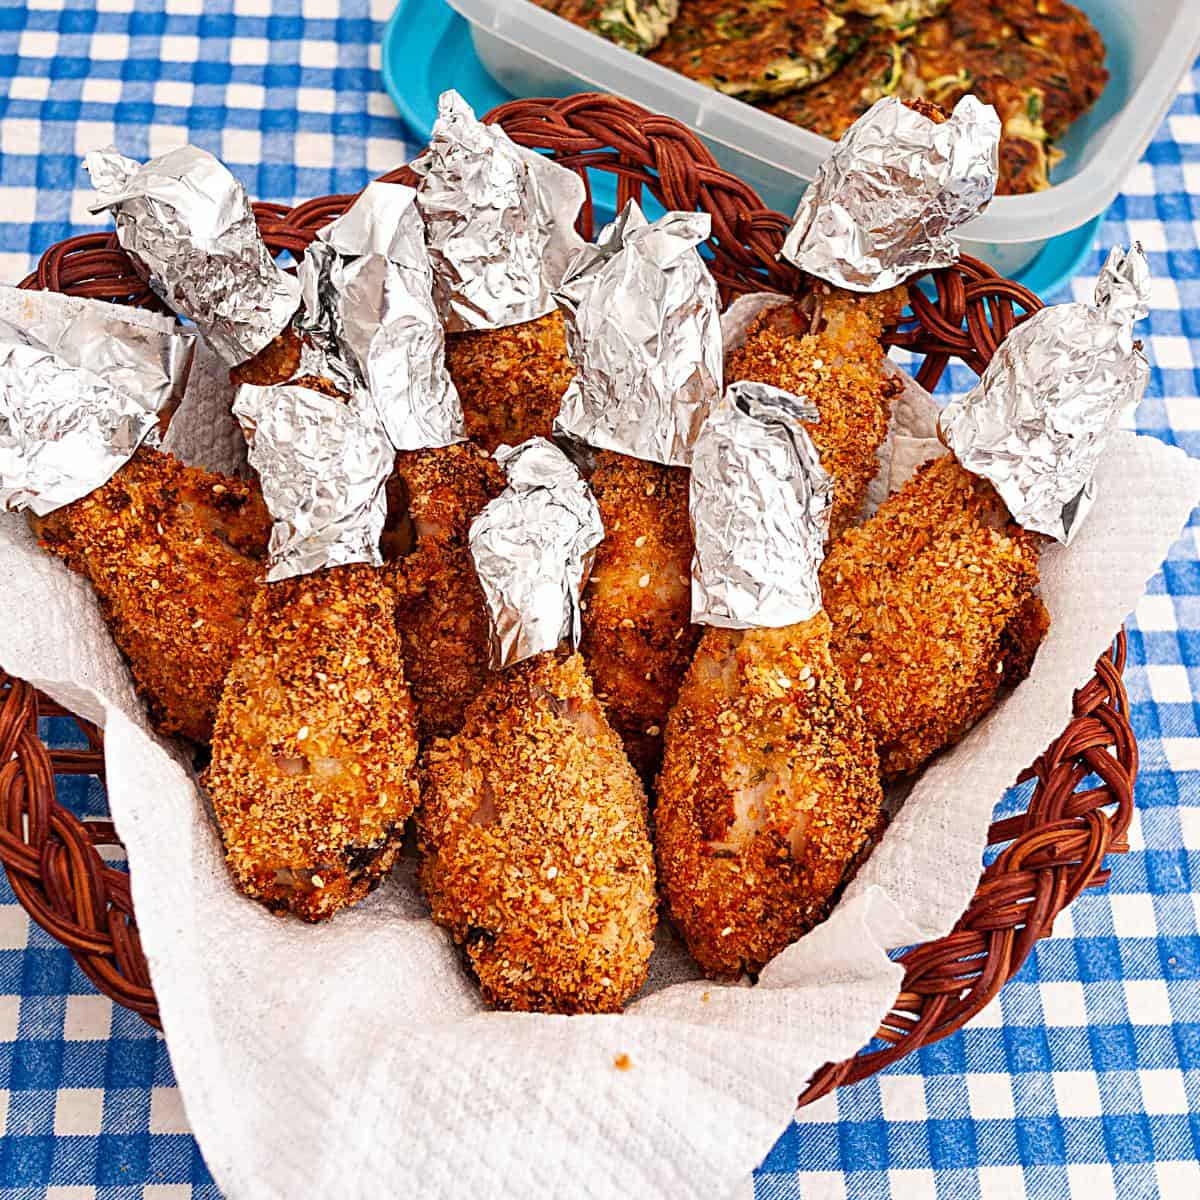
Crispy chicken makes perfect freezer meals
I usually make more than I need for one meal, so I can put the extra pieces in the freezer for busy days.
- Cook them as we do above. When they are cold, just place them in a ziplock bag. These make amazing sandwiches and wraps. If you have teenagers (who are always hungry), these are great to have on hand. Just thaw as many as you need in the microwave.
- You can also freeze them uncooked. Place them in a ziplock bag, remove as much air, and lay them flat in the freezer until frozen. Once they are frozen, you can stack them and store them in the freezer corner until you need them.
To re-use, just thaw them in the fridge for a couple of hours and cook them as we do above.


Frequently asked questions
This crispy chicken is best made fresh when the crust is nice and crispy. But leftovers will keep in the fridge for 3 to 4 days.
This is a very versatile dish that pairs well with almost any veggies. For example, try sautéed green beans or asparagus, baked butternut squash, or carrots. You can also try a side of simple salad like celery, carrots, cabbage, etc.
You can also use crushed cornflakes or crushed cereal to coat the chicken. Make sure to give it a good oil spray to ensure you have a nice golden color.
Both deep-fried and oven-crispy chicken have their unique taste and texture.
Deep-fried is considered more flavorful and crispy on the outside. Tender and flavorful on the inside. However, deep-frying is also considered unhealthy and loaded with calories and saturated fat.
On the other hand, oven-baked crispy chicken is a healthier alternative. It is still delicious, crispy, and not greasy. You can see the left chicken in this picture is deep-fried, and the right is oven-baked.
Yes!! It is a healthier version of this crispy fried chicken. Once you’ve coated the chicken with flour, give it a generous spray with cooking oil. Preheat the air fryer to 200C/400F, then place the chicken in there and cook for 20 to 25 minutes, turning once in between.
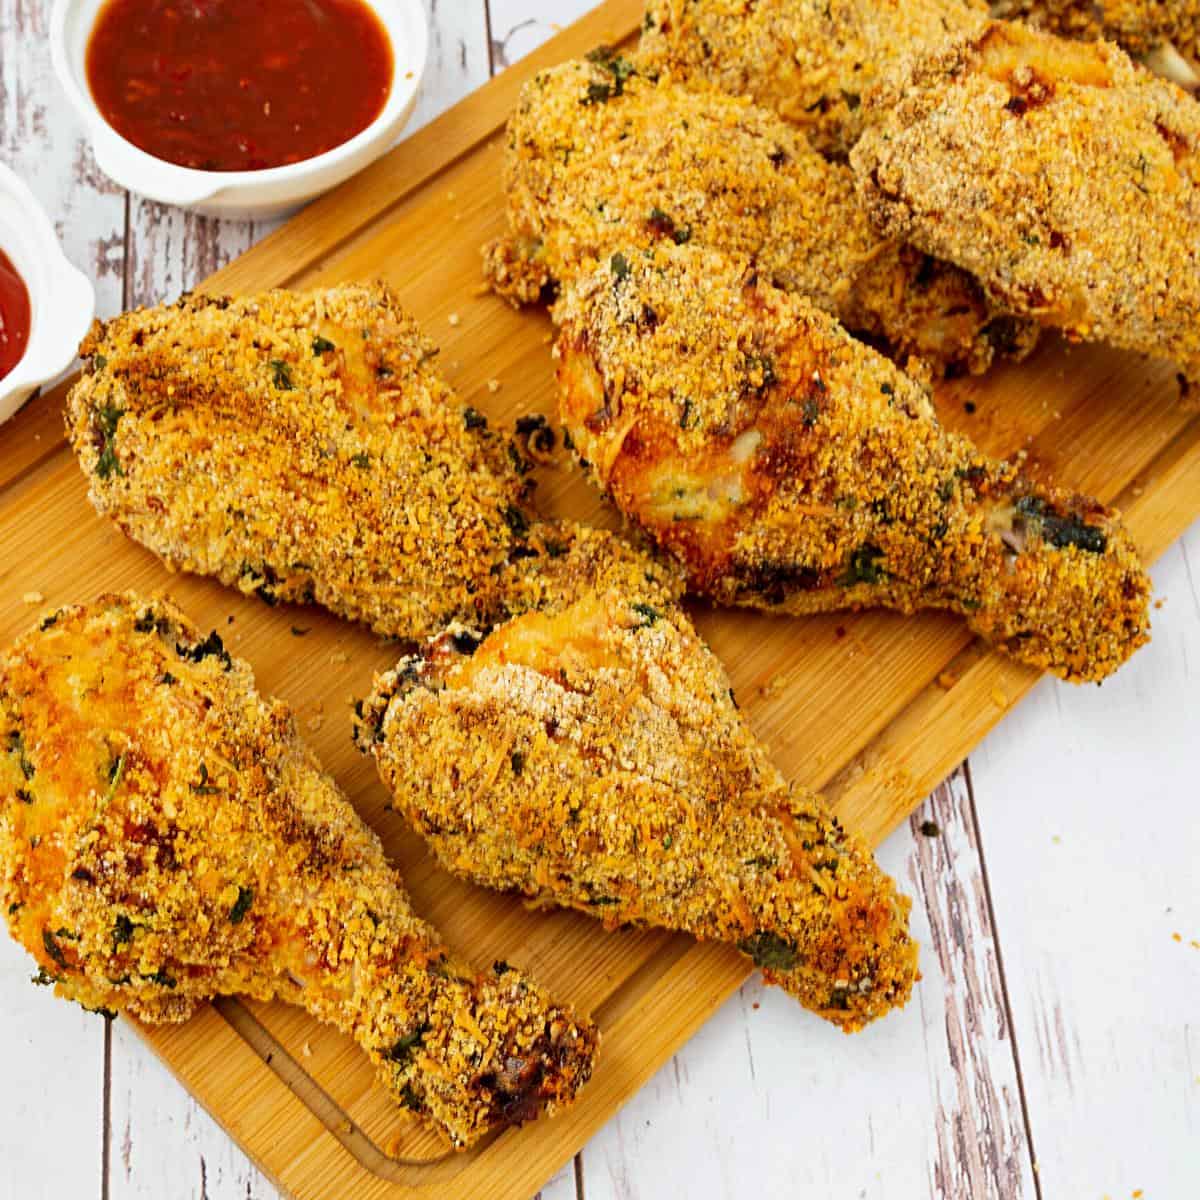
Crispy Oven Fried Chicken Recipe
These crispy oven-fried chicken drumsticks are crunchy and crispy on the outside and tender and moist on the inside. They are baked, not deep-fried. A few simple tricks are all you need to make them in a little over an hour.
Video
Ingredients
- 8 (2 lb) Chicken legs (drumstick or thighs) skinless bone-in
- 4 tbsp (60 g) Greek yogurt
- 1 tbsp Mustard
- 1 large Egg yolk
- ¼ tsp Garlic powder
- 1 tsp Paprika smoked hot or sweet
- ½ tsp Salt
- ½ tsp Pepper
- 1 tsp Italian herbs dried
- 4 tbsp (30 g) Flour
- 2 tbsp Parsley or cilantro finely chopped
- ½ cup (50 g) Breadcrumbs
- ½ cup (30 g) Panko breadcrumbs
- ½ cup (85 g) Semolina
- ¼ cup (30 g) Cornstarch
- ¼ cup (40 g) Rice flour or cornstarch
- 2 tbsp Parsley or cilantro, finely chopped
- ½ tsp Salt
- ½ tsp Pepper
- ½ tsp Italian herbs dried
- 2 tbsp Parmesan finely grated
- 2 tbsp Cheddar or similar finely grated
Method
- Marinade – Place all the marinade ingredients in a large bowl and combine well.4 tbsp Greek yogurt, 1 tbsp Mustard, 1 large Egg yolk, ¼ tsp Garlic powder, 1 tsp Paprika, 1/2 tsp Salt, 1/2 tsp Pepper, 1 tsp Italian herbs, 4 tbsp Flour, 2 tbsp Parsley
- Marinate – Add the chicken pieces and combine well. Cover the bowl and leave to marinate for 30 minutes on the counter or up to 12 hours in the fridge. Pro tip – Long marination will make the chicken tender and juicy, but up to overnight only.8 Chicken legs (drumstick or thighs)
- Coating – In a large bowl, combine all the coating ingredients. Pro tip – The flour tends to settle at the bottom, so keep tossing it around during coating.½ cup Breadcrumbs, ½ cup Panko breadcrumbs, ½ cup Semolina, ¼ cup Cornstarch, ¼ cup Rice flour , 2 tbsp Parsley, ½ tsp Salt, ½ tsp Pepper, ½ tsp Italian herbs, 2 tbsp Parmesan, 2 tbsp Cheddar
- Oven – Preheat the oven to 200C/ 400F / Gas Mark 6. Line a baking tray with parchment paper for easy cleanup. Spray the parchment paper with cooking spray. Pro tip – Spraying the parchment paper will prevent the chicken from sticking to the parchment during baking.
- Coat – Use a fork to pick the drumstick from the marinade and add it to the breadcrumb coating. Coat it generously with the breadcrumbs. Shake off the excess.
- Tray – Place the chicken pieces on the baking tray and spray generously with cooking spray.
- Bake – Transfer to the oven on the center rack and bake for 40 to 45 minutes, turning them over to cook evenly. Spray with cooking spray again, too. Pro tip – Spraying will give the chicken a nice golden color. Otherwise, they will be baked but with a very pale breadcrumb color.
- Cool – Remove the chicken from the oven and let cool for 10 minutes before serving.
Notes
- Let the chicken marinate for a longer time, which will tenderize the chicken and make it more flavorful.
- Use spices and herbs for flavor, and generously season the chicken with salt and pepper.
- It is best to overseason and flavor the breadcrumb flour mixture, as much of it will not be used.
- It is best to use a baking tray rather than a baking dish. This helps with air circulation around the chicken, preventing excess moisture accumulation.
- Preheat the oven for no less than 30 minutes. This will ensure the chicken goes into the hot oven, and fewer juices will pool on the baking tray. If you prefer, you can also place the chicken on a wire rack to increase air circulation.
- Use a cooking spray or high-smoking oil to coat the chicken. This will give the chicken a nice golden color, which looks very appetizing and impressive to serve. For a deep, darker golden crust, you can also brush with melted butter.
- The chicken must be cooked until the internal temperature of the chicken reaches 165F.
- If you don’t get a nice golden color on the chicken, put the broiler on or heat the top heating rack for the final few minutes.
Equipment you will need


Nutrition
Tried this recipe?
Mention @veenaazmanov_kitchen or tag #veenaazmanovkitchen!Don’t lose this recipe! Save it for Later!
📌 Save this Recipe for later on Pinterest so you can easily find it again.
⭐ Add Veena Azmanov Kitchen to your Google Preferred Sources.
It helps Google show you more of our recipes.
📧 Subscribe for new recipes delivered to your inbox.
🎥 Follow us for more recipes


Dear Veena , Amazing Crispy baked chicken . I tried this , and it turned out to be great . The chicken was so delicious – just the right texture and juicy. I think this recipe is a keeper . I follow your blog and recipes – so helpful for me ! Wish you all the best.
Sorry i could not click any pictures – the chicken was eaten off in a jiffy !
Thank you so much, Pritha. So happy to hear that.
These drumsticks look amazing – my mouth is watering at the thought of them! A delicious weeknight or weekday meal!
Thanks, Bintu. I hope you try them soon.
So crispy and tender! Great recipe.
Thank you, Katherine
This looks so crispy and delicious. Even better that it is baked.
Thank you, Dannii.
These chicken are incredibly crispy and juicy, and best of all, no need to deal with hot oil! 🙂
Absolutely, Thanks, Anita.
Simple and tasty! I never would have thought of semolina!
Thank you Scott