The Secret Weapon To Perfectly Cooked Meat
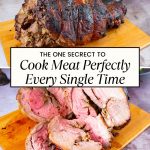


Whether you’re a beginner or an experienced chef, cooking meat to perfection can be tricky. Getting it right involves understanding factors such as meat weight, cooking time, and levels of doneness. A meat thermometer can make this process much simpler and more accurate.

In this guide, we’ll explore what a meat thermometer is, common challenges when cooking meat, how to calculate cooking times, and why using a meat thermometer is the most reliable way to achieve perfect doneness every time.
What is a Meat Thermometer?
A meat thermometer is a small but essential kitchen tool that measures the internal temperature of meat during the cooking process. It helps ensure the meat reaches the correct temperature for food safety and desired doneness. Several types of meat thermometers are available, including digital instant-read thermometers, probe thermometers, and even wireless versions. Each of these tools allows you to accurately gauge the temperature inside your meat, helping to avoid overcooking or undercooking.
My favorite thermometer
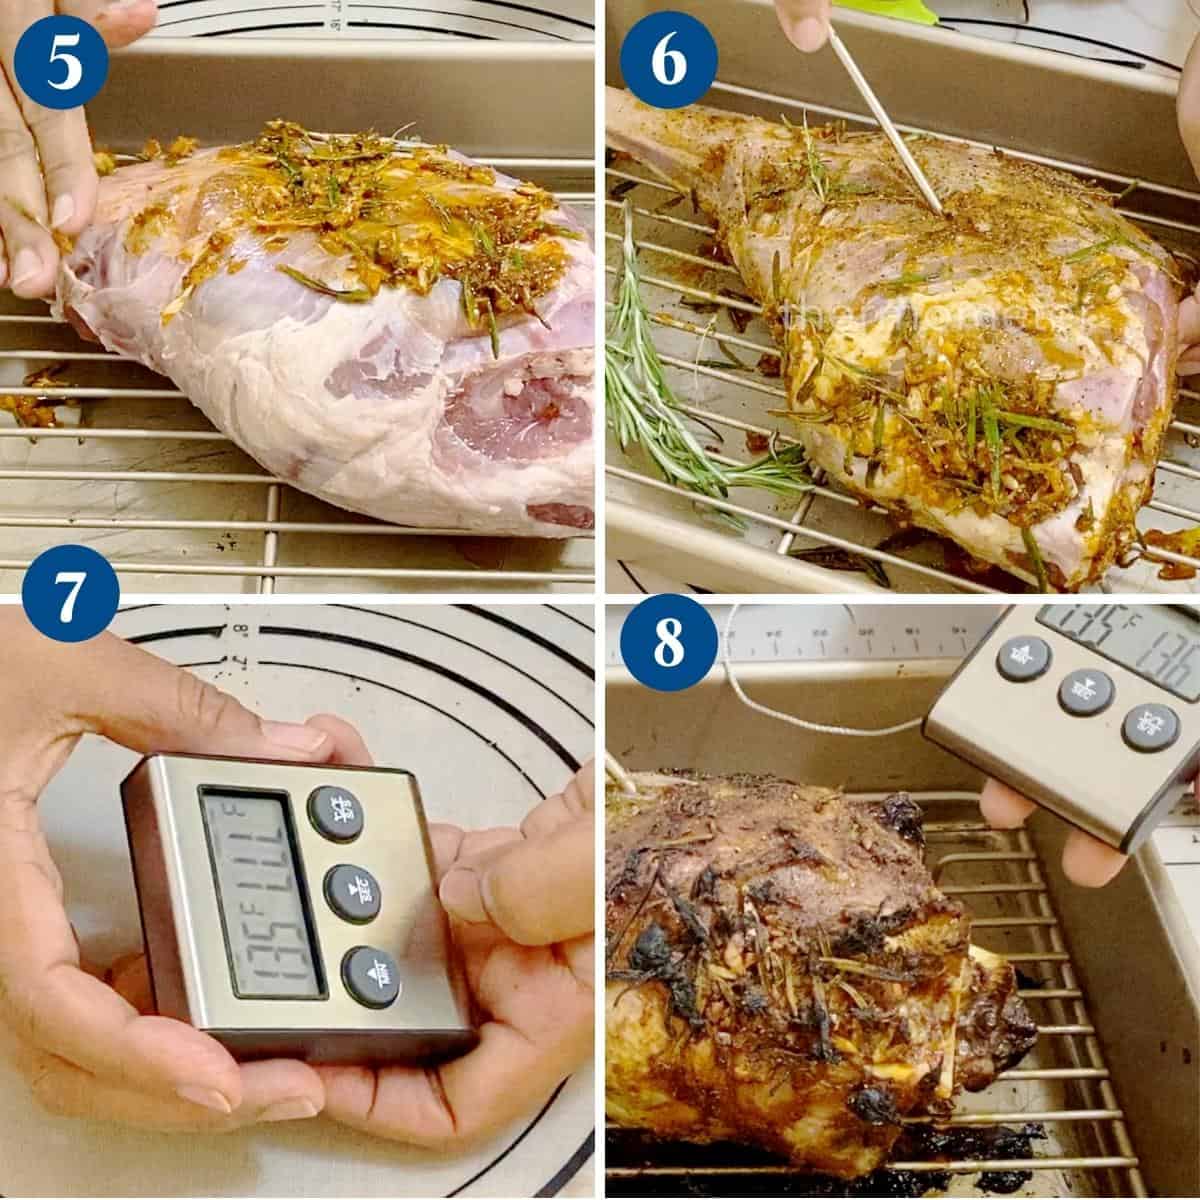
I love these meat thermometers because I can simply insert them into the meat while it’s in the oven, and once it reaches my preset temperature, it beeps to let me know. Then, all I have to do is take the meat out of the oven—no guesswork involved!


You can also use a regular stick thermometer to check your meat doneness. The only difference is that with a stick thermometer, you must remember to keep an eye and check at the appropriate time or times.
Challenges When Cooking Meat
Cooking meat can be a delicate process due to the variety of factors involved. Here are a few of the common challenges:
1. Weight and Thickness of the Meat
The size of the meat greatly affects how long it needs to cook. For example, a thick steak cut will take longer than a thin one. Similarly, a whole roast chicken or turkey will take significantly longer than a smaller portion, like chicken thighs. Many people miscalculate cooking times by not accounting for the meat’s weight and thickness, which can lead to uneven cooking.
2. Calculating Cooking Time
Knowing how long to cook meat based on its weight can be tricky. Traditionally, cooks rely on estimated cooking times, such as “20 minutes per pound” for certain meats. However, this method often leads to inconsistencies. Different cuts of meat and various cooking methods—such as grilling, roasting, or frying—can require vastly different times. This is where many cooks go wrong: relying too much on general estimates without factoring in other variables, like the oven’s heat consistency or the specific cut of meat.
3. Understanding Doneness
Doneness refers to the level to which meat is cooked. This is another area where many people struggle. Undercooking can pose health risks (especially with poultry or pork) while overcooking results in tough, dry, and flavorless meat. The challenge is understanding the different levels of doneness and knowing when your meat reaches the desired point.
Different Levels of Doneness
Red meat is typically cooked to five levels of doneness, each defined by its internal temperature:
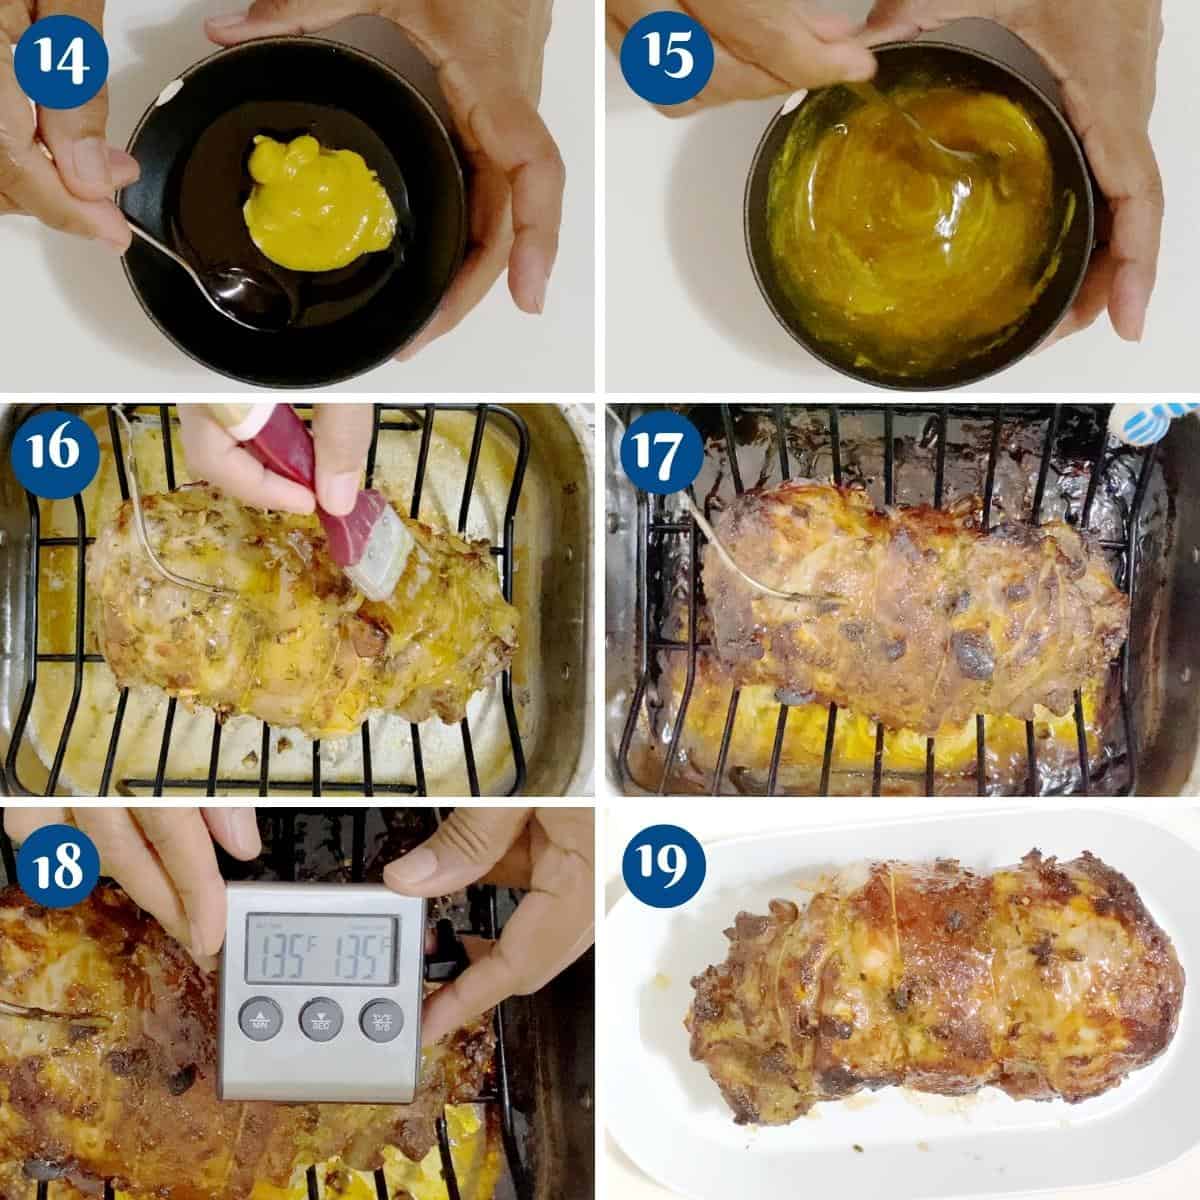
- Rare: 120°F–125°F (49°C–51°C) – The center of the meat is bright red and cool. This level is for steak and other red meats.
- Medium-Rare: 130°F–135°F (54°C–57°C) – The center is warm and has a reddish-pink color. This is the ideal doneness for many cuts of steak.
- Medium: 140°F–145°F (60°C–63°C) – The meat is pinkish throughout, with the center slightly more cooked than medium-rare.
- Medium-Well: 150°F–155°F (65°C–68°C) – The meat has only a faint hint of pink in the center, and the texture is firmer.
- Well Done: 160°F+ (71°C+) – The meat is thoroughly cooked, with no pink. This can result in drier textures if not done carefully.
These temperature guidelines apply to beef, but every type of meat has its own safe internal temperature. For instance, chicken must always reach at least 165°F (74°C) to be safe for consumption, regardless of your preferred doneness.
Why a Meat Thermometer is the Best Method
There are several methods for checking meat doneness—such as cutting into the meat, checking its color, or using the “finger test” for steak—but none are as reliable as a meat thermometer. Here’s why:
1. Accuracy and Safety
A meat thermometer gives you a precise temperature reading so you can avoid undercooked meat’s dangers. This is particularly important when cooking poultry, pork, or ground meats, where certain bacteria must be killed to ensure food safety. Using a thermometer can eliminate guesswork and ensure the meat is cooked to the exact safe temperature.
2. Consistency
When cooking large pieces of meat, such as roast or whole chicken, it’s common for the outer portions to cook faster than the inside. A thermometer allows you to check the internal temperature in various spots, ensuring the entire cut of meat is cooked evenly. This is especially useful when using a cooking method like grilling or roasting, where heat is applied from the outside in.
3. Prevents Overcooking
While undercooked meat can be dangerous, overcooked meat is simply disappointing. It becomes dry, tough, and chewy. Using a meat thermometer ensures you remove the meat from the heat at the perfect moment, preventing overcooking. You can also use the thermometer to take advantage of “carryover cooking,” where the internal temperature rises a few degrees after removing the meat from heat, allowing it to finish cooking without drying out.
4. Perfect for All Cooking Methods
A meat thermometer works for all cooking methods—grilling, roasting, frying, or slow cooking. It’s versatile enough to use with different cuts of meat and cooking styles, ensuring you can achieve the perfect level of doneness no matter how you cook.
How to Use a Meat Thermometer
Now that you know why a meat thermometer is the best tool for cooking meat, here are some simple steps on how to use it:
- Choose the Right Type of Thermometer – Select an instant-read digital thermometer for quick readings or a probe thermometer to monitor the meat throughout the cooking process.
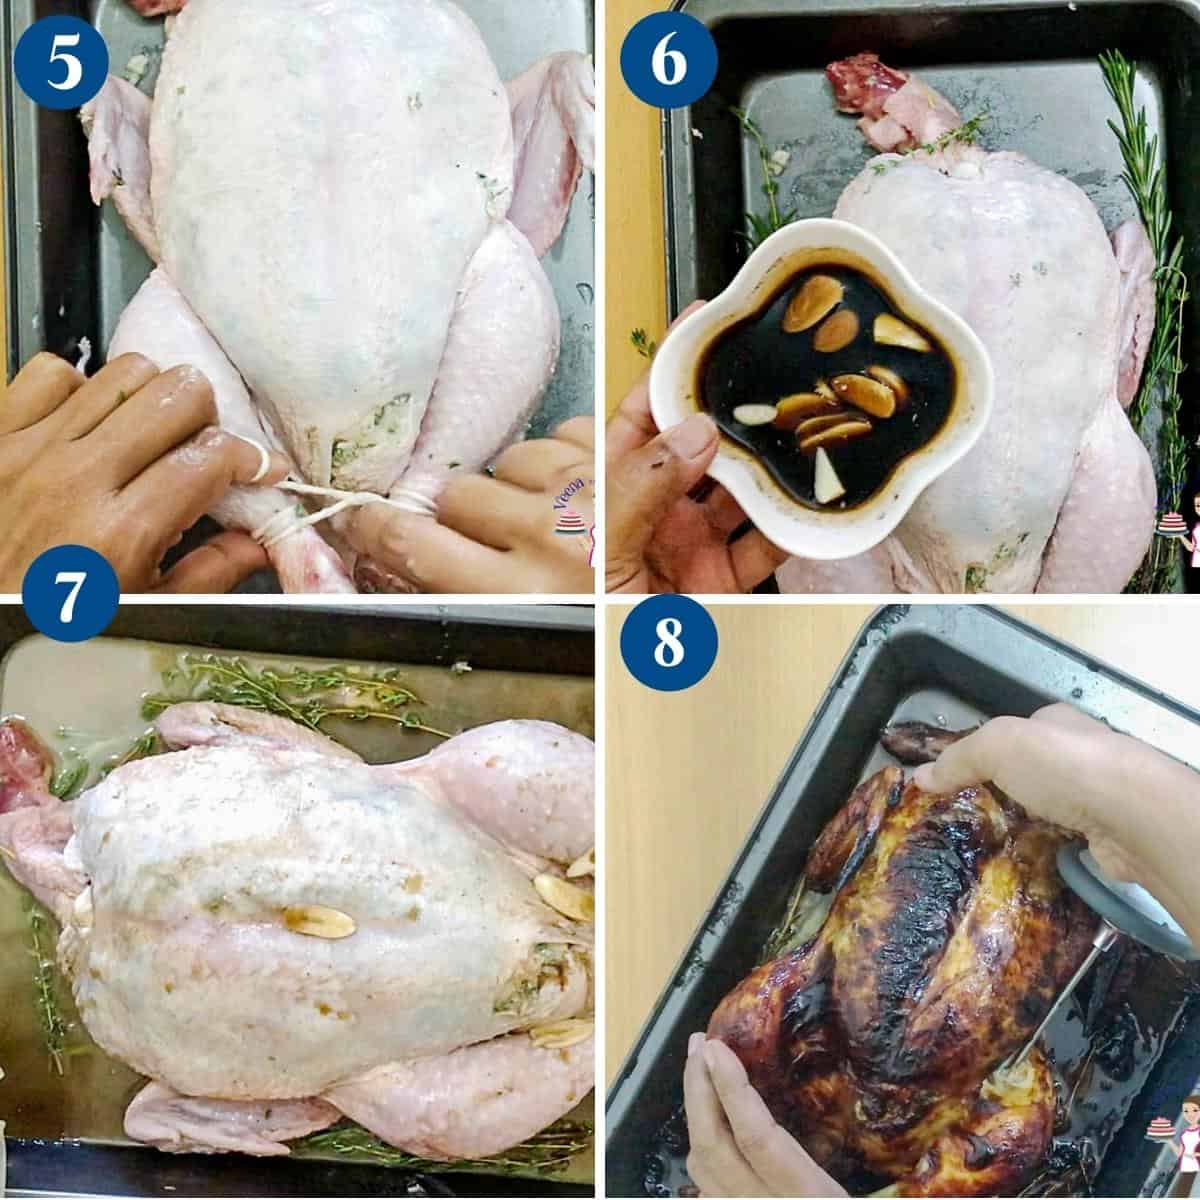
- Insert it in the Thickest Part of the Meat – Always insert the thermometer into the thickest part of the meat, avoiding bones, fat, or gristle, as these can give inaccurate readings. For poultry, place it in the thickest part of the thigh without touching the bone. For roasts, check in the center.
- Check Regularly – If using an instant-read thermometer, check the temperature toward the end of the cooking time. If using a probe thermometer, keep it inserted during cooking to monitor the temperature continuously.
- Let the Meat Rest – Once the meat reaches the correct internal temperature, remove it from the heat and let it rest for a few minutes. This redistributes the juices, making the meat more flavorful and tender. Resting also lets the internal temperature rise a few degrees, bringing the meat to the perfect level of doneness.
- Whole Roast Chicken
- Maple Roast Chicken Recipe
- Slow Cooker Roast Chicken
- Dutch Oven Roast Chicken Recipe
- Roasted Chicken and Veggies Recipe
- Cast Iron Roast Chicken Recipe


Calculating Cooking Time with a Meat Thermometer
While a thermometer helps with accuracy, you still need an estimate of cooking time to plan your meal. For example, beef roasts generally take 15 to 20 minutes per pound at 350°F (177°C), while chicken may take 20 minutes per pound at the same temperature. Use these estimates as guidelines, but always rely on the thermometer to determine when the meat is done.
A meat thermometer is an indispensable tool in the kitchen, whether you’re cooking a simple steak or a whole roast. It provides accuracy, consistency, and safety, ensuring your meat is always perfectly cooked. By understanding the challenges of cooking meat—like weight, cooking times, and doneness—and combining that knowledge with a thermometer, you can elevate your meat-cooking skills to a whole new level. No more guesswork, just perfectly cooked meat every time!
- Moroccan Roast Leg of lamb
- Roast leg of lamb with garlic butter marinade
- Lamb Shoulder in red wine
- Lamb Roast Shoulder Boneless
- Boneless Leg of Lamb


Frequently asked questions
Cooking times can vary depending on the type of meat, its thickness, and your oven’s accuracy. A meat thermometer ensures precise internal temperatures, helping you avoid undercooking or overcooking.
There are various types, including digital instant-read thermometers, probe thermometers, and wireless options. Digital thermometers are popular for their speed and accuracy, while probe thermometers are useful for continuous monitoring during cooking.
Insert the thermometer into the thickest part of the meat, avoiding bones, fat, or gristle. Take multiple readings in different areas for larger cuts to ensure even cooking.
Chicken: 165°F (74°C)
Beef (medium-rare): 130°F–135°F (54°C–57°C)
Pork: 145°F (63°C)
Lamb: 145°F (63°C). Always refer to food safety guidelines for accurate temperatures based on the type of meat.
For probes or wireless thermometers, yes. These are designed to stay in the meat during cooking. Instant-read thermometers should be used only for quick readings and removed immediately after.
Always clean your thermometer with warm, soapy water before and after each use to prevent cross-contamination. Avoid submerging digital units in water; clean the probe only.
Absolutely! Meat thermometers can also be used for bread, casseroles, or even testing the temperature of liquids like oil or chocolate.
After reaching the desired temperature, let your meat rest for 5–10 minutes. Resting allows the juices to redistribute, making the meat more tender and flavorful.
Carryover cooking happens when meat continues to cook even after it’s removed from the heat. A thermometer helps you account for this by removing the meat just before it reaches the final desired temperature. The internal heat will finish the job while resting.
- Kleftiko: Greek Roast Leg Of Lamb Recipe
- Boneless Leg of Lamb
- Lamb Shoulder Roast Boneless
- The Secret Weapon To Perfectly Cooked Meat
- Boneless Roast Lamb


Don’t lose this recipe! Save it for Later!
📌 Save this Recipe for later on Pinterest so you can easily find it again.
⭐ Add Veena Azmanov Kitchen to your Google Preferred Sources.
It helps Google show you more of our recipes.
📧 Subscribe for new recipes delivered to your inbox.
🎥 Follow us for more recipes


Wow! This is very helpful. I tried it with chicken and it did gives me a juicy and perfectly cooked meat. Thank you.
This really is the best way to do it! I loved your tricks for using the meat thermometer too! I learned a few things!
These tips were so helpful! I am so glad that I came across this post. It helped me cook the perfect roast for my family.
Using this secret weapon totally changed my meat game—every bite was juicy and packed with flavor! It’s like my grill finally got a promotion, and now I can’t imagine cooking without it.
What a lovely, well-explained post! I’m ready to make this turkey feast soon without being anxious! Thanks!
Your tips for perfectly cooked meat were a game changer for me! I used them for steak last night, and it came out perfectly tender and juicy. This is seriously going to elevate my cooking—thank you so much!
Thank you Catalina