Sharp Edges on Ganache Cakes


Sharp edges on ganache cakes are now the basics of good cake decorating. Almost all professionally decorated cakes you see have beautiful, crisp, sharp edges with perfectly straight sides. I show you two methods to cover a cake with ganache and get sharp edges; here are two easy methods.
Ganache is a rich and luxurious mixture commonly used in cake decorating and pastry making. It combines chocolate and cream, creating a smooth and glossy texture. The ratio of chocolate to cream can vary depending on the desired consistency and purpose.
Its popularity in cake decorating stems from its delightful taste, versatility, stability, and ability to create visually appealing finishes. Whether used as a filling, glaze, or decoration, ganache adds a touch of elegance and indulgence to cakes and pastries.
For us cake decorators, remember when you see that cake leveler perfectly spot on!!! Happy Dance – Isn’t it? Getting those sharp edges for some of us has been a lot of hard work with trial and error. I tried so many different techniques until I found one that worked for me. Today, I’m going to share two very popular methods but, most of all, very easy!
Useful tools
- You will need a cake board for the bottom of the cake.
- You will need two cake circles. One for the top and one for the bottom. Make sure they are both the same size. They must be firm and not bend or flex.
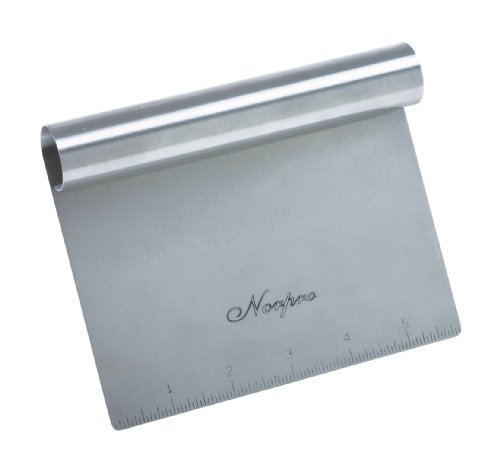
- Tall metal bench scrapers are best if you ganache cakes often.
- A right angle will help make sure your cake is straight.
- A leveler works great to ensure that your cake is leveled. A level cake is especially important when you have stacked cakes.
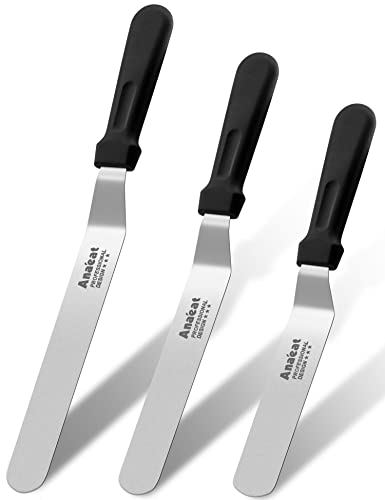
- Use straight spatulas for the sides and an offset spatula for the top.
Materials to ganache a cake
- 2 x cake layers – see 30 plus layer cake recipes
- Buttercream Frosting – see 30 plus buttercream frosting recipes
- Simple syrup to keep the cakes moist
- Cake Decorators Chocolate Ganache for cake decorating – Dark or
- Cake Decorators White Chocolate Ganache

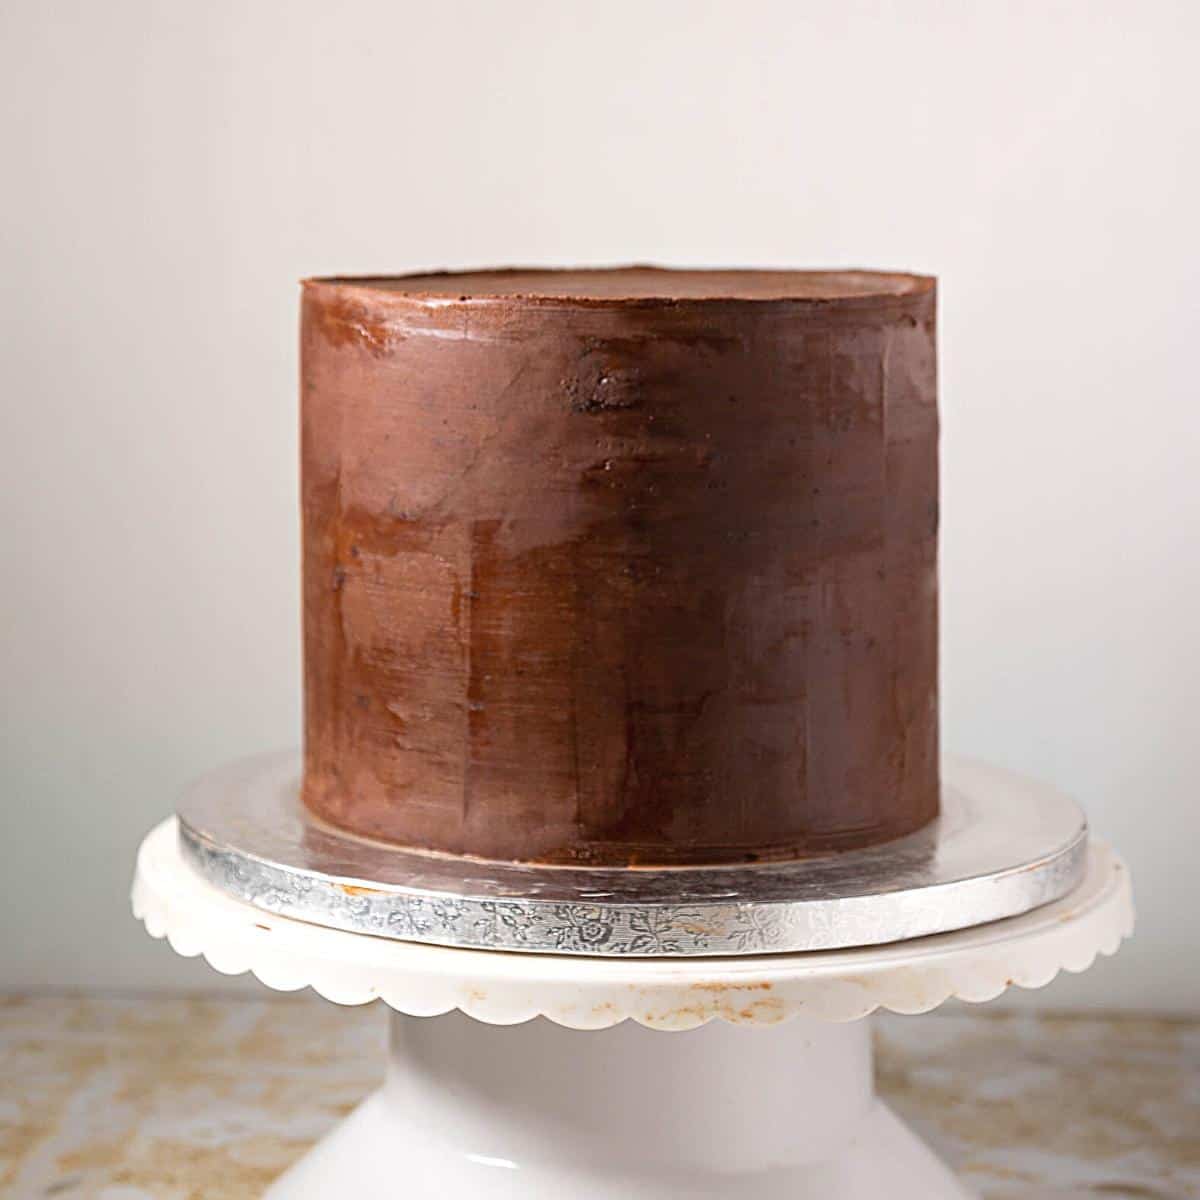
How to ganache a cake – Method 1
- Bake and cool your cakes. I usually make sure I have at least two layers, each 2 inches tall, so the finished cake is a minimum of 4 inches tall.
Pro tip – If you like to trim the caramelization off your cakes, make sure to bake more cake or taller layers so you have 2-inch after trimmings. Sometimes I even freeze the cake for half an hour, so it’s firmer to work with.
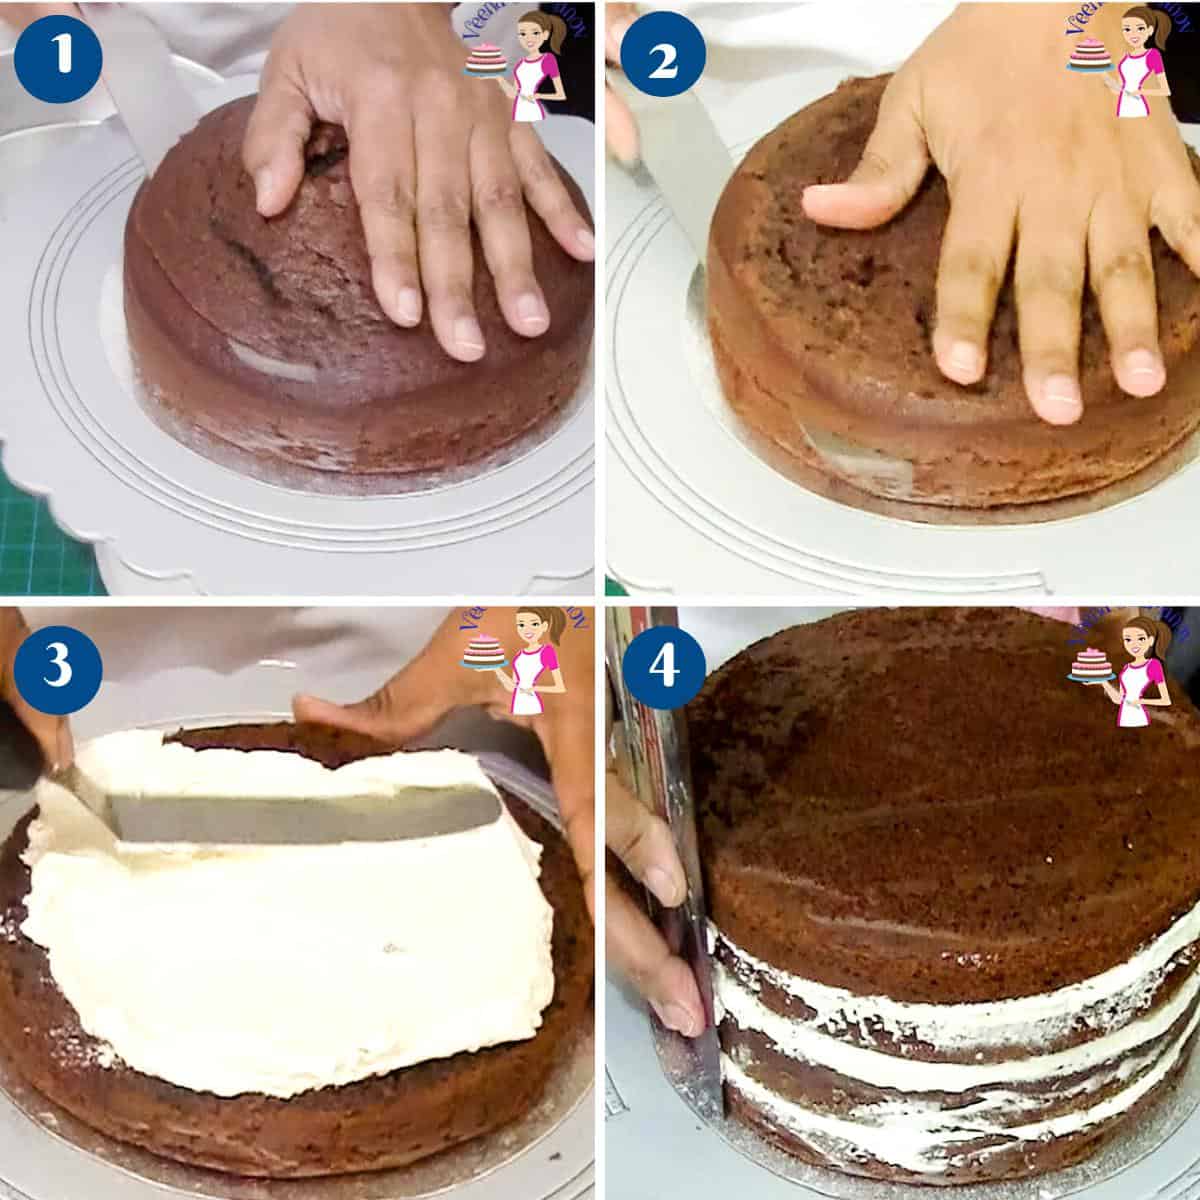
- Level the cake layers – cut the domes off the cake using a bread knife or cake leveler
- Torte each layer into two horizontally. Place one cake board with a little ganache on the cake drum to help keep it in place.
Pro tip – I like to use a turntable with a non-slip mat. The non-slip mat under my cake drum prevents it from moving around. - Moisten – Simple syrup, each layer with a pastry brush.
- Fill – Add a big dollop of buttercream or ganache on each layer. Spread with a straight-edged spatula.
- Stack – Place the next layer on top, followed by more frosting, until you have stacked all four layers
Pro tip – Trim the outside edge if necessary – you can see me do this in my video – This ensures the sides are straight. - Level – Use a cake leveler to ensure the cake is leveled. You may need to press down on the side that is higher to help shimmy the frosting around.
Pro tip – Then use two bench scrapers on either side of the cake to ensure the sides are straight. (just so the layers are not peaking out) - Chill – Place the cake in the fridge for 10 minutes – the frosting will set, and the layers won’t move when you are frosting the outside.
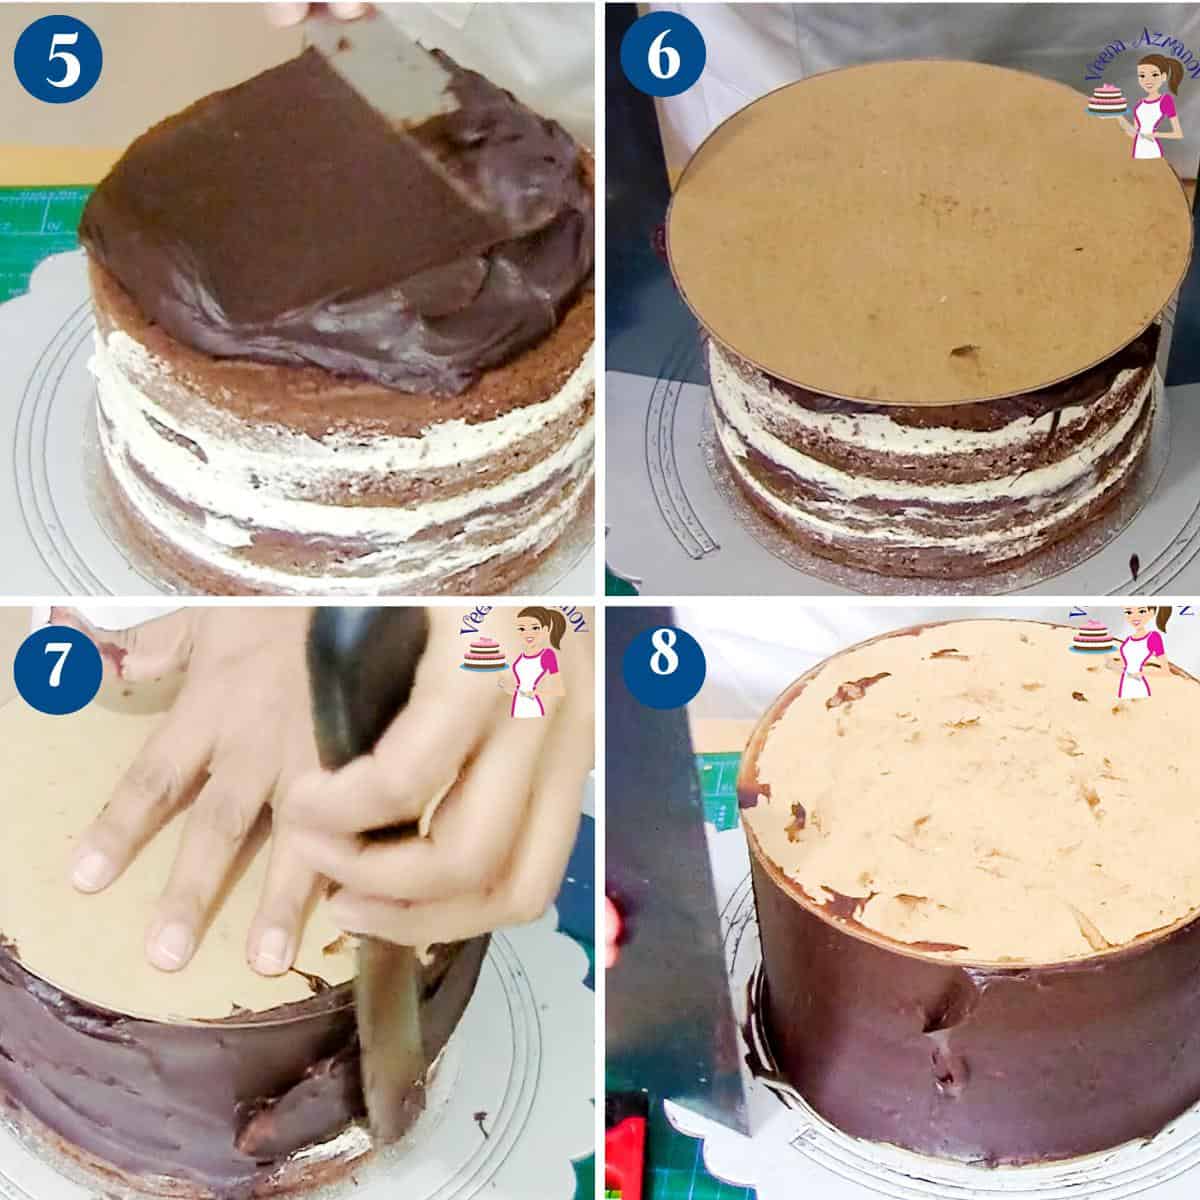
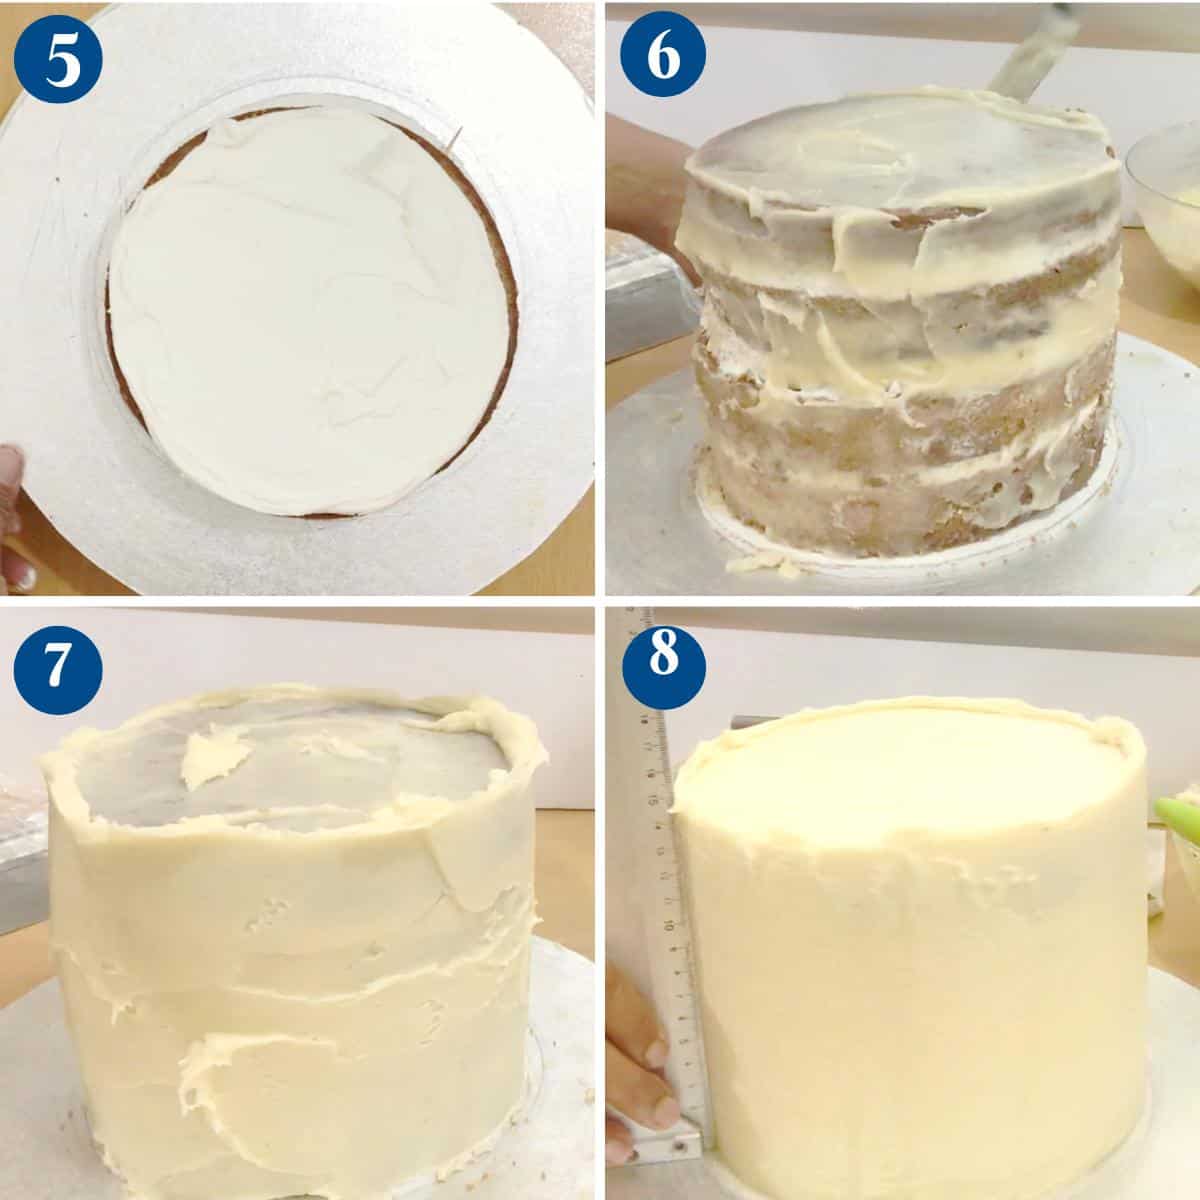
- Cake top – Place a big dollop of ganache on the top layer. Spread it evenly, making sure you have ganache over the edges.
- Cake board – Place a cake board the same size as the bottom board. Use two cake scrapers to ensure the top and bottom boards are aligned. Chill the cake for 20 minutes.
- Cake sides – Using a spatula, frost the sides of the cake with ganache. Make sure to use a paddle motion with the ganache – this prevents air pockets. Use a bench scraper to smooth the sides of the cake.
- Chill – Continue to spread and smooth the ganache until you have smooth sides. Chill the cake for at least 2 hours
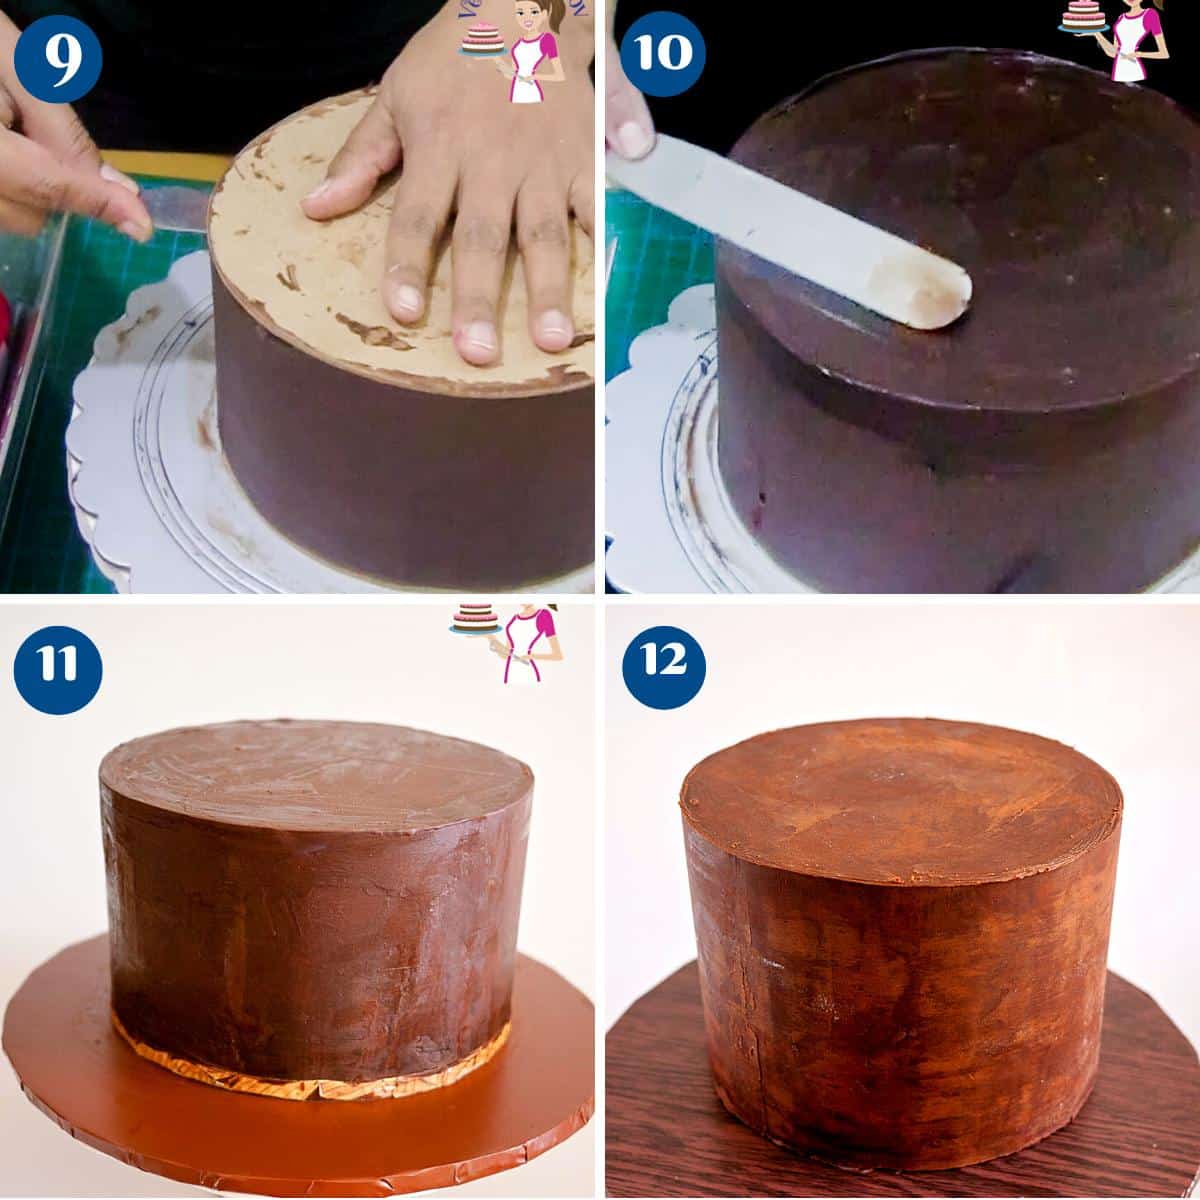
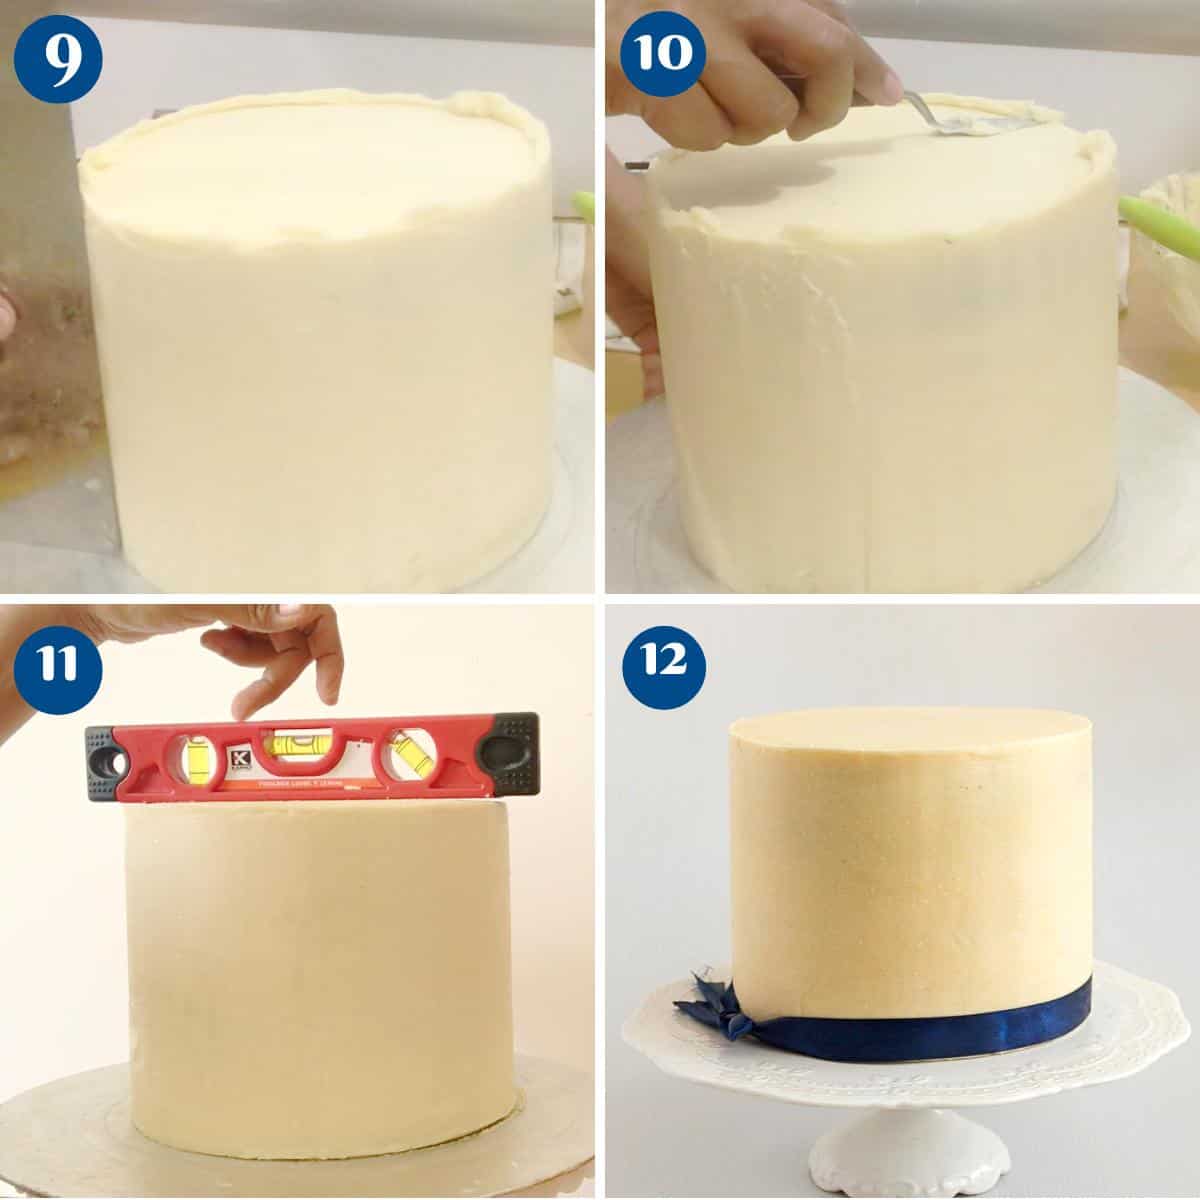
- Top board – Use a hot spatula or knife. Place the spatula between the top cake board and the ganache (see video) Pass the spatula under the board until you have loosened the board from the cake.
Pro tip – Dip the spatula in hot water. Gentle move the spatula – letting the heat from the spatula guide you along. Do not push too hard, as the ganache will crack - Smooth top – The top will be uneven and rough – this is normal. Add just enough ganache to fill and cover the top. Use an offset spatula to smooth the top, and use a bench scraper to smooth the sides.
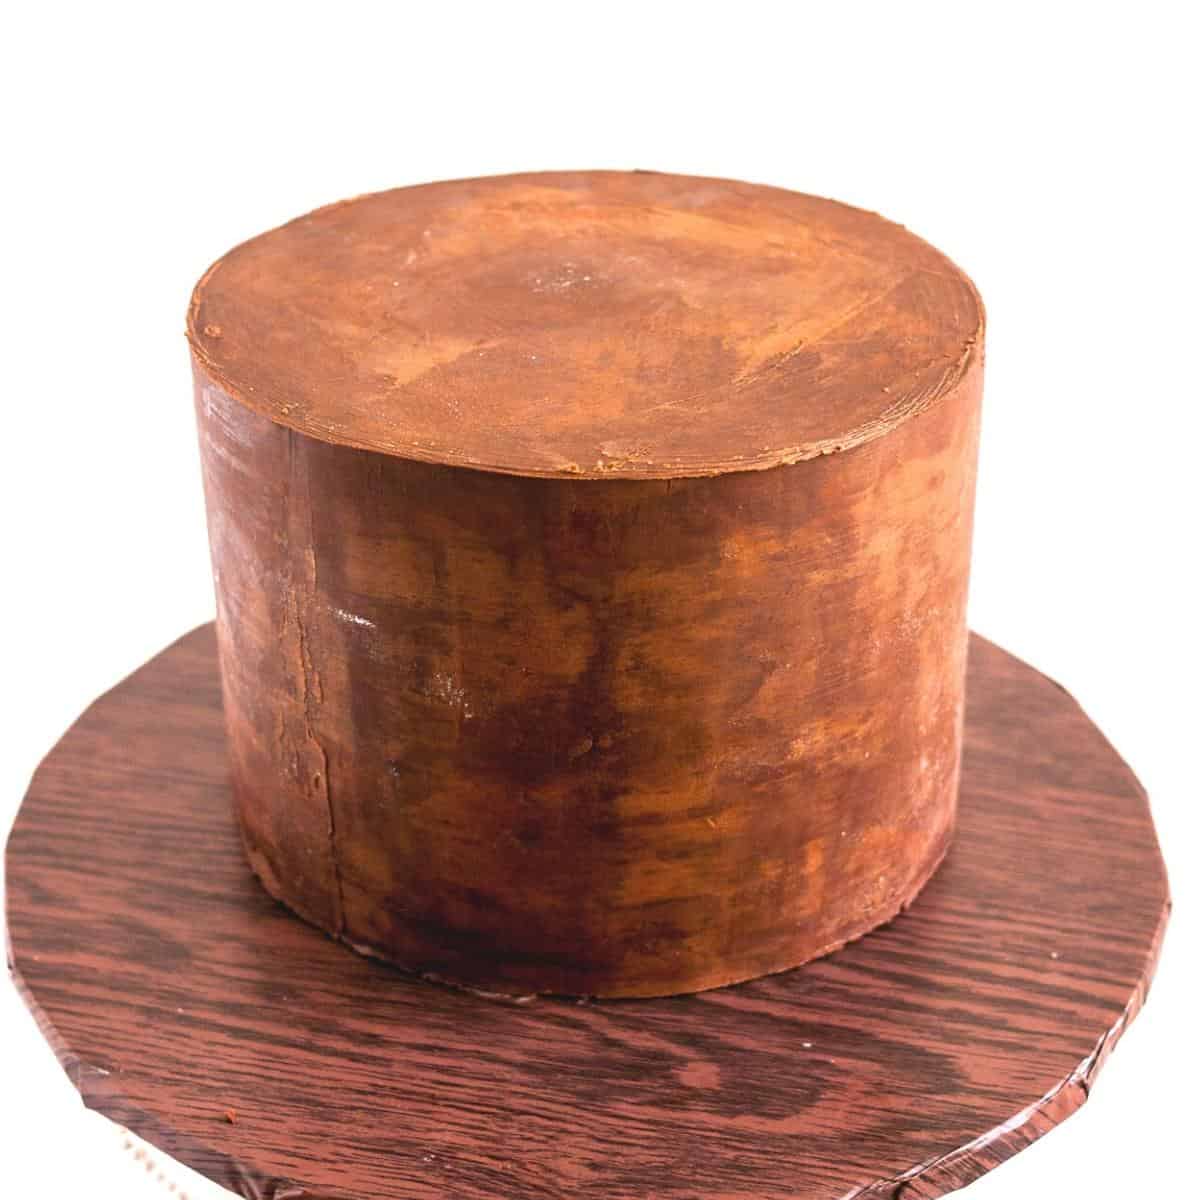
Pro tip – Since the cake is chilled well, the sides will remain smooth. - Edge – Once smooth, the little ganache that’s left over the edges can be taken off with a spatula or knife (see video)
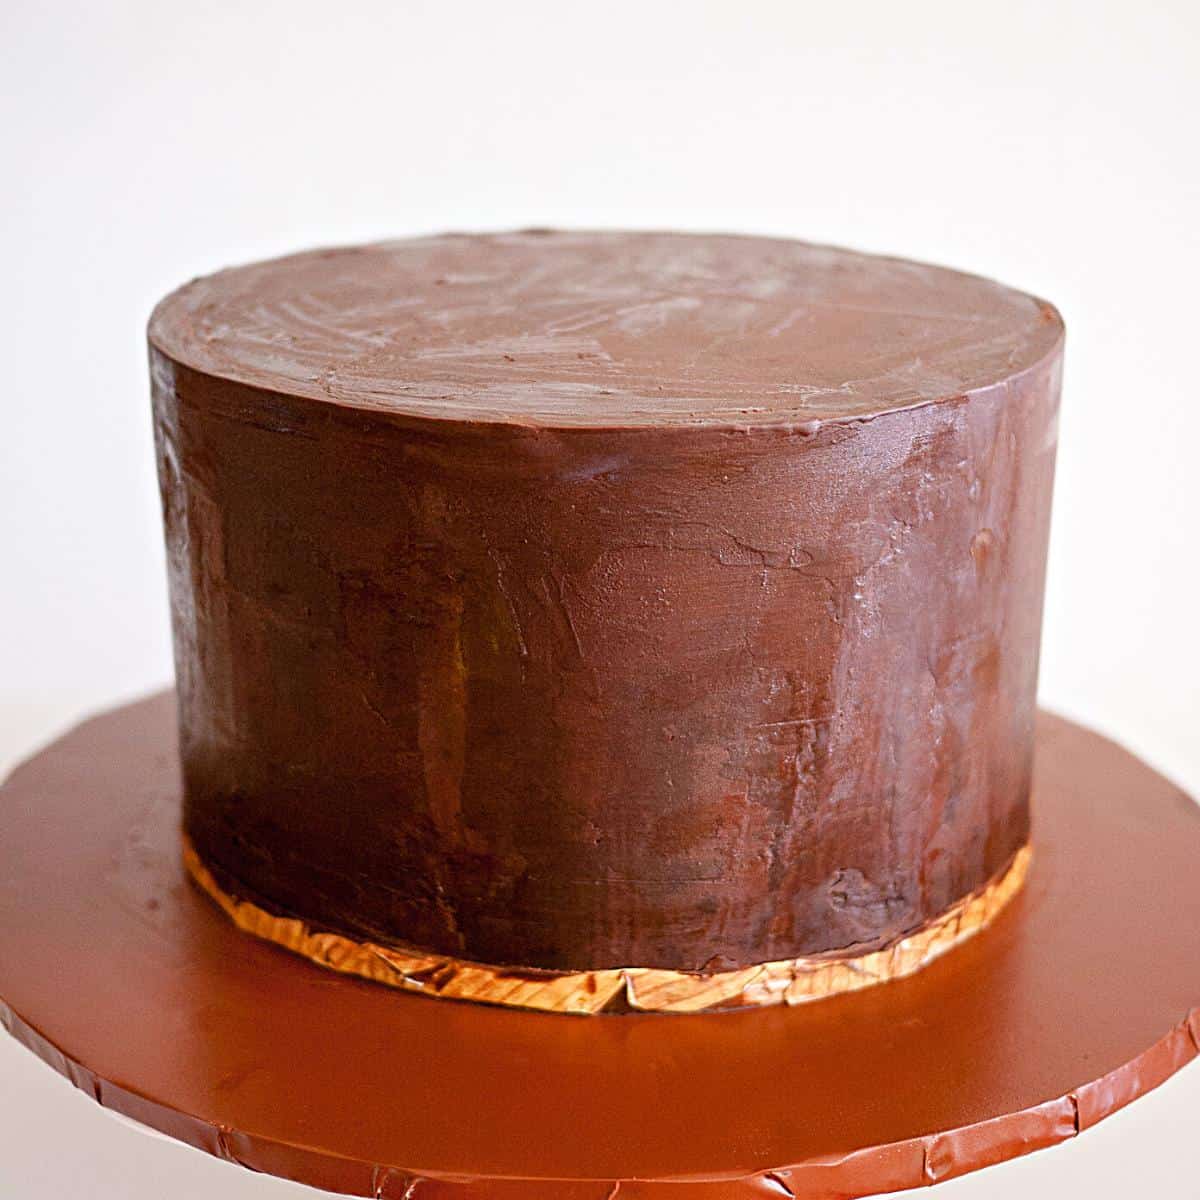
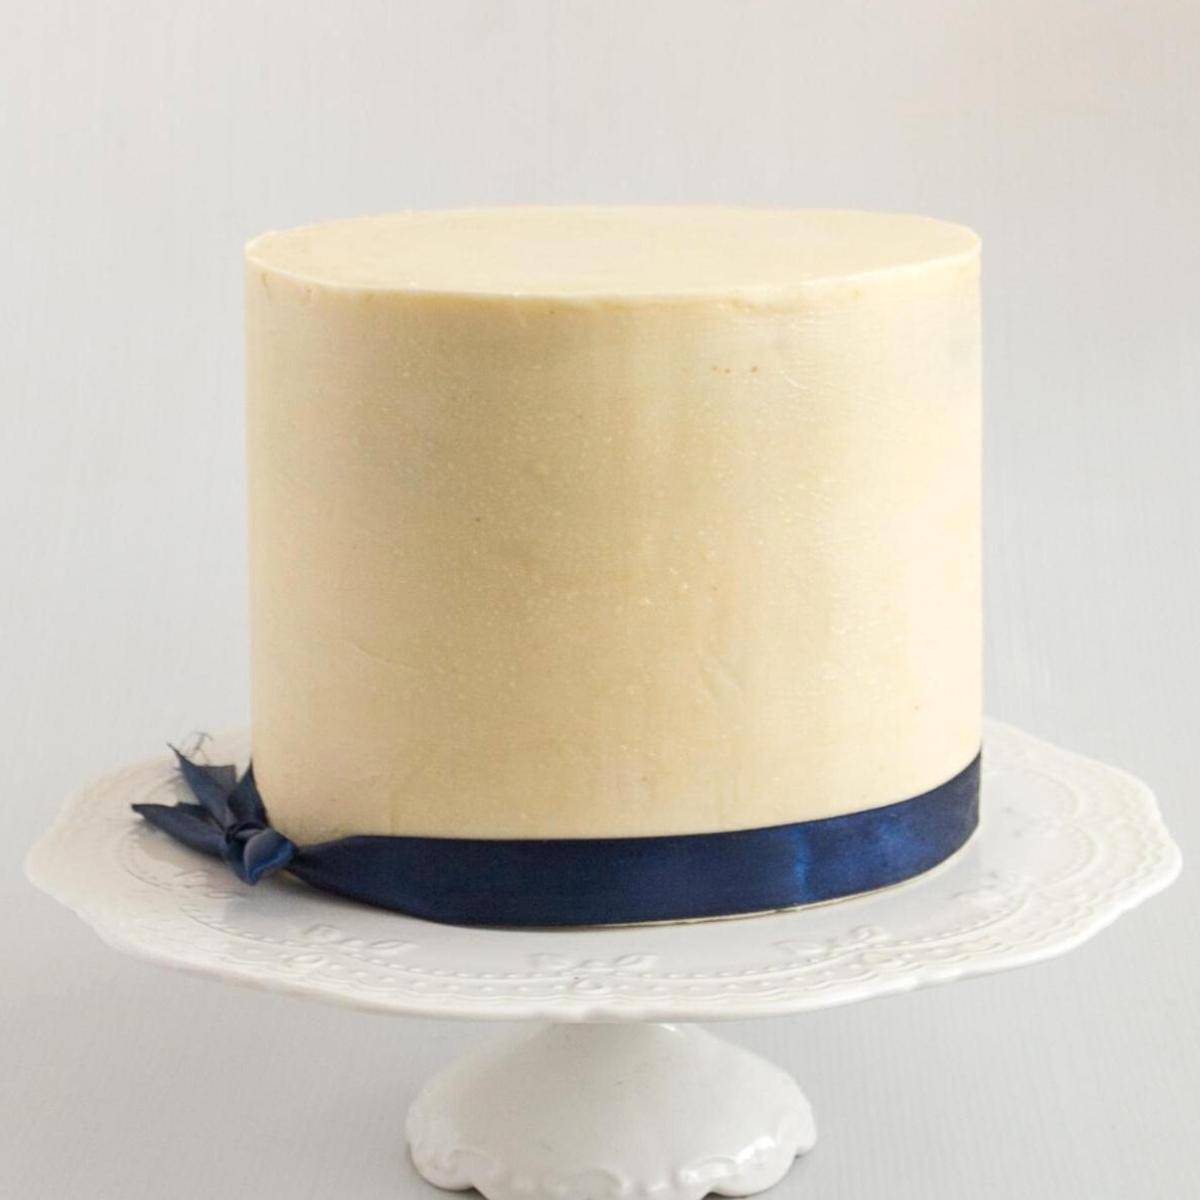
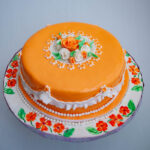
You can cover this cake with fondant once chilled!
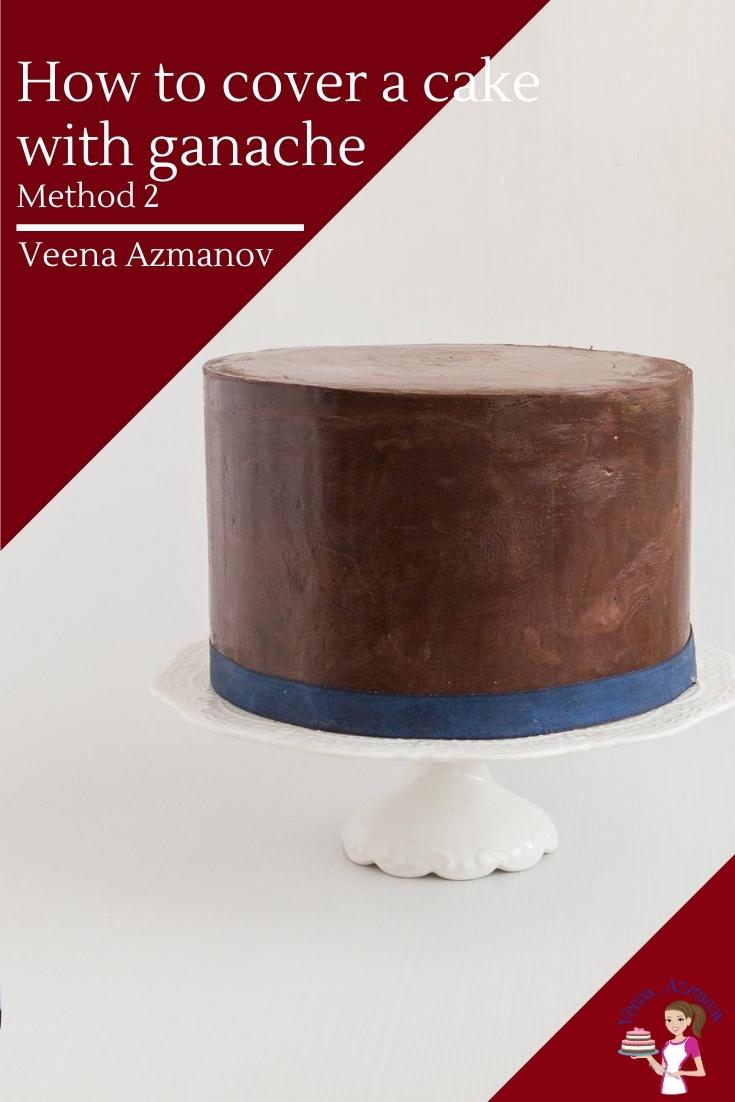
Sharp Edges Ganache Cake – Method 2
- Bake and cool your cakes. I usually make sure I have at least two layers each 2 inches tall so the finished cake is a minimum of 4 inches tall.
Pro tip – If you like to trim the caramelization off your cakes make sure to bake more cake or taller layers so you have 2-inch after trimmings. Sometimes I even freeze the cake for half an hour, so it’s firmer to work with.
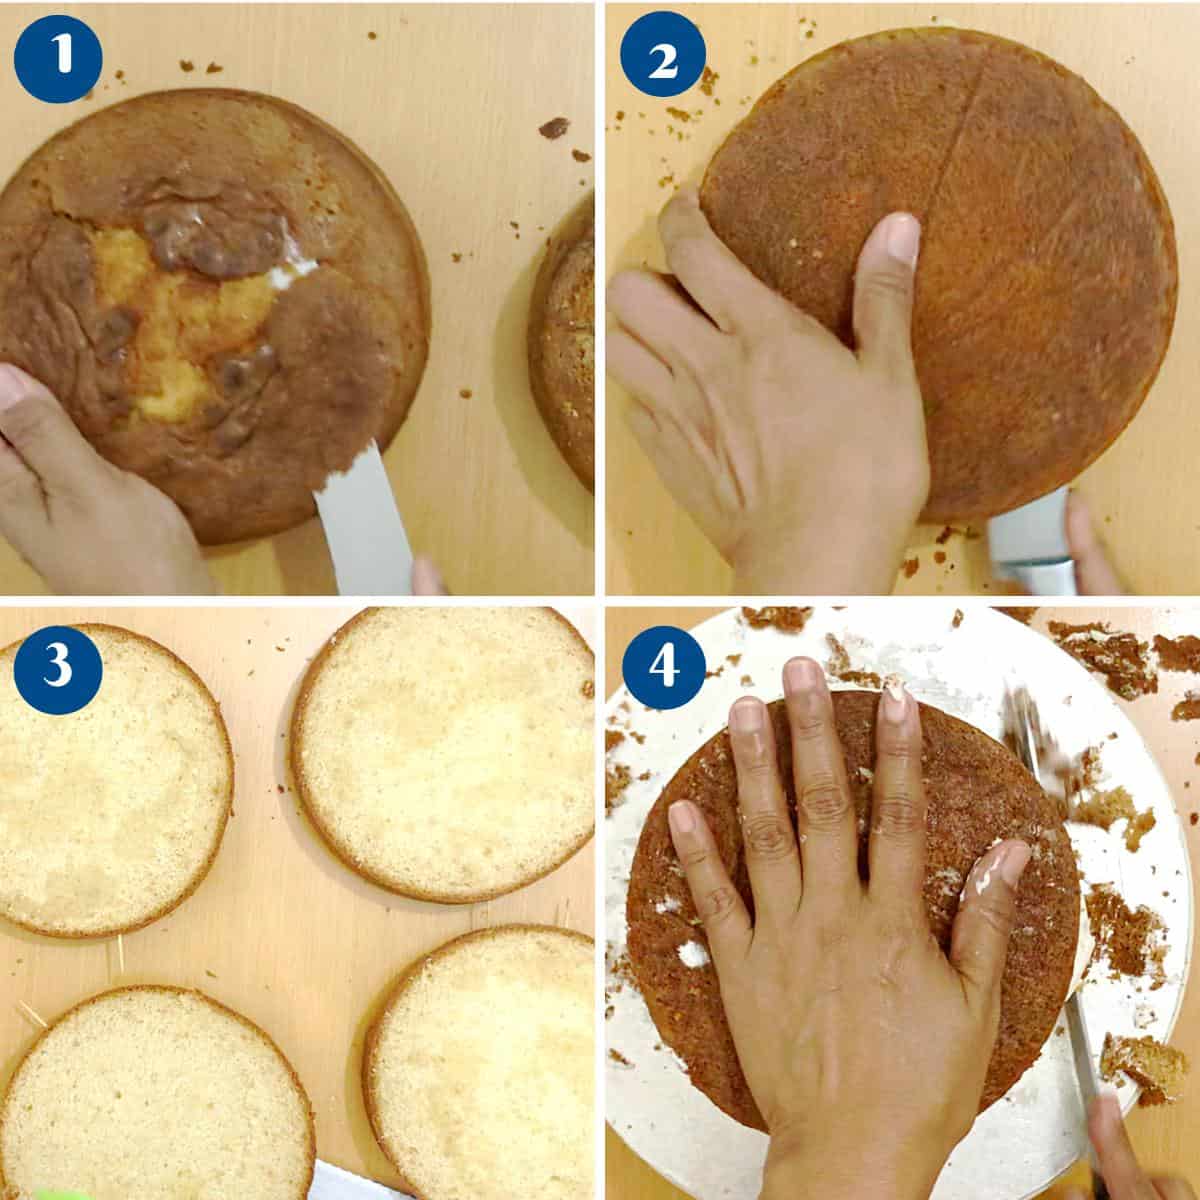
- Level the cake layers – cut the domes off the cake using a bread knife or cake leveler
- Torte each layer into two horizontally. Place one cake board with a little ganache on the cake drum to help keep it in place.
Pro tip – I like to use a turntable with a non-slip mat. The non-slip mat under my cake drum prevents it from moving around. - Moisten – Simple syrup each layer with a pastry brush.
- Fill – Add a big dollop of buttercream or ganache on each layer. Spread with a straight-edged spatula.
- Stack – Place the next layer on top, followed by more frosting, until you have stacked all four layers
Pro tip – Trim the outside edge if necessary – you can see me do this in my video – This ensures the sides are straight. - Level – Use a cake leveler to ensure the cake is leveled. You may need to press down on the side that is higher to help shimmy the frosting around.
Pro tip – Then use two bench scrapers on either side of the cake to ensure the sides are straight. (just so the layers are not peaking out)
- Chill – Place the cake in the fridge for 10 minutes – the frosting will set, and the layers won’t move when you are frosting the outside.
- Cake top – Add a large dollop of ganache on top and smooth the top with an offset spatula and bench scraper. Chill the cake for 30 minutes.
- Cake sides – Using a spatula, frost the sides of the cake with ganache. Make sure to use a paddle motion with the ganache. Use a bench scraper to smooth the sides of the cake, leaving a large lip on top of it. (see video or progress pictures)
Pro tip – A paddle motion in the spatula when frosting will prevent air pockets. - Chill – Continue to spread and smooth the ganache until you have smooth sides. Chill the cake for at least 2 hours
Pro tip – As you frost the cake, much of the frosting will collect on the top edge. Leave it for now – this is called the lip! - Top edge– Use a hot spatula or knife and trim the top lip/ edge (collected ganache). This will then give you a neat square edge on the cake.
Pro tip – Dip the spatula in hot water. Do not push too hard, as the ganache will crack.
What is the best ganache to frost cakes?
For cakes that need to be covered with fondant, I use my cake decorator’s chocolate ganache or the cake decorator’s white chocolate ganache. The ratio of cream to chocolate is different in those with more chocolate and less cream. The Classic White and Dark chocolate ganache are good, but they stay soft, so they are not the best for cake with fondant.
Tips for Success
To achieve sharp edges on a ganache-covered cake, here are some tips to follow:
- Level and Crumb Coat the Cake: Start with a level and evenly baked cake. Trim any domed tops to create a flat surface. Apply a thin layer of ganache as a crumb coat, smoothing it over the cake to seal in any crumbs. Chill the cake in the refrigerator until the ganache sets.
- Prepare a Smooth Base: Place the chilled cake on a cake board or turntable covered with a non-slip mat or parchment paper. Ensure the cake is centered and level.
- Stacks – Use a cake board and dowels if you stack layers over 6 inches tall.
- Apply a Thick Ganache Layer: Prepare a thick ganache mixture. This will provide a more substantial base for achieving sharp edges. Pour the ganache over the chilled cake, ensuring it covers the sides evenly and is thick enough to create a stable structure.
- Smooth the Ganache: Use an offset spatula or a bench scraper to smooth the ganache over the cake, starting from the top and working your way down the sides. Hold the spatula or scraper perpendicular to the cake and apply gentle pressure to create a smooth surface. Remove excess ganache, keeping the layer as even as possible.
- Chill and Set: Place the ganache-covered cake in the refrigerator to chill until the ganache is firm and set. This will help ensure the ganache maintains its shape and sharpness when working on the edges.
- Hot spatula – For Method 1 – Use a bench scraper dipped in hot water to get smooth sides. And a spatula dipped in hot water to smooth the top.
- Shape the Edges: Remove the cake from the refrigerator once the ganache is set. For method 2, use a sharp knife or an acrylic cake scraper to clean and shape the edges. Hold the knife or scraper at a slight angle against the cake, applying gentle pressure as you rotate the turntable. This process will remove any excess ganache and create sharp, clean edges.
- Smooth Again: After shaping the edges, use a clean and warm offset spatula or bench scraper to smooth the edges further. Gently run the tool along the sides of the cake while rotating the turntable to refine the sharpness of the edges.
- Final Chill: Return the cake to the refrigerator for a final chilling period, allowing the ganache to set and harden fully. This will help maintain the sharp edges during the subsequent steps of decorating or applying additional layers.
Remember, practice makes perfect. It may take a few tries to master the technique, so be patient and keep refining your skills.
Frequently asked questions
A cake frosted with only ganache can be kept out at room temperature for 2 to 3 days in a cool, dry place. However, it is best to refrigerate the cake in hot and humid temperatures.
It depends on which ganache recipe you are using and what is the ratio of chocolate to cream in the ganache. Cake Decorators Chocolate Ganache does get firm and works best to cover a cake with fondant.
If the ganache is soft because you warmed it too much – just place it in the fridge for 5 minutes or more until you have the consistency you need.
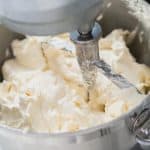
If the ganache is soft because you have less chocolate in the ganache recipe, it’s best to whip the ganache. The whipping will help make it spreadable.
Place the ganache in the microwave for 10 seconds and stir with a spatula. If necessary give it another 5 to 10 seconds in the microwave.
Chocolate melts easily, so 10 seconds in the microwave is all it takes.
Don’t lose this recipe! Save it for Later!
📌 Save this Recipe for later on Pinterest so you can easily find it again.
⭐ Add Veena Azmanov Kitchen to your Google Preferred Sources.
It helps Google show you more of our recipes.
📧 Subscribe for new recipes delivered to your inbox.
🎥 Follow us for more recipes

How to Ganache A Cake with Sharp Edges
Sharp edges on ganache cakes are now the basics of good cake decorating. Almost all professionally decorated cakes you see have beautiful crisp share edges with perfectly straight sides all around. This video shares how I get sharp edges on my ganache cakes.
Video
Ingredients
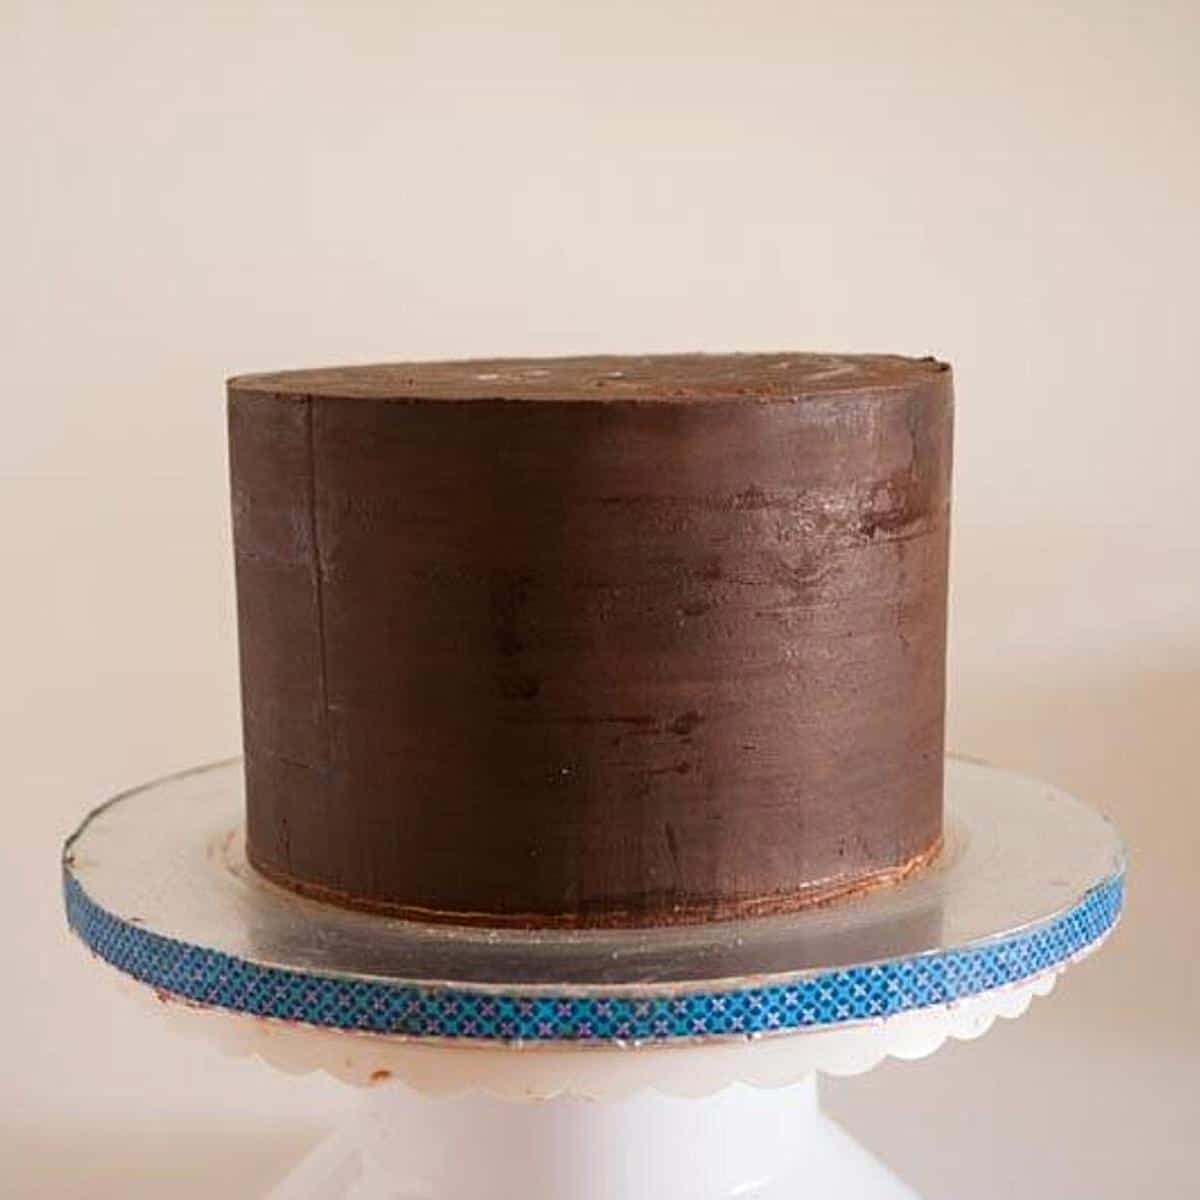
- 2 layers Devil’s Food chocolate cake
- 400 grams Velvet American Buttercream or more ganache
- 800 grams Cake Decorators Chocolate Ganache
- ½ cup Simple syrup to moisten cakes
Method
- Bake and cool your cakes. I usually make sure I have at least two layers each 2 inches tall so the finished cake is a minimum of 4 inches tall.Pro tip – If you like to trim the caramelization off your cakes make sure to bake more cake or taller layers so you have 2-inch after trimmings. Sometimes I even freeze the cake for half an hour so it's firmer to work with.
- Level the cake layers – cut the domes off the cake using a bread knife or cake leveler
- Torte each layer into two horizontally. Place one cake board on the cake drum with a little ganache to help keep it in place.Pro tip – I like to use a turntable with a non-slip mat. The non-slip mat under my cake drum prevents it from moving around.
- Moisten – Simple syrup each layer with a pastry brush.
- Fill – Add a big dollop of buttercream or ganache on each layer. Spread with a straight-edged spatula.
- Stack – Place the next layer on top followed by more frosting until you have stacked all four layersPro tip – Trim the outside edge if necessary – you can see me do this in my video – This ensures the sides are straight.
- Level – Use a cake leveler to ensure the cake is leveled. You may need to press down on the side that is higher to help shimmy the frosting around. Pro tip – Then use two bench scrapers on either side of the cake to ensure the sides are straight. (just so the layers are not peaking out)
- Chill – Place the cake in the fridge for 10 minutes – the frosting will set and the layers won't move when you are frosting the outside.
- Cake top – Place a big dollop of ganache on the top layer. Spread it evenly making sure you have ganache over the edges.
- Cake board – Place a cake board the same size as the bottom board. Use two cake scrapers to make sure the top and bottom boards are aligned together. Chill the cake for 20 minutes.
- Cake sides – Using a spatula frost the sides of the cake with ganache. Make sure to use a paddle motion with the ganache – this prevents air pockets. Use a bench scraper to smooth the sides of the cake.
- Chill – Continue to spread and smooth the ganache until you have smooth sides. Chill the cake for at least 2 hours
- Top board – Use a hot spatula or knife. Place the spatula between the top cake board and the ganache (see video) Pass the spatula under the board until you have loosened the board from the cake.Pro tip – dip the spatula in hot water. Gentle move the spatula – letting the heat from the spatula guide you along. Do not push too hard as the ganache will crack
- Smooth top – The top will be uneven and rough – this is normal. Add just enough ganache to fill and cover the top. Use an offset spatula to smooth the top and use a bench scraper to smooth the sides.Pro tip – Since the cake is chilled well the sides will remain smooth.
- Edge – Once smooth the little ganache that's left over the edges can be taken off with a spatula or knife (see video)
- Cake top – Add a large dollop of ganache on top and smooth the top with an offset spatula and bench scraper. Chill the cake for 30 minutes.
- Cake sides – Using a spatula, frost the sides of the cake with ganache. Make sure to use a paddle motion with the ganache. Use a bench scraper to smooth the sides of the cake, leaving a large lip on top of the cake. Pro tip – a paddle motion in the spatula when frosting will prevent air pockets.
- Chill – Continue to spread and smooth the ganache until you have smooth sides. Chill the cake for at least 2 hoursPro tip – as you frost the cake a lot of the frosting will collect on the top edge. Leave it for now – this is called the lip!
- Top edge– Use a hot spatula or knife and trim the top lip/ edge (collected ganache). This will then give you a neat square edge on the cake. Pro tip – dip the spatula in hot water. Do not push too hard as the ganache will crack.
Notes
- Level and Crumb Coat the Cake: Start with a level and evenly baked cake. Trim any domed tops to create a flat surface. Apply a thin layer of ganache as a crumb coat, smoothing it over the cake to seal in any crumbs. Chill the cake in the refrigerator until the ganache sets.
- Prepare a Smooth Base: Place the chilled cake on a cake board or turntable covered with a non-slip mat or parchment paper. Ensure the cake is centered and level.
- Stacks – Use a cake board and dowels if you stack layers over 6 inches tall.
- Apply a Thick Ganache Layer: Prepare a thick ganache mixture. This will provide a more substantial base for achieving sharp edges. Pour the ganache over the chilled cake, ensuring it covers the sides evenly and is thick enough to create a stable structure.
- Smooth the Ganache: Use an offset spatula or a bench scraper to smooth the ganache over the cake, starting from the top and working your way down the sides. Hold the spatula or scraper perpendicular to the cake and apply gentle pressure to create a smooth surface. Remove excess ganache, keeping the layer as even as possible.
- Chill and Set: Place the ganache-covered cake in the refrigerator to chill until the ganache is firm and set. This will help ensure the ganache maintains its shape and sharpness when working on the edges.
- Hot spatula – For Method 1 – Use a bench scraper dipped in hot water to get smooth sides. And a spatula dipped in hot water to smooth the top.
- Shape the Edges: Remove the cake from the refrigerator once the ganache is set. For method 2 use a sharp knife or an acrylic cake scraper to clean and shape the edges. Hold the knife or scraper at a slight angle against the cake, applying gentle pressure as you rotate the turntable. This process will remove any excess ganache and create sharp, clean edges.
- Smooth Again: After shaping the edges, use a clean and warm offset spatula or bench scraper to smooth the edges further. Gently run the tool along the sides of the cake while rotating the turntable to refine the sharpness of the edges.
- Final Chill: Return the cake to the refrigerator for a final chilling period to allow the ganache to fully set and harden. This will help maintain the sharp edges during the subsequent steps of decorating or applying additional layers.


Lesson 7-DONE
Hi Veena, very nice video. Can you please share white ganache recipe and colored ganache aa well? Any idea on the brands of white chocolate and cream to make best colored ganache for frosting?
Hey Swapna – I do have white chocolate ganache recipes too. Both the classic as well as Cake Decorators. I use Callebaut or Laubeca – these are the good quality brands I get here.
Is it possible to paint the white ganache with edible paint
Yes, Julie. You can paint on white chocolate just as you can paint on the dark ganache. I think powdered colors mixed in 100% alcohol would be more effective
Hi Veena,
Can i apply edible sugar lace on ganache directly? or do I have to cover the cake with fondant?
Yes, of course Zenani. Just attach it with water. A light brush of water is all it needs.
hi..
I follow the exact same way. Bu t i always feel that with the plastic and tape on top, the horizontal level may get imbalanced. Don’t you think so? How do ensure that it doesn’t happen?
Thanks
~K
I don’t think the plastic affects much. I have tried doing this method for long. Now I don’t use the top board anymore much. I will share that video soon too.
HI VEENA, I AM VERY HAPPY TO JOIN YOU CLASS,THIS HELP ME A LOT. IAM BERLY STARTED MY BUSSINES . I LOVE IT ,SO SOME TIME I NEED HELP,. I AM SO GLAD FINDED YOU. THANS SO MUCH.
Thank you so much Lidia. feel free to send me a message any time or write a comment on the tutorial you need help. i’m always happy to help. Have fun.
Hi Veena.
I have watched lots of your blogs and vids. It amazes me how sharp you get your edges with both fondant, and buttercream. I have tried, well I’ve lost count, several times to get my fondant not to tear or crack. I’ve used so many different brands. As yet, have not found a REALY good stretchy fondant that doesn’t tear!! Please help! What do you use?
Kind regards josine
Hi Josine. As you can see in the video. I do a simple yet sure process. I do hope it helps you. I have tired Satin Ice, my homemade fondant as well as some local brands here they all work with this method. Majority of my cakes are now Satin Ice…. Thanks.