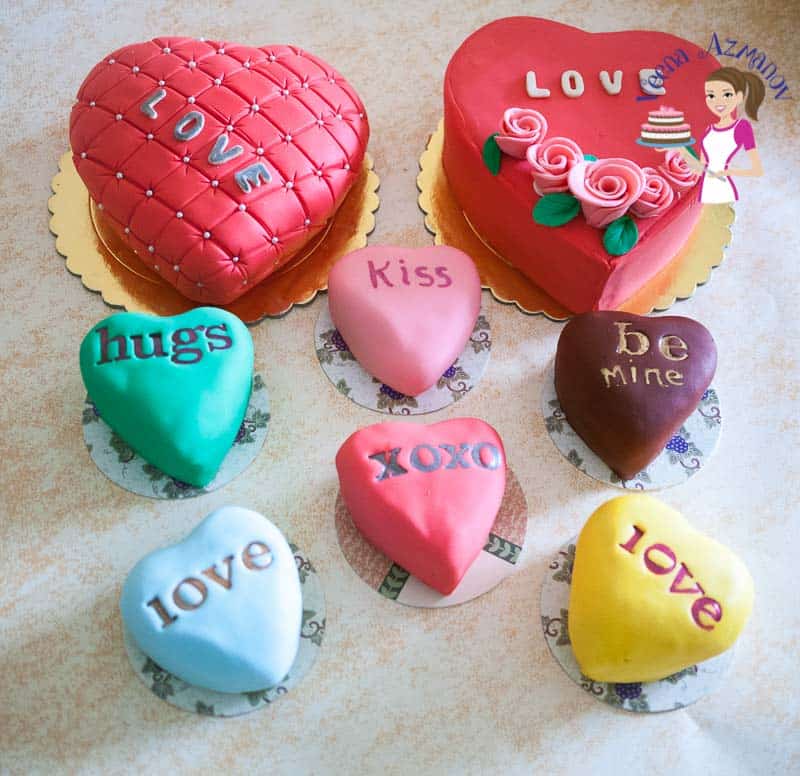
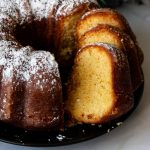
Pillow Cake


A pillow cake gives that wonderful, warm-hug feeling. And, making it a red heart cake just makes it perfect for Valentine’s Day. You will be surprised how easy this cake is to make. And, your valentine will think you slaved all day over it.

Pillow or cushion cakes are a delightful confectionery trend that brings a touch of whimsy and elegance to any celebration. These cakes are crafted to resemble plush pillows or cozy cushions, often adorned with intricate designs, textures, and vibrant colors, creating a visually stunning centerpiece. Pillow or cushion cakes are often made for various occasions, including birthdays, bridal showers, weddings, and anniversaries. However, they are particularly popular for Valentine’s Day due to their romantic and whimsical appearance.
Why make this cake?
- Versatile: This recipe can be adapted to different cake flavors and fillings, allowing for creativity and personalization.
- Professional Results: Using fondant and the lattice pattern creates a professional-looking cake that will surely impress.
- Valentine’s Day Theme: The heart shape and red fondant make this cake perfect for Valentine’s Day, adding a romantic touch to your celebration.
- Easy-to-Find Ingredients: The ingredients required for this recipe are common and easy to find in most grocery stores or baking supply shops.
Step-by-step: Pillow Cake Recipe
Bake the cake
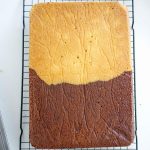
- Preheat the oven to 350℉/175℃/Gas mark 4. Grease and line one 7-inch heart cake pan or 8 x 8-inch square pan
- Sift the flour with baking powder and salt.
- In a separate bowl, cream butter and sugar until light and fluffy. Add eggs one at a time. Followed by the vanilla extract. Lastly, add the flour mixture and buttermilk and combine until smooth.
- Bake for about 25 to 30 minutes until a skewer inserted in the center comes out clean.
- Cool on a wire rack for 10 minutes before removing from the pan. Always cool cakes completely before decorating or storing them.
Pro tip – Freeze the cake for an hour (optional) to make carving easier.
Prepare frosting
- In a large bowl with the whisk attachment, cream the butter until light and fluffy. Then, add the powdered sugar one cup at a time. Add the salt and vanilla extract, followed by the heavy cream. Continue to whip until light and fluffy.
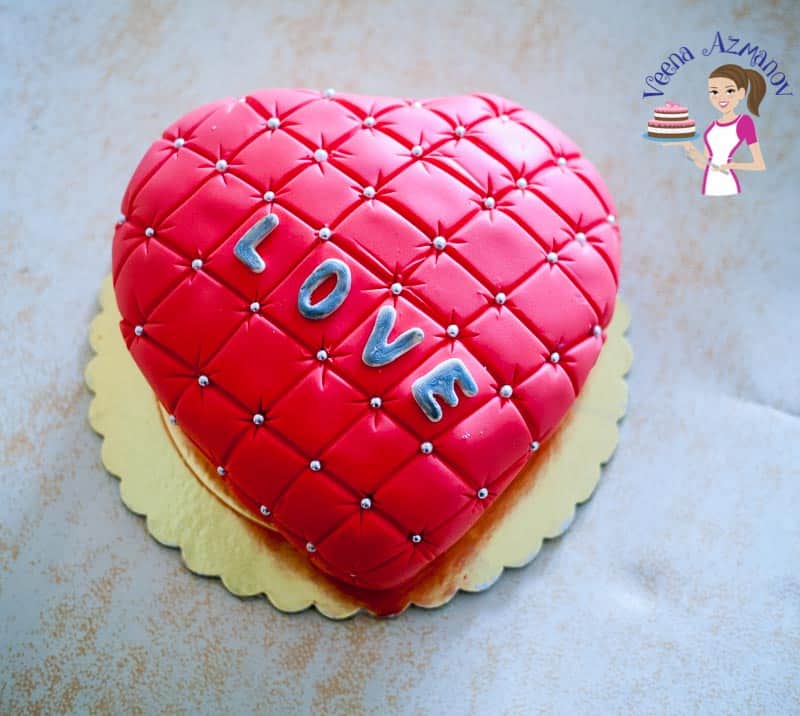
Pillow/Cushion cakes
- If you use a square pan – Using the heart template, cut out the heart cake. Hold the knife at a 90% angle – straight up – so you get a nice straight side (not beveled)
- Round the edges and shape the heart, as shown in the video. Make sure to flip the cake over and carve both sides.
- Crumb-coat the cake and let it chill for 15 minutes. Make sure to flip the cake over and carve both sides.
- Chill the cake for at least an hour. Then, use a cling wrap to smooth the cake, as shown in the video.
- Roll red-colored fondant 10 inches larger than the diameter of the cake. Gently roll it over the rolling pin. Then, unroll it over the cake. Use your hands to smooth it out, cutting any excess as necessary.
- Tuck the fondant under so the edges are raised from the sides. Use a fondant smoother or your hands to smooth the sides and edges.
- Use a fondant lattice tool or the back of a paintbrush to create diagonal lines about an inch apart in one direction. Then, turn the cake over and do the same diagonally in the other direction.
Pro tip: Starting from the center works best. Make a line in the center, then continue on one side, then the other. This helps keep them evenly spaced. - You should now have a square (lattice) pattern on the cake. Use the back of a paintbrush to deepen the same lines. Use the bottom of your paintbrush to make a slight dip at every intersection of the lines.
- Using a tweezer, place a dragee at the corner of every square. Dust the cake with luster dust for a smooth, shiny finish.
This is one of the cakes from my Heart Cake Tutorials collection. You may also like to see the videos for my Heart Cake and Conversation Heart cakes.
How do you create a lattice pattern on the cake?
- Roll out a small amount of red fondant into a thin rope.
- Use a lattice impression mat to create the lattice pattern on the fondant rope. Alternatively, you can use a pizza cutter or sharp knife to create the lattice pattern by hand.
- Attach the fondant lattice to the top of the cake using a small amount of edible glue or water. Start from the center and work your way outwards, gently pressing the lattice onto the fondant-covered cake.
- Valentine Strawberry Gift Box Cake
- Heart Cake Video Tutorial
- Valentine Heart Macarons
- Strawberry Red Velvet Cake
- Valentine Heart Cookies
Frequently asked questions
Yes, you can use store-bought fondant instead of making your own. Just make sure to knead it well and roll it out to the desired thickness before covering the cake.
Yes, you can bake the cake layers ahead of time and freeze them until you’re ready to assemble and decorate the cake. Just make sure to wrap them tightly in plastic wrap and thaw them in the refrigerator before using.
The decorated cake can be stored at room temperature for 2-3 days. If you need to store it longer, you can refrigerate it, but be aware that the fondant may become sticky when brought back to room temperature.
Yes, you can use a gluten-free cake recipe and gluten-free fondant to make this cake gluten-free. Just make sure all your ingredients are certified gluten-free.
Valentine Heart Pillow Cake Recipe & Tutorial
A pillow cake gives that wonderful warm hugs feeling and making it a red heart cake just makes it perfect for Valentine's Day. You will be surprised how easy this cake is to make. Your valentine will think you slaved all day over it.
Video
Ingredients
- 1½ cup (190 g) All-purpose flour
- 1 ½ tsp Baking powder
- ½ tsp Salt
- ½ cup (113 g) Unsalted Butter room temperature
- 1 cup (200 g) White sugar
- 2 large Eggs
- 1 tsp Vanilla Extract
- ½ cup (80 ml) Buttermilk
- 1 cup (228 grams) Butter unsalted unsalted
- 4 cups (480 g) Powdered sugar
- 1 tsp Vanilla extract
- 2 -4 tbsp Whipping cream for consistency
- 1 batch Marshmallow fondant red or your choice of color
Method
- Preheat the oven to350℉/ 175℃/ Gas mark 4. Grease and line one 7-inch heart cake pan or 8 x 8-inch square pan.
- Sift flour with baking powder and salt.1½ cup All-purpose flour, 1 ½ tsp Baking powder, ½ tsp Salt
- In a separate bowl, cream butter and sugar until light and fluffy. Add eggs one at a time. Followed by the vanilla extract. Lastly, add the flour mixture and buttermilk and combine until smooth.½ cup Unsalted Butter , 1 cup White sugar, 2 large Eggs, 1 tsp Vanilla Extract, ½ cup Buttermilk
- Pour the batter into the prepared baking pan and bake in the preheated oven for 35 to 40 minutes until a skewer inserted in the center comes out clean.
- Cool on a wire rack for 10 minutes before removing from the pan. Always cool cakes completely before you decorate or store cakes awayPro tip – Freeze the cake for an hour (optional) as it makes it easier to carve.
- In a large bowl with the whisk attachment, cream the butter until light and fluffy. Then, add the powdered sugar one cup at a time. Add the salt and vanilla extract followed by the heavy cream. Continue to whip until light and fluffy.1 cup Butter unsalted, 4 cups Powdered sugar, 1 tsp Vanilla extract, 2 -4 tbsp Whipping cream
- If you use a square pan – Using the heart template, cut out the heart cake. Hold the knife at a 90% angle – straight up – so you get a nice straight side (not beveled)
- Round the edges and shape the heart, as shown in the video. Make sure to flip the cake over and crave both sides.
- Crumb-coat the cake and let chill for 15 minutes. Make sure to flip the cake over and crave both sides.
- Chill the cake for at least an hour. Then use a cling wrap to smooth the cake as shown in the video
- Roll red color fondant 10 inches larger than the diameter of the cake. Gently roll it over the rolling pin. Then, unroll it over the cake. Use your hands to smooth it out, cutting any excess as necessary.1 batch Marshmallow fondant
- Tuck the fondant under so the edges are raised from the sides. Use a fondant smoother or your hands to smooth the sides and edges.
- Use a fondant lattice tool or the back of a paintbrush to create diagonal lines about an inch apart in one direction. Then, turn the cake over and do the same diagonally in the other direction. Pro tip: Starting from the center works best. Make a line in the center, then continue on one side, then the other. This helps keep them evenly spaced.
- You should now have a square (lattice) pattern on the cake. Use the back of a paintbrush to deepen the same lines. Use the bottom of your paintbrush to make a slight dip at every intersection of the lines.
- Using a tweezer place a dragee at the corner of every square. Dust the cake with luster dust for a smooth shiny finish.
Notes
- Prepare Your Work Area: Make sure your work surface is clean and lightly dusted with powdered sugar or cornstarch to prevent the fondant from sticking.
- Use Fresh Fondant: Fresh fondant is easier to work with and will give you a smoother finish on your cake.
- Work Quickly: Fondant can dry out quickly, so work efficiently when rolling it out and covering the cake.
- Smooth the Fondant: Use a fondant smoother to gently smooth out any wrinkles or air bubbles in the fondant.
- Chill the Cake: Chilling the cake before applying the fondant can make it easier to handle and less likely to crumble.
- Practice the Lattice Pattern: If you’re using a lattice impression mat, practice using it on a small piece of fondant before applying it to the cake to ensure you get the desired pattern.
- Be Patient: Decorating with fondant can be a bit time-consuming, so take your time and enjoy the process.
- Store Correctly: Store the finished cake in a cool, dry place away from direct sunlight to prevent the fondant from melting or drying out.
Equipment you will need


Nutrition
Tried this recipe?
Mention @veenaazmanov_kitchen or tag #veenaazmanovkitchen!SAVE THIS RECIPE ON PINTEREST FOR LATER. TRIED MY RECIPE? SHARE IT WITH ME, PLEASE.
Share a picture of your work with me by uploading an image here below my image on this board. You can also find a collection of my tutorials and recipes here on Pinterest.


This cake looks beautiful. I am really fond of your baked goods. They are always outstanding.
Thank you so much, Gunjan.
What an impressive cake!!! I know what I’ll be making this Valentine’s Day!
Thanks, Pam. I hope you try this one.
wow, veena! the cake looks so awesome. Perfect for Valentine’s day! You always bake so good and creative.
Thank you so much, Uma.
How gorgeous this cake is. A perfect valentines day treat.
Thank you, Kushi
I guess it’s time to start rolling fondant again. This cake looks absolutely beautiful and perfect for Valentine. And I’m sure it will be a hit also.
Thank you, Linda. I hope you try this cake.
Wow, what an insanely gorgeous cake! You make it look so easy, I believe I can actually create this work of art! My hubby will just love it!
Thank you, Aleta. I hope you give this a try
Thank you Veena. I used this tutorial to make a baby shower cake. Thanks for the inspiration ideas you mentioned
Thank you, Momina. So happy to hear you found this tutorial useful. Thanks for the feedback. Sounds beautiful
Wowww! this pillow type of cake is amazing and so beautiful. I love it!! Would love a real pillow in this shape too! So cute. Love how easy you make this look.
Thank you Syed.
Thank you for this tutorial Veena. Love the details.
You are very welcome Archana. Happy to know this was useful
You always make things look so simple and easy. Love this tutorial. Thanks for the recipe as well.
You are very welcome Sam.