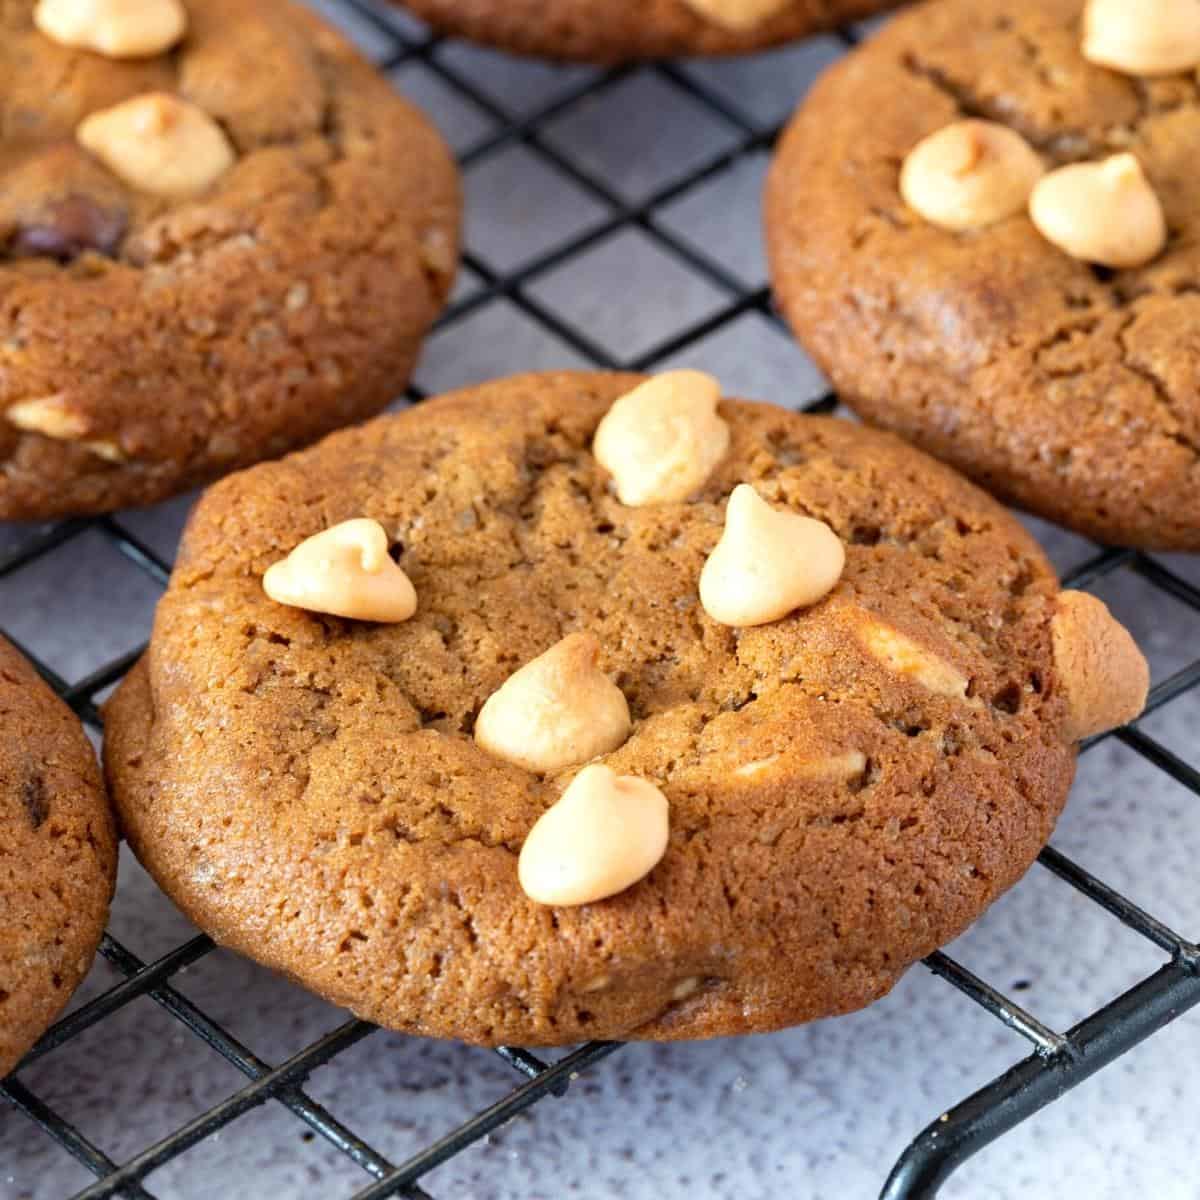




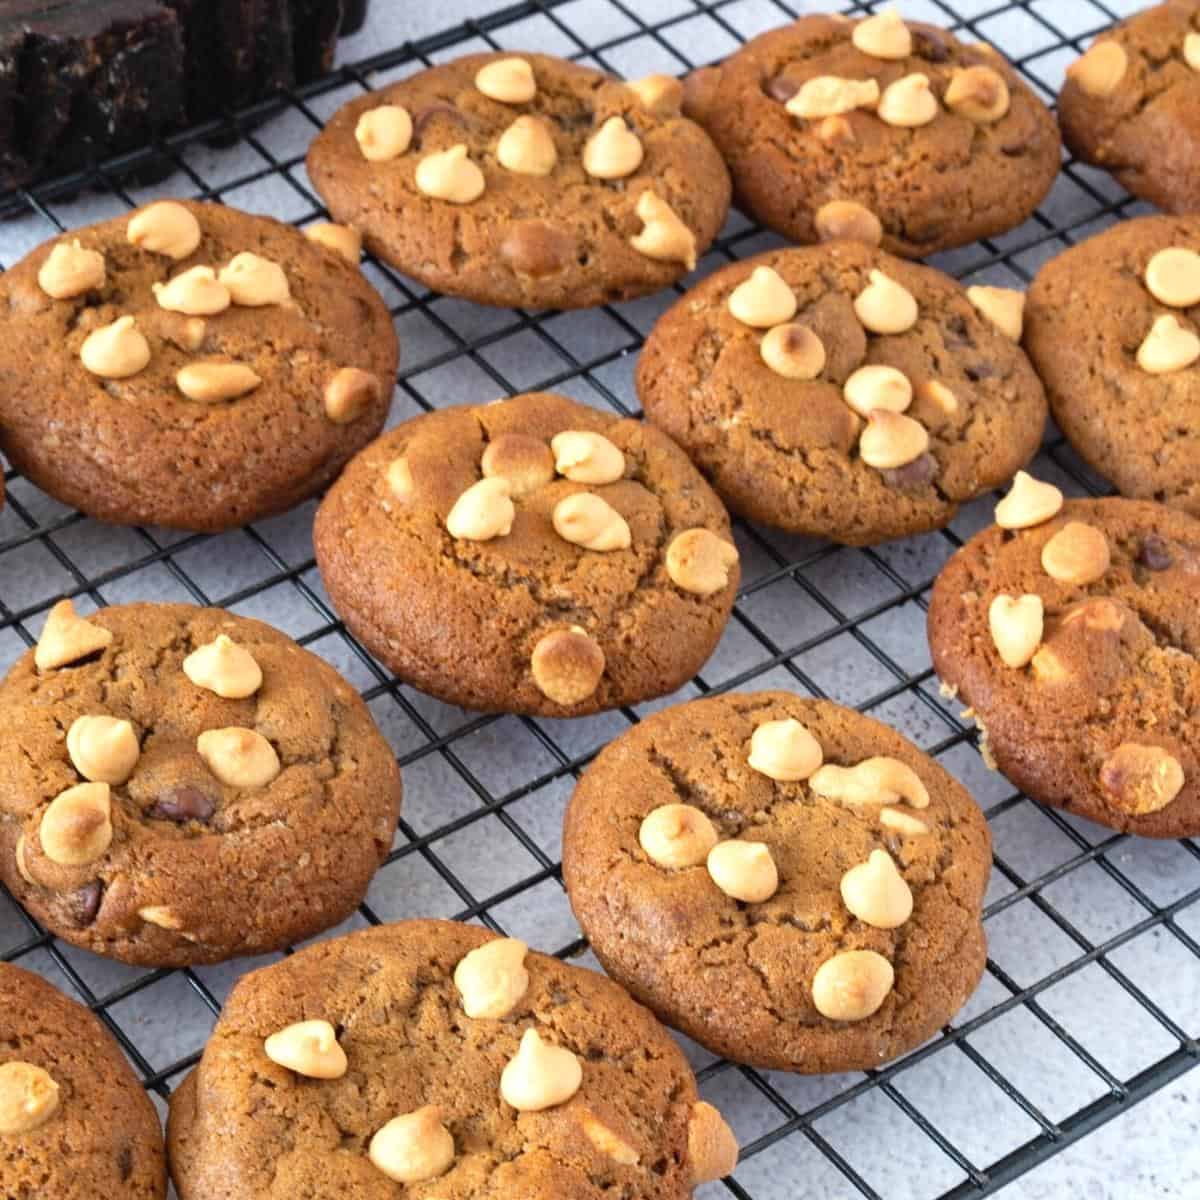
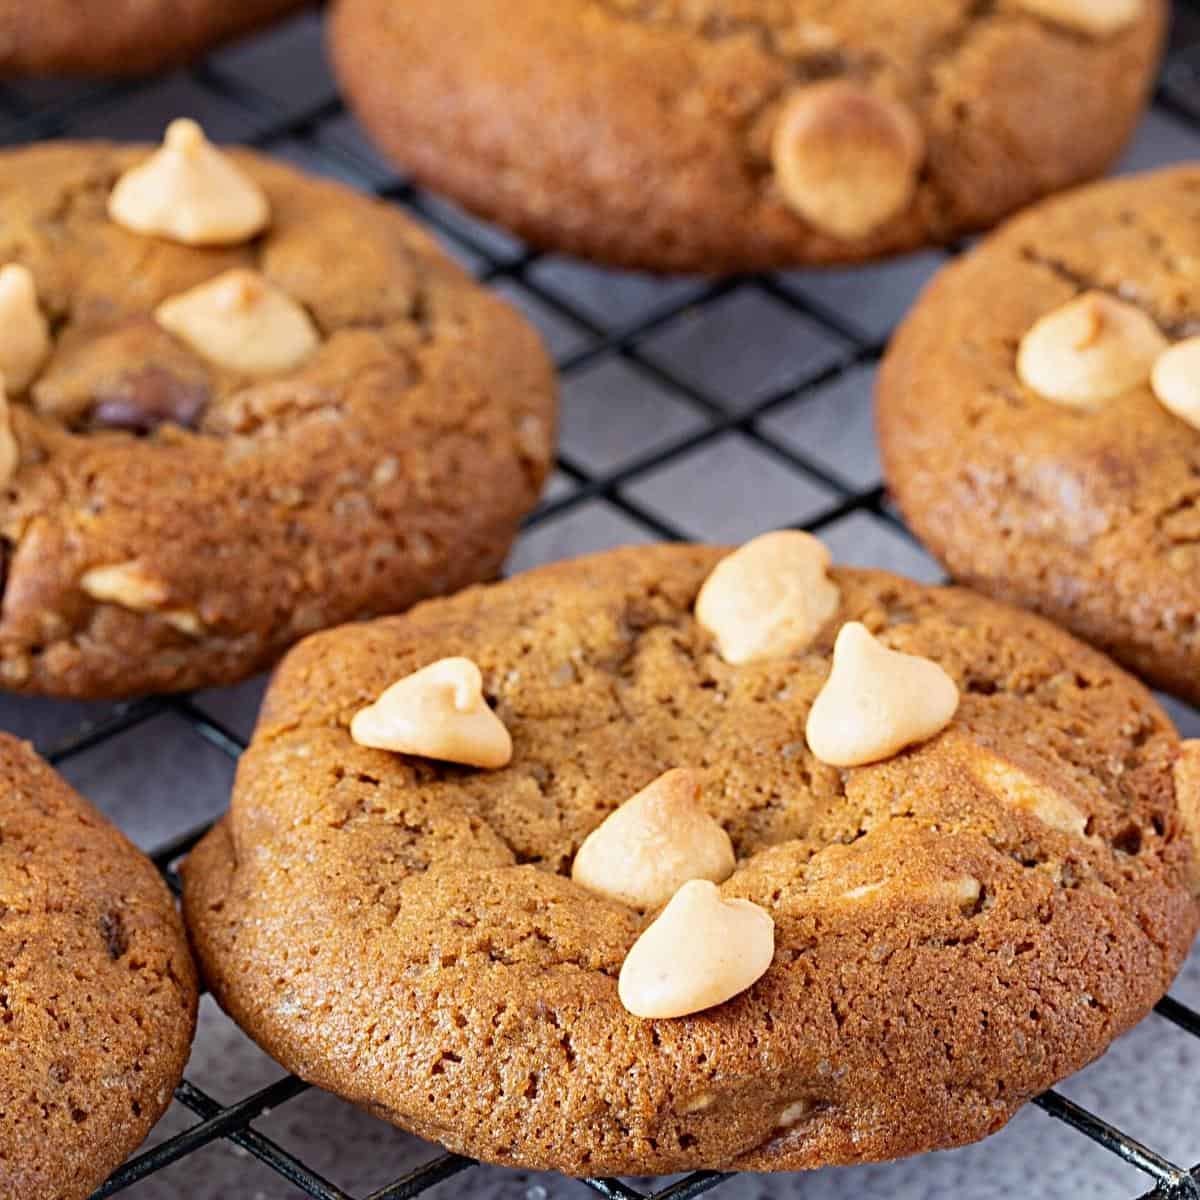
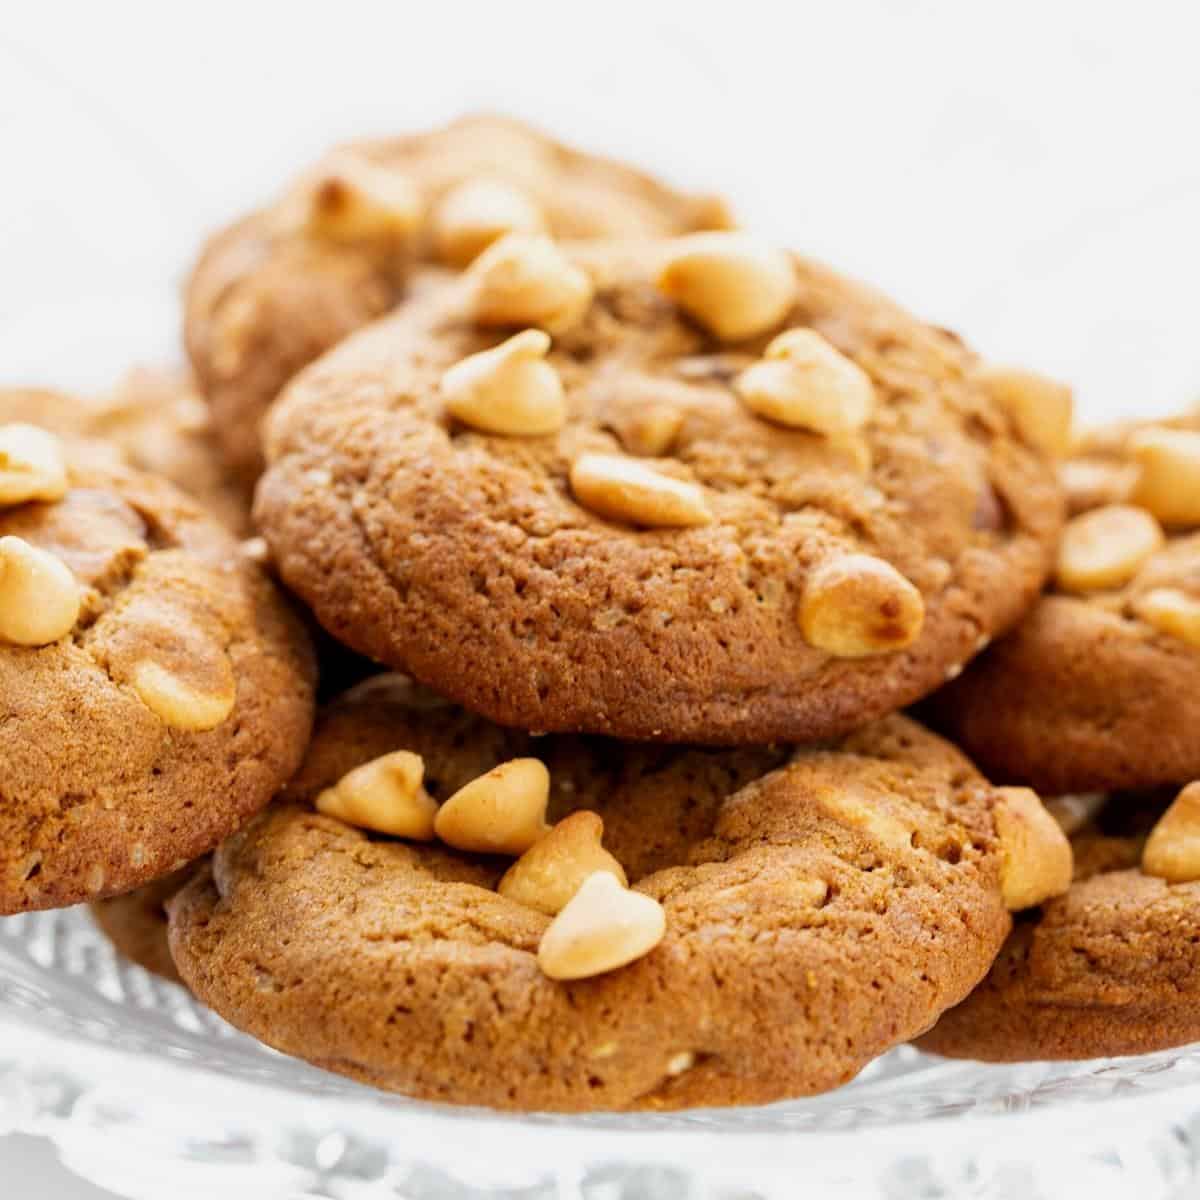
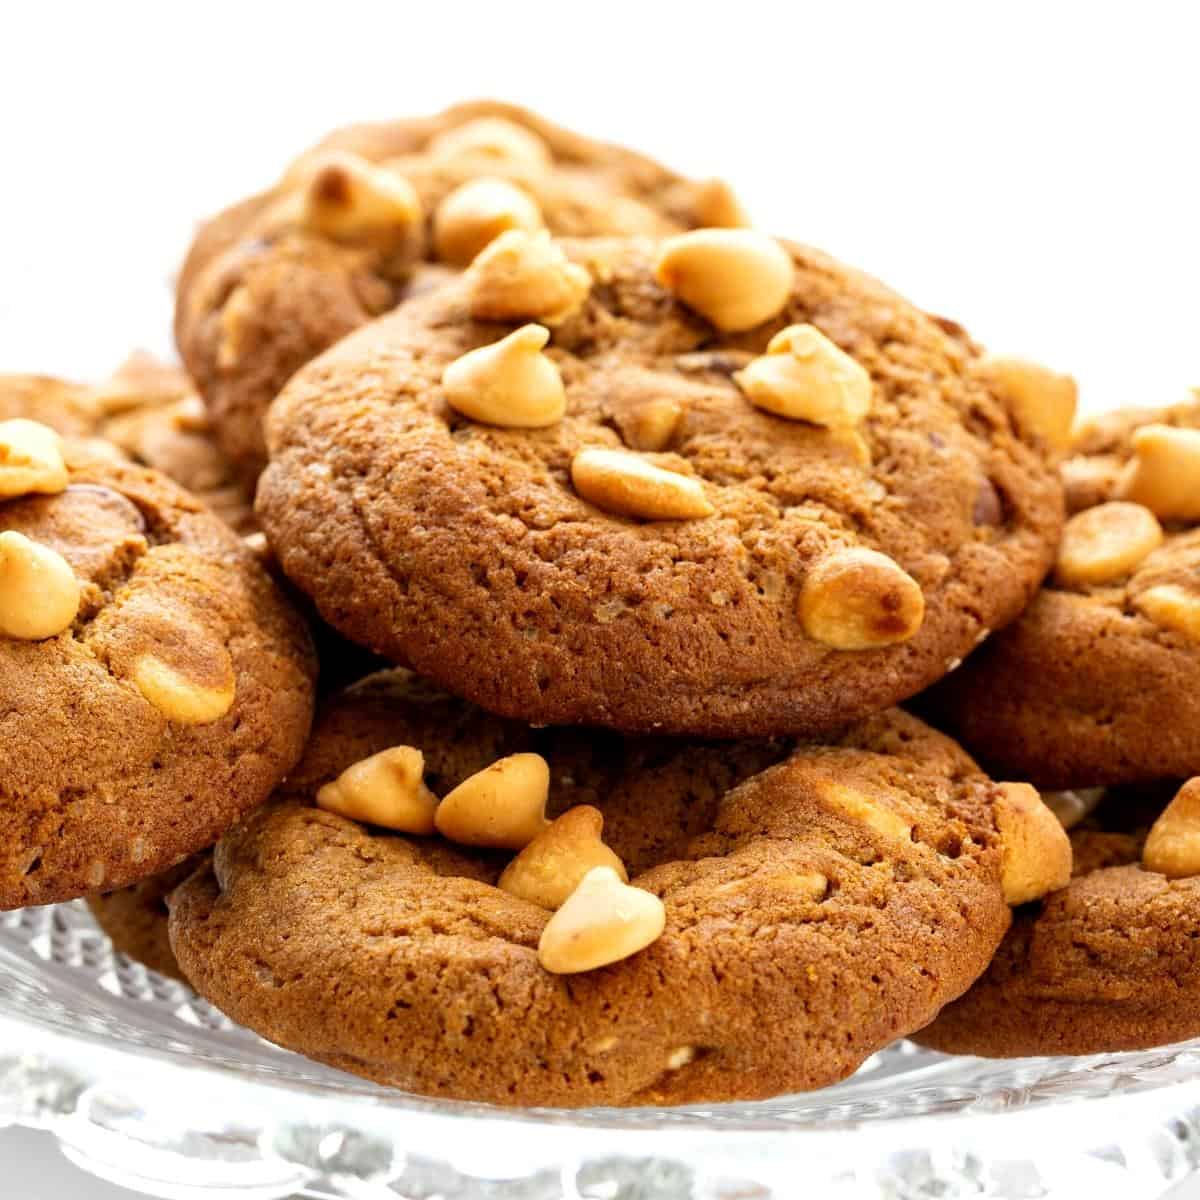
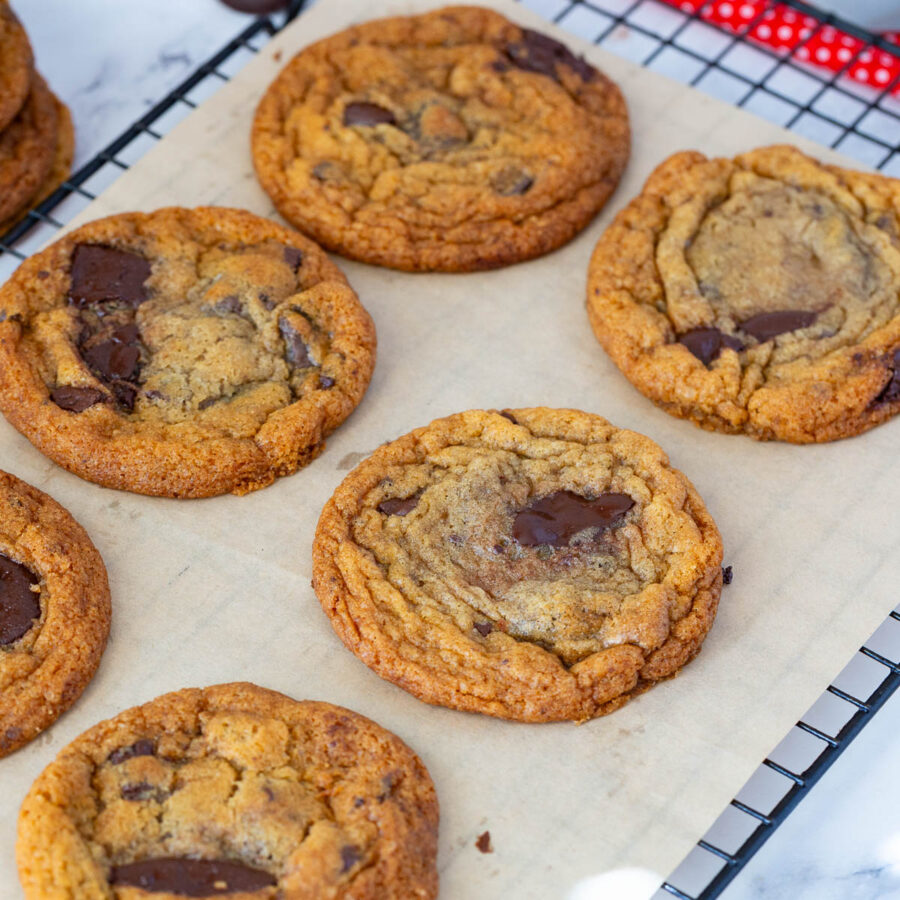
These peanut butter chip cookies are soft and chewy with plenty of peanut butter chips and chocolate chips in every bite. They’re made with melted butter and dark brown sugar for a chewy center and slightly crisp edges.
Unlike classic peanut butter cookies, there’s no peanut butter in the cookie dough. The peanut butter flavor comes from the chips, which means you get little pockets of peanut butter throughout the cookie along with the chocolate.
I already have a classic peanut butter cookie recipe made with peanut butter, so I wanted these cookies to be different. Here, the peanut butter chips are the star.
I use more peanut butter chips than chocolate chips so you get peanut butter in almost every bite without the chocolate taking over. The cookie dough itself is a simple brown sugar dough made with melted butter, which means there’s no need to cream butter and sugar.
The combination of melted butter, dark brown sugar, one whole egg, and an extra yolk gives these cookies their soft, chewy texture. The only thing to remember is to give the dough time to chill before baking. Because we’re starting with melted butter, that short chill helps control how much the cookies spread.
Why you’ll love these cookies
- Soft and chewy – Dark brown sugar and an extra egg yolk help give the centers that lovely chewy texture.
- Lots of peanut butter chips – They’re the main flavor here, not just another mix-in.
- Chocolate and peanut butter – A smaller amount of chocolate chips gives you both flavors without overpowering the peanut butter.
- No mixer needed – Melted butter means there’s no creaming, so the dough comes together quickly.
Ingredients and Substitutions
- Butter – Melted butter gives these cookies their soft, chewy texture and means there’s no need to cream the butter and sugar. Let it cool slightly before adding the egg.
- White sugar – Adds sweetness and helps the cookies spread and develop lightly crisp edges.
- Dark brown sugar – Adds moisture, chewiness, and a deeper caramel flavor. Light brown sugar will also work, but I prefer dark brown sugar here.
- Egg and egg yolk – The whole egg provides structure, while the extra yolk adds richness and helps keep the centers soft and chewy.
- All-purpose flour – Measure accurately and avoid adding extra flour, which can make the cookies dry and prevent them from spreading properly.
- Baking powder and baking soda – I use both. Baking soda encourages browning and spread, while baking powder gives the cookies a little lift.
- Salt – Balances the sweetness and brings out the peanut butter and chocolate flavors.
- Peanut butter chips – The main flavor in these cookies. They give you little pockets of peanut butter throughout without adding peanut butter to the dough.
- Chocolate chips – I use fewer chocolate chips than peanut butter chips so the chocolate complements rather than overwhelms the peanut butter flavor. Semi-sweet or dark chocolate chips work well.

Step-by-step: How to make peanut butter chip cookies
Make the cookie dough
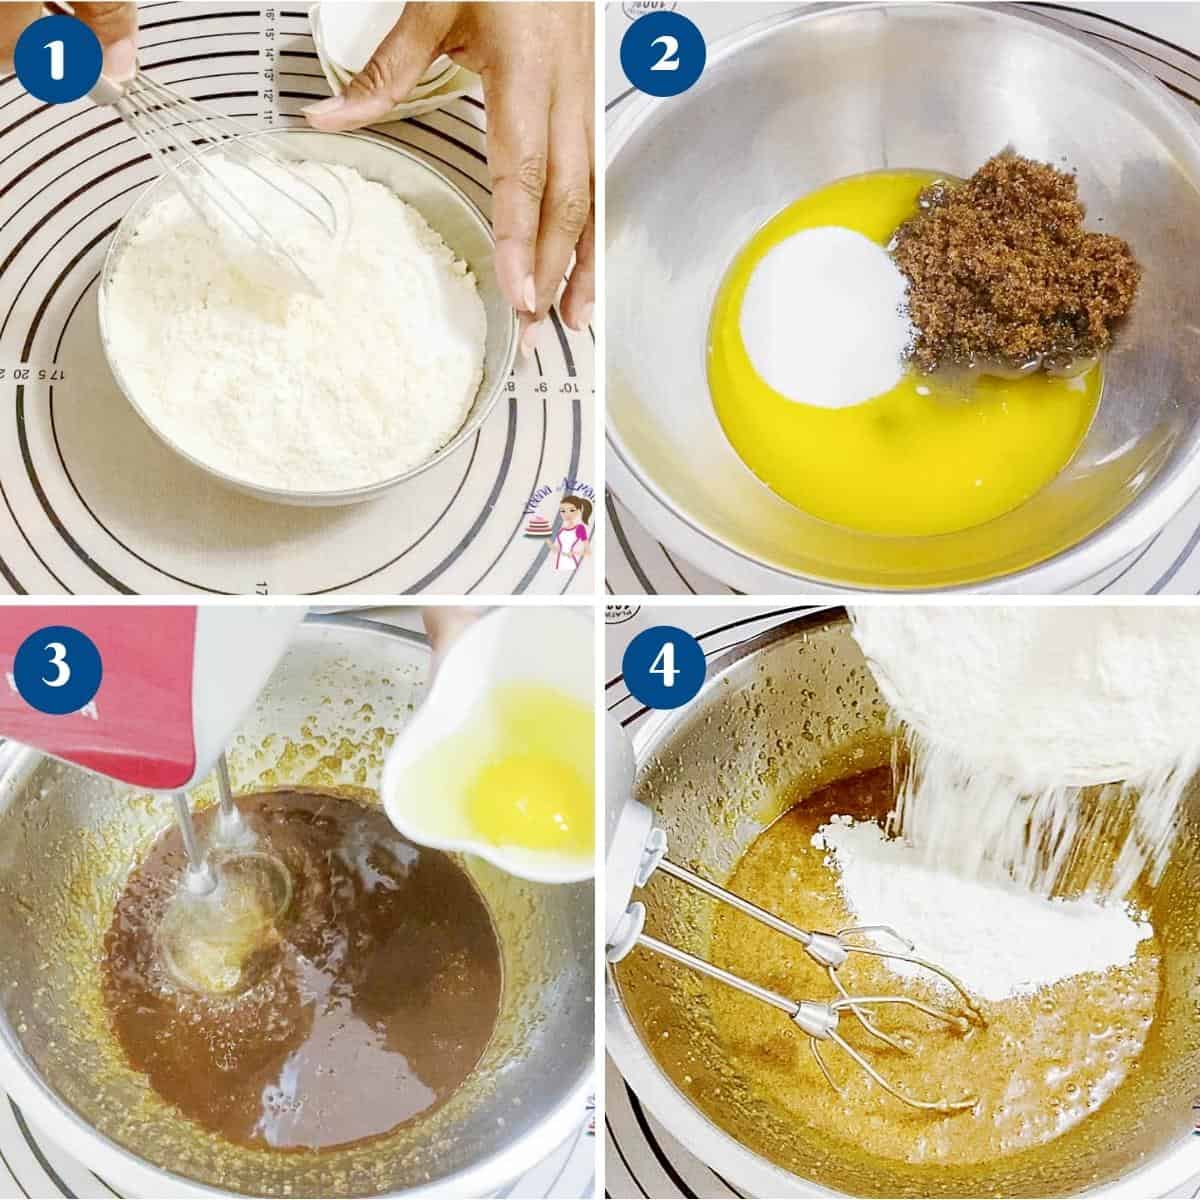
- Combine the butter and sugars – Add the melted butter, white sugar, and dark brown sugar to a large bowl. Whisk until well combined.
- Add the egg and yolk – Add the whole egg and egg yolk. Whisk again until the mixture looks smooth and slightly thickened.
- Combine the dry ingredients – In a separate bowl, whisk together the flour, baking powder, baking soda, and salt.
- Make the dough – Add the dry ingredients to the butter mixture and stir just until no dry flour remains. Do not overmix.
- Add the chips – Fold in the peanut butter chips and chocolate chips until evenly distributed through the dough.
Chill and shape
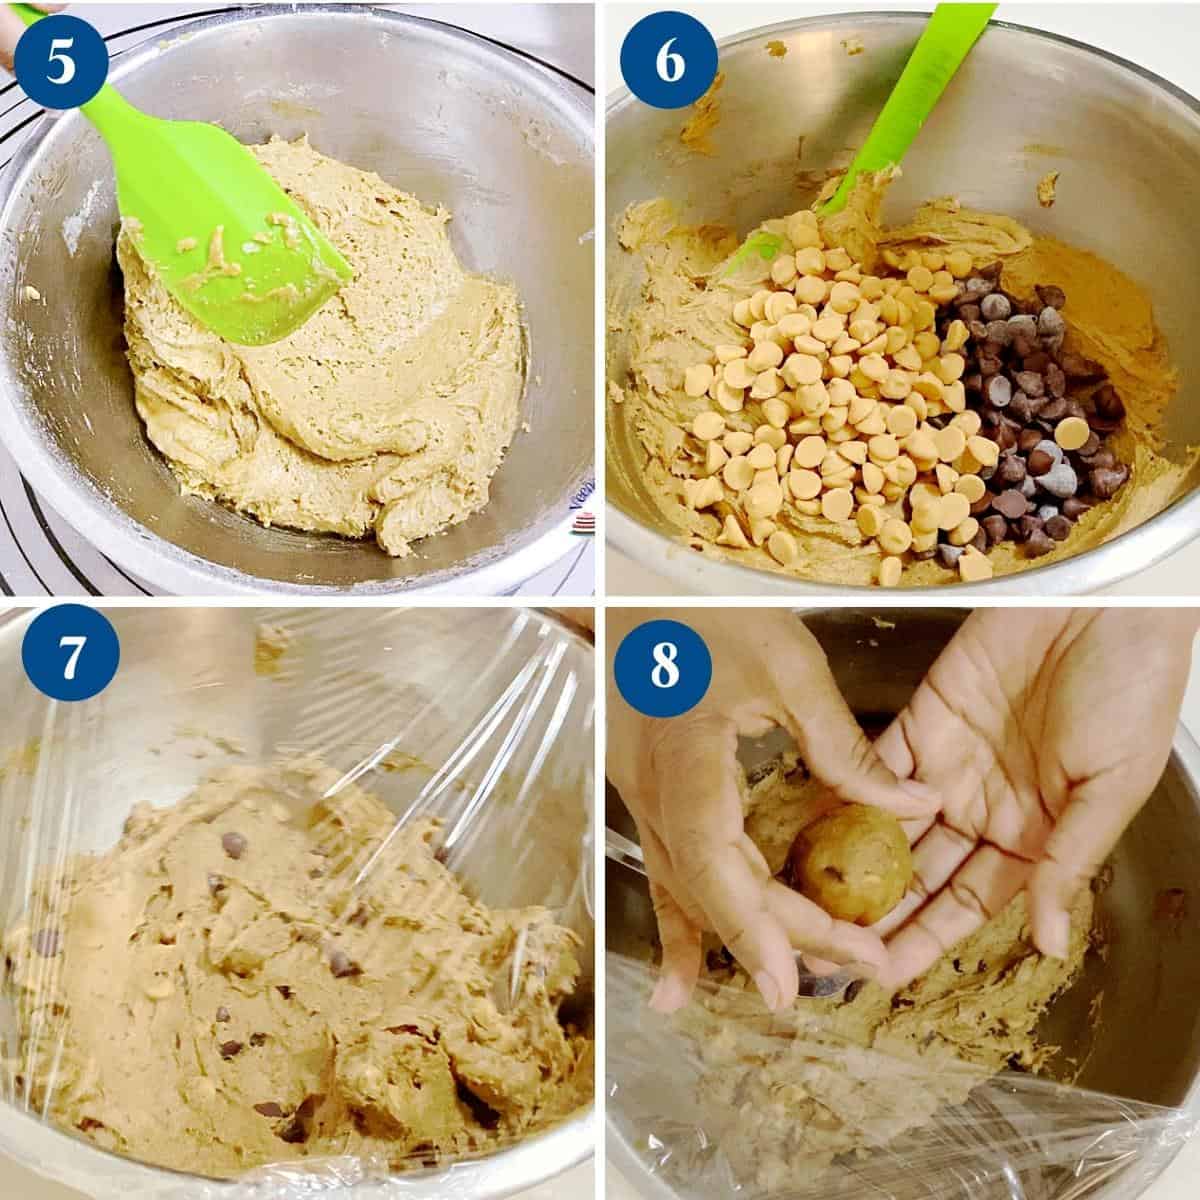
- Chill the dough – Cover and refrigerate the cookie dough for about 30 minutes, or until it has firmed enough to scoop easily.
- Preheat the oven – Preheat the oven to 350°F / 180°C / Gas Mark 4. Line baking sheets with parchment paper.
- Shape the cookies – Scoop portions of dough and roll lightly into balls. Place them a few inches apart on the prepared baking sheet to allow room for spreading.
Bake
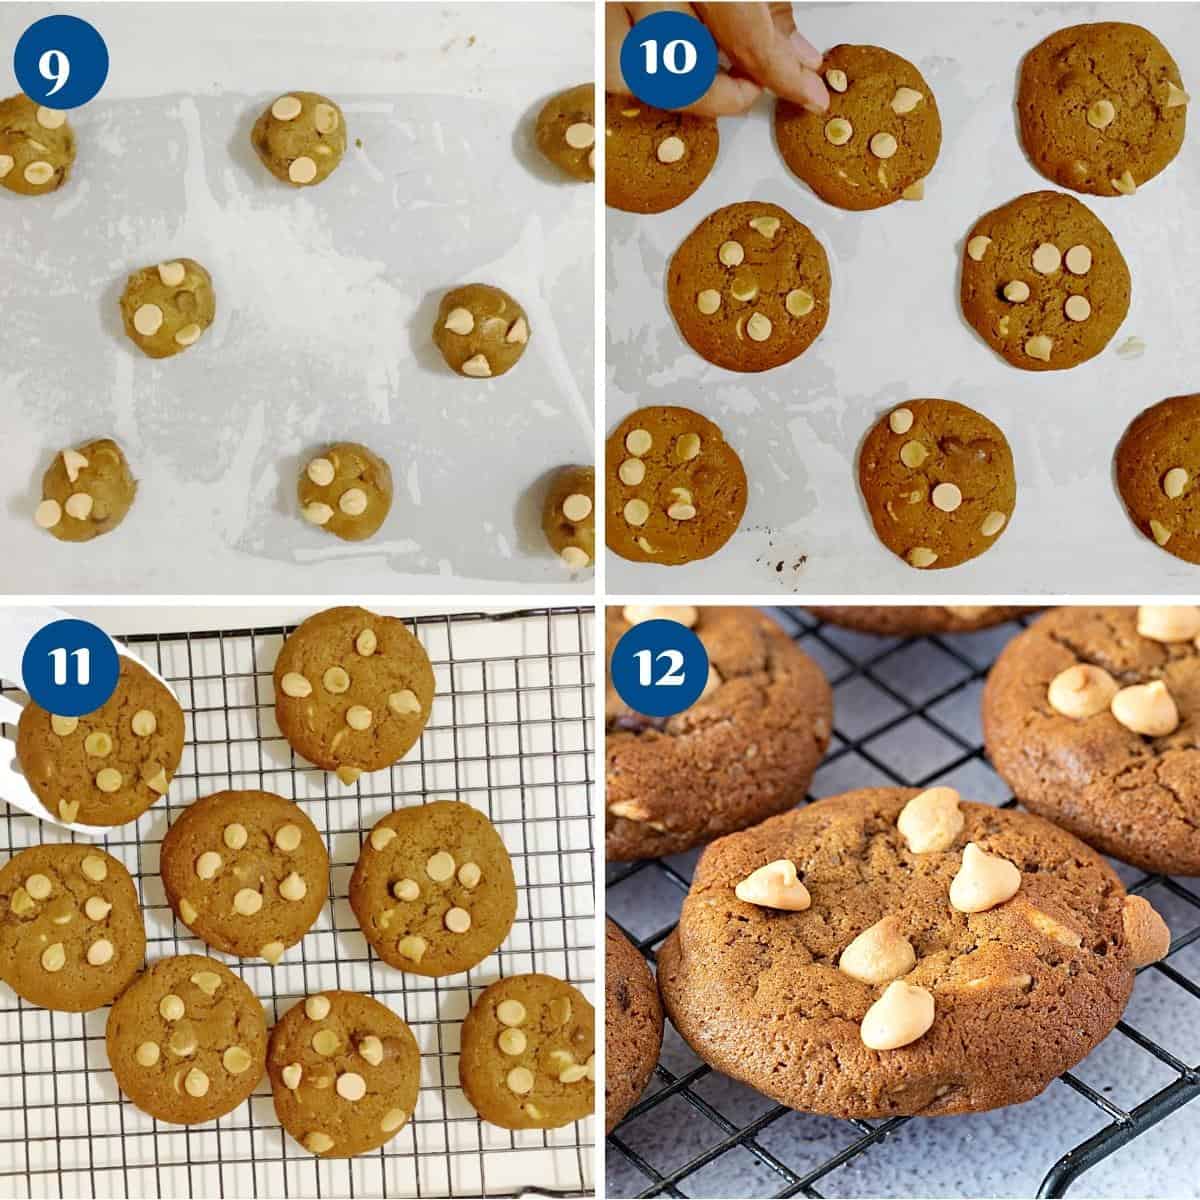
- Bake – Bake for about 10 to 12 minutes, or until the edges are lightly golden but the centers still look slightly soft.
- Cool – Let the cookies rest on the baking sheet for about 5 minutes before transferring them to a cooling rack.
Veena’s tip
Do not wait until the centers look fully baked before taking the cookies out. They continue cooking on the hot baking sheet, and that is what keeps the centers soft and chewy.
Make Ahead and Storage
- Make ahead – Prepare the cookie dough, cover, and refrigerate for up to 2 days. Let it sit at room temperature for a few minutes if it becomes too firm to scoop.
- Freeze the dough – Scoop the dough into balls and freeze on a tray until firm, then transfer to a freezer bag or container for up to 3 months. Bake from frozen, adding a minute or two to the baking time if needed.
- Store baked cookies – Keep completely cooled cookies in an airtight container at room temperature for 4 to 5 days.
- Freeze baked cookies – Freeze in an airtight container for up to 3 months. Thaw at room temperature before serving.
Peanut Butter Chip Cookies
Ingredients
- 170 g (¾ cup) Unsalted butter melted and slightly cooled
- 100 g (½ cup) White sugar
- 150 g (¾ cup) Dark brown sugar
- 1 large Egg
- 1 large Egg yolk
- 250 g (2 cups) All-purpose flour
- ½ tsp Baking powder
- ½ tsp Baking soda
- ½ tsp Salt
- 255 g (1½ cups) Peanut butter chips
- 85 g (½ cup) Semi-sweet chocolate chips
Instructions
- Combine the wet ingredients – In a large bowl, whisk the melted butter, white sugar, and dark brown sugar until well combined. Add the whole egg and egg yolk and whisk until smooth.170 g Unsalted butter, 100 g White sugar, 150 g Dark brown sugar, 1 large Egg, 1 large Egg yolk
- Combine the dry ingredients – In a separate bowl, whisk together the flour, baking powder, baking soda, and salt.250 g All-purpose flour, ½ tsp Baking powder, ½ tsp Baking soda, ½ tsp Salt
- Make the dough – Add the dry ingredients to the butter mixture and stir just until combined. Avoid overmixing once the flour has been added.
- Add the chips – Fold in the peanut butter chips and chocolate chips until evenly distributed throughout the dough.255 g Peanut butter chips, 85 g Semi-sweet chocolate chips
- Chill – Cover the bowl and refrigerate the dough for about 30 minutes, or until firm enough to scoop and shape.
- Preheat the oven – Preheat the oven to 350°F / 180°C / Gas Mark 4. Line a baking sheet with parchment paper.
- Shape – Scoop the dough into approximately 2-tablespoon portions and roll lightly into balls. Place them about 2 inches apart on the prepared baking sheet.
- Bake – Bake for 10 to 12 minutes, until the edges are set and lightly golden but the centers still look slightly soft.
- Cool – Leave the cookies on the baking sheet for about 5 minutes before transferring them to a cooling rack.
Video
Notes
- Let the melted butter cool slightly before adding the egg and yolk.
- Don’t add extra flour if the dough initially seems soft. Chilling will firm it up.
- Chill the dough for at least 30 minutes to control spreading.
- Don’t overbake. The centers should still look slightly soft when the cookies come out of the oven.
- For prettier cookies, reserve a few peanut butter and chocolate chips and press them into the tops before baking.
Equipment


Made this recipe?
I’d love to see how yours turned out! Share a photo on Instagram and tag @veenaazmanov_kitchen or use #veenaazmanovkitchen. And don’t forget to leave a rating and review!
Tips for Success
- Let the melted butter cool slightly before adding the egg so the mixture isn’t hot.
- Measure the flour accurately. Too much flour will give you thick, dry cookies that don’t spread well.
- Don’t skip the chill. About 30 minutes helps firm the melted butter so the cookies don’t spread too much.
- Don’t overbake. Take the cookies out when the edges are set but the centers still look slightly soft. They’ll continue to bake on the hot tray.
Troubleshooting
| Problem | What happened | How to fix it |
|---|---|---|
| Cookies spread too much | The dough was too warm. | Chill the dough longer before baking. |
| Cookies don’t spread | Too much flour or the dough was very cold. | Measure flour accurately and let very firm dough sit for a few minutes before baking. |
| Cookies are dry or hard | They were overbaked. | Remove them when the centers still look slightly underdone. |
| Cookies bake unevenly | Dough portions were different sizes. | Use a cookie scoop so the cookies bake at the same rate. |
More Chip cookies
Frequently asked questions
These peanut butter chip cookies will keep in an airtight container for up to a week. You can chill the cookies in the refrigerator for up to 3 days, or you can also freeze the dough for up to 3 months or freeze the cookies for up to a month.
These cookies do spread so make sure to leave enough room around them.
However, too much butter or sugar in the recipe can lead to cookies spreading. Also, too much baking powder or baking soda can also make cookies spread too much.
In addition, place cookies on a cold, not hot baking pan.
And make sure the oven is at the right temperature.
You can freeze the cookie dough for up to a month. You can also freeze the cookie dough balls in freezer bags for up to 3 months. The baked cookies will keep in the freezer for up to a month.
More Cookies
- Classic Gingerbread cake or Gingerbread Cupcakes
- Spiced Gingerbread Loaf Cake
- The Best Molasses Cookies and Ginger molasses cookies
- Shortbread with Molasses
Don’t lose this recipe! Save it for Later!
📌 Save this Recipe for later on Pinterest so you can easily find it again.
⭐ Add Veena Azmanov Kitchen to your Google Preferred Sources.
It helps Google show you more of our recipes.
📧 Subscribe for new recipes delivered to your inbox.
🎥 Follow us for more recipes


Hi, I’m Veena
I’m the recipe developer, baker, and food photographer behind Veena Azmanov Kitchen.
I’ve spent years developing and testing recipes, from everyday meals and homemade breads to cakes and desserts.
I share the practical tips and little details I’ve learned along the way so you can get great results in your own kitchen.