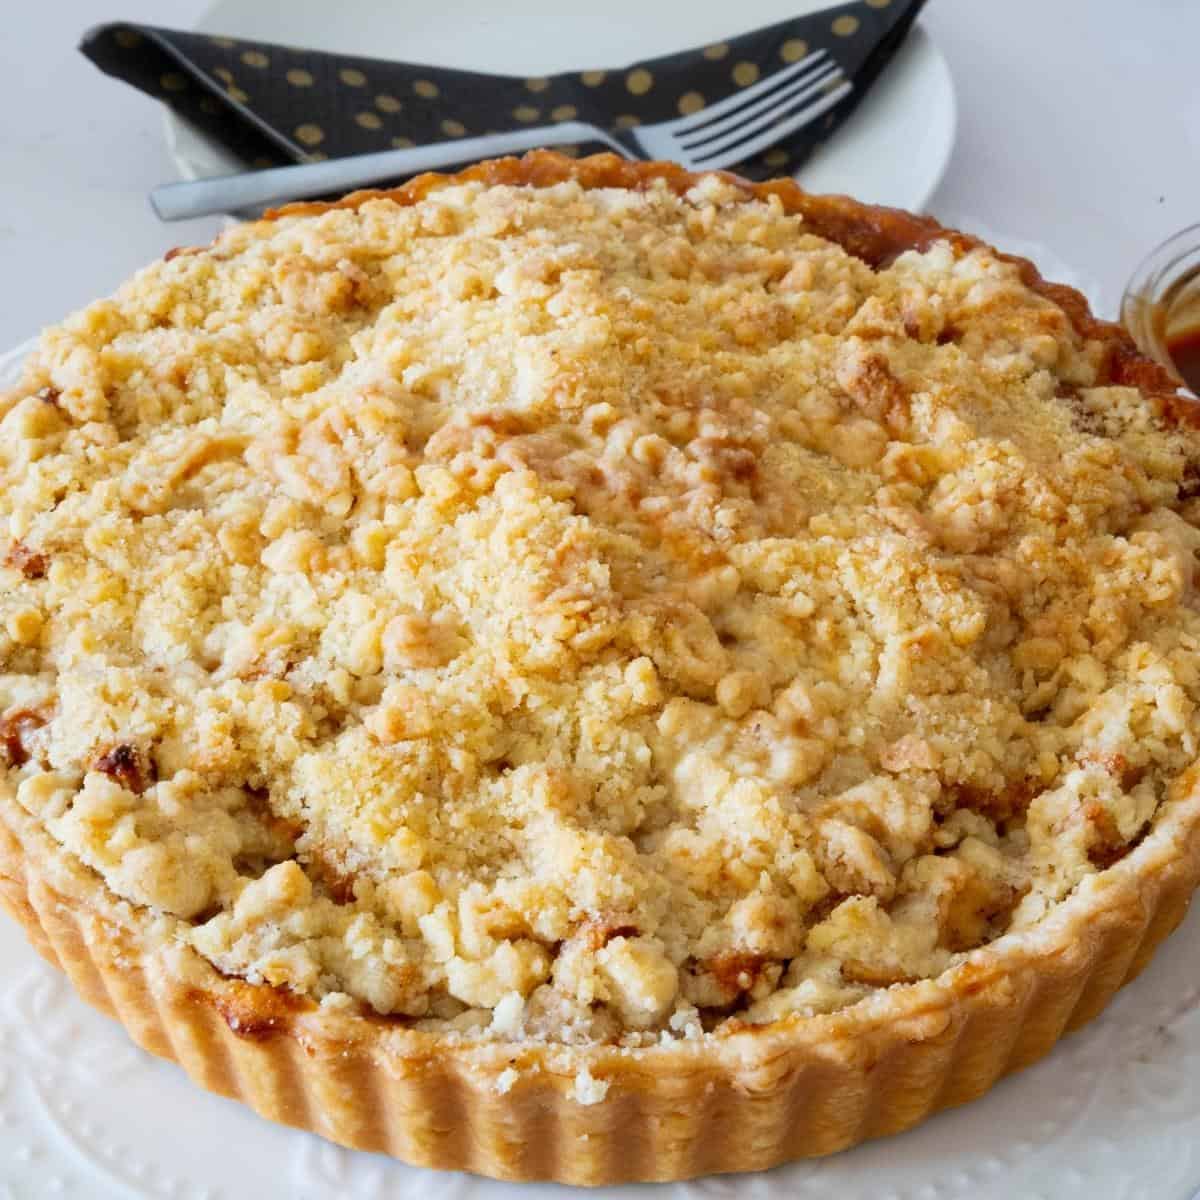
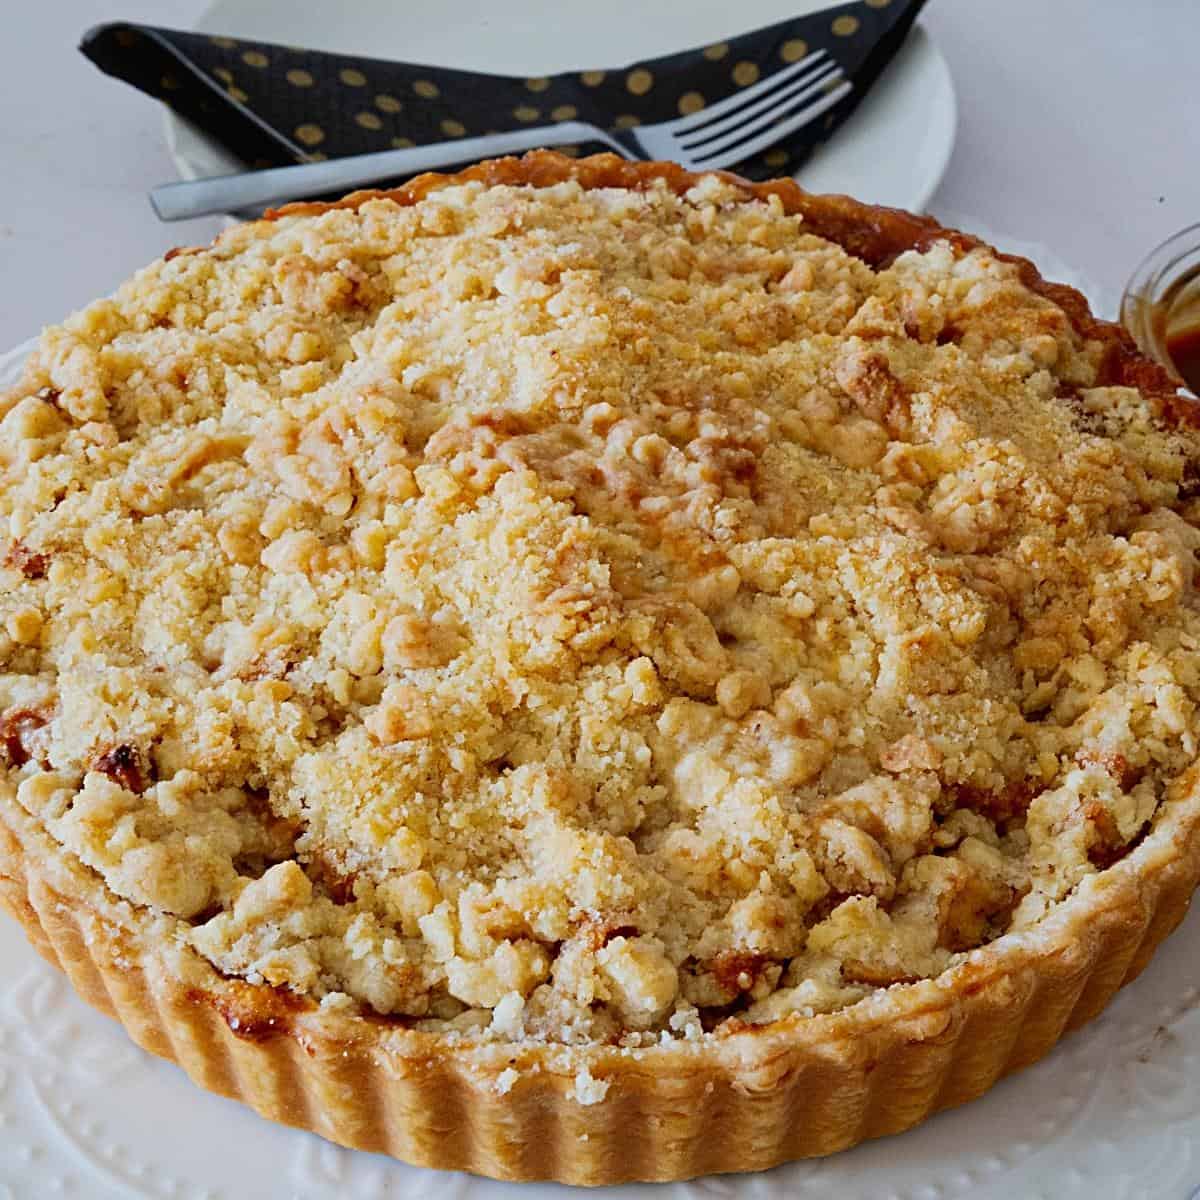
Caramel Dutch Apple Pie
 Prep Time 20 minutes Cook Time 20 minutes Total Time 1 hour 40 minutes


If you’ve ever wished your Dutch apple pie came with an extra layer of indulgence, meet your new favorite dessert: Caramel Dutch Apple Pie. It’s everything you love about a flaky crust, tender cinnamon-spiced apples, and buttery crumble topping—plus a ribbon of sweet, gooey caramel. Perfect for Thanksgiving, Christmas, or any fall baking day when you want something a little extra special.
What is Caramel Dutch Apple Pie?
Caramel Dutch apple pie is a twist on the classic appelkruimeltaart (Dutch apple pie with crumble topping) that adds a layer of caramel to the apple filling. The caramel melts into the apples as they bake, creating a rich, gooey texture and deeper flavor. You can use homemade caramel sauce for a from-scratch bake or store-bought caramel for convenience. Either way, it’s the ultimate upgrade to a holiday dessert table.
I’ve been making Dutch apple pie for years, but once I tried adding caramel, I was hooked. That sweet, slightly chewy layer turns an everyday apple pie into a show-stopping dessert. My kids call it “the gooey pie,” and friends always ask for the recipe after the first bite. It’s now my go-to when I want a dessert that’s easy to make but feels bakery-worthy.
Why You’ll Love This Caramel Dutch Apple Pie
- Flaky homemade crust that stays crisp under the filling
- Juicy apple filling enhanced with warm spices
- Gooey caramel layer that melts into every bite
- Buttery crumble topping for texture and sweetness
- Easy to make ahead—perfect for holiday baking

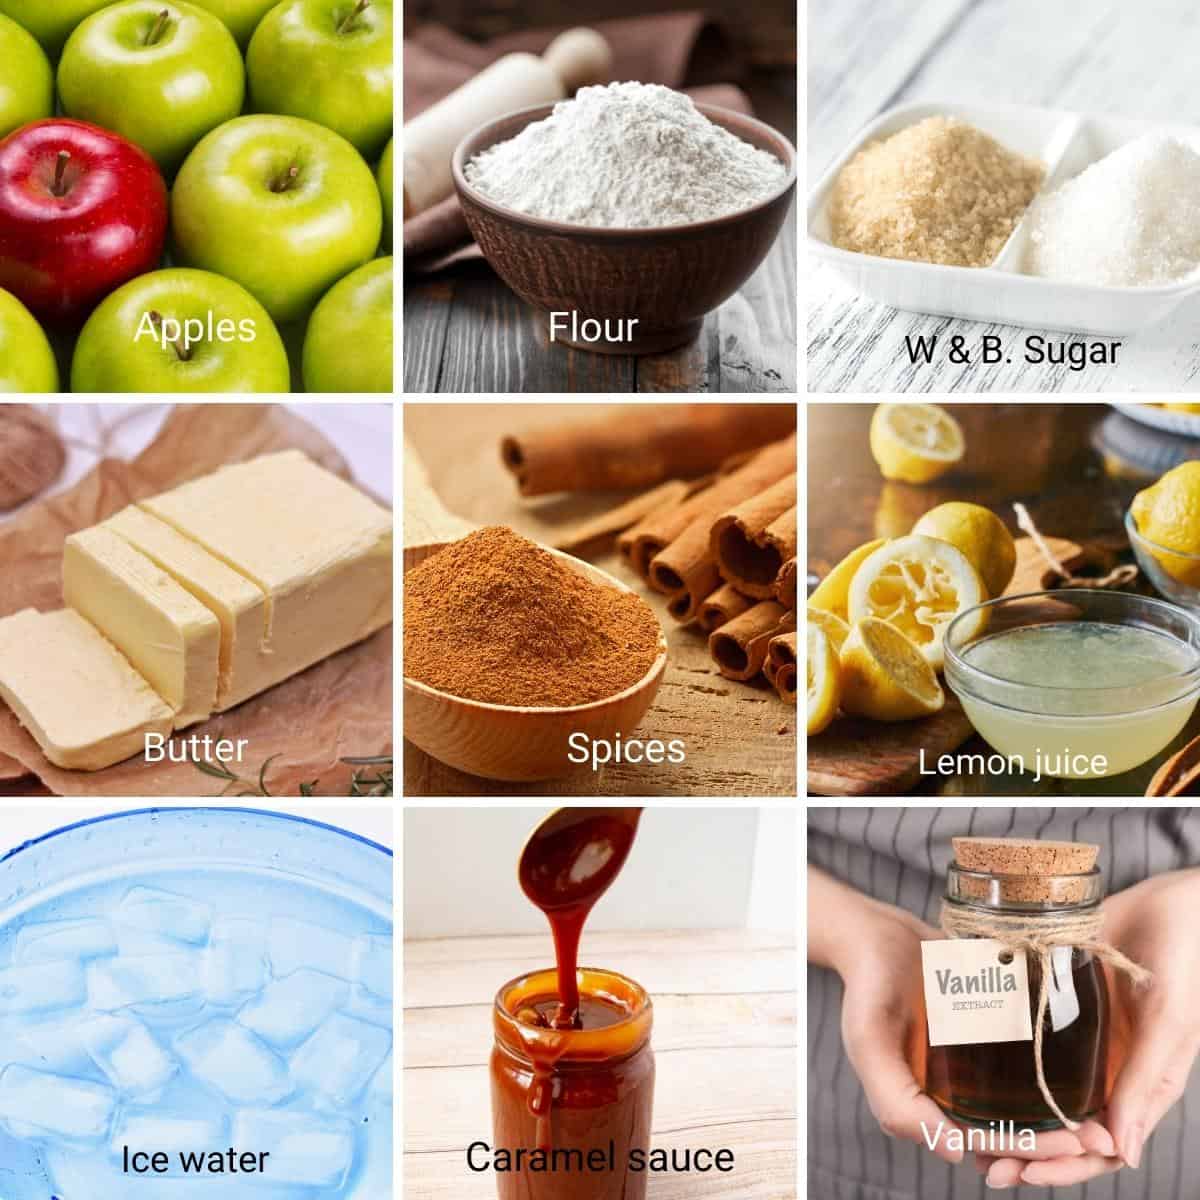
Ingredients and substitutions
- Apples – Use a mix of tart (Granny Smith) and sweet (Honeycrisp, Fuji, or Gala) for depth.
- Sugar – Light brown sugar in the filling and crumble for warm caramel notes.
- Spices – Cinnamon, nutmeg, and ginger give that cozy fall flavor.
- Lemon juice – Prevents browning and balances sweetness.
- Pie crust – My all-butter homemade crust works beautifully; store-bought works in a pinch.
- Cornstarch – Thickens the filling for clean slices.
- Caramel sauce – Homemade for maximum flavor, or store-bought if you’re short on time. Salted caramel adds a gourmet twist.
- Butter – Keep it cold for a perfect crumble topping.
Step-by-step: How to make Caramel Dutch apple pie
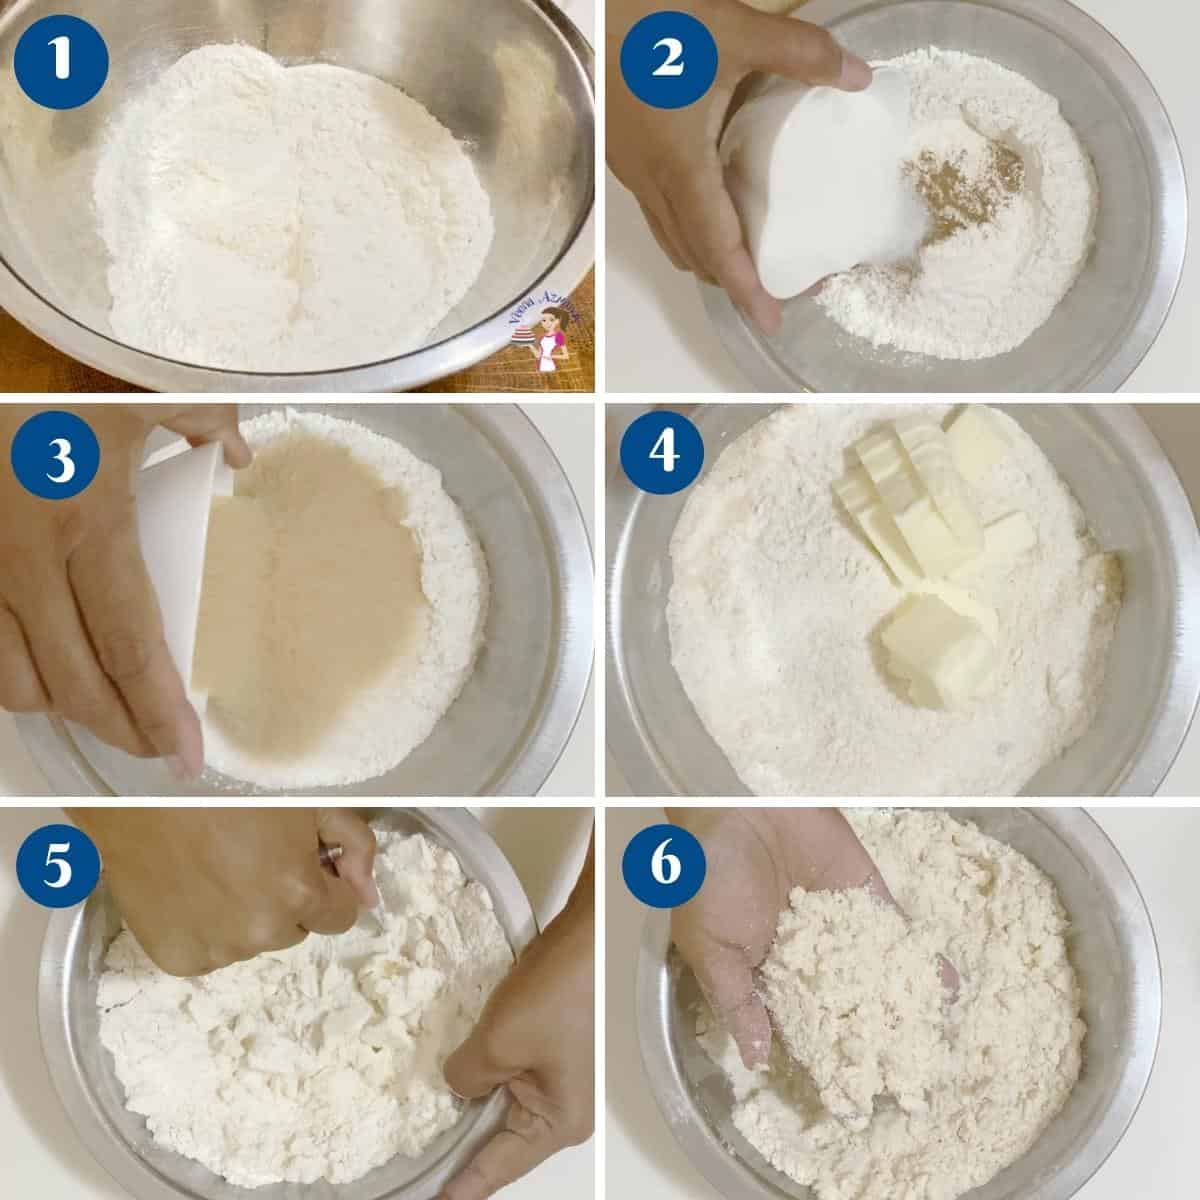
1. Make the Crumble Topping
Mix brown sugar, salt, spices, and flour in a bowl. Cut in the cold butter until the mixture forms large and small crumbs. Chill until ready to use.
Pro Tip: Grating butter into the flour creates perfect crumbs that bake up crisp.
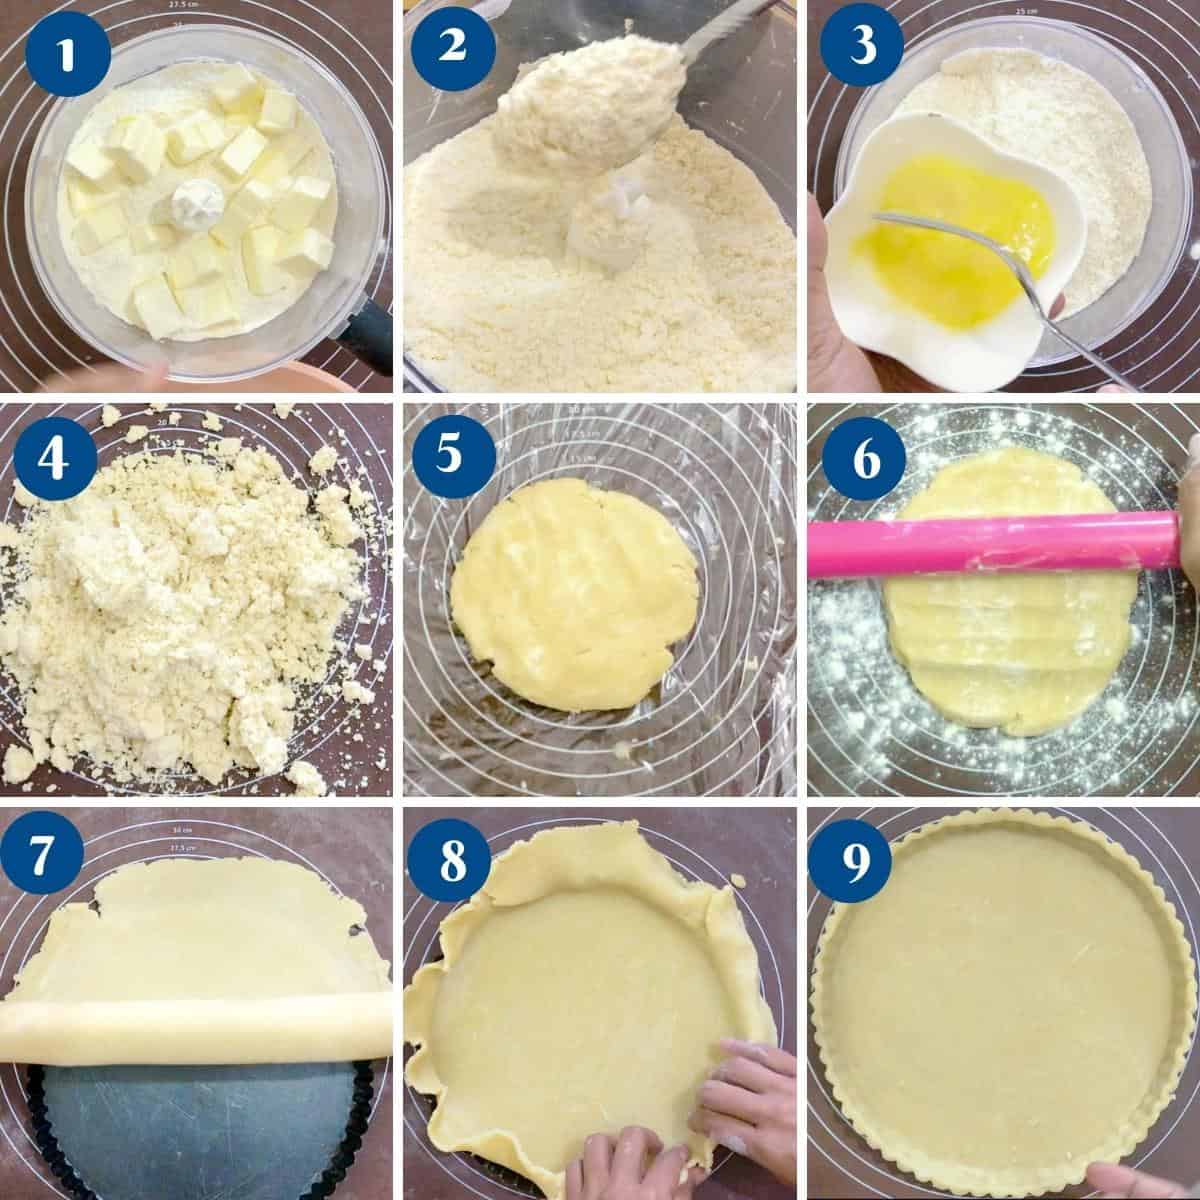
2. Make the Pie Crust
In a food processor or by hand, combine flour, salt, and cold butter until sandy. Add cold water just until the dough comes together. Shape into a disc, wrap, and chill for 20–30 minutes. Roll out, fit into a 9-inch pie pan, crimp edges, and chill again.
Pro Tip: Blind-bake or partially bake the crust to prevent sogginess.
3. Cook the homemade caramel
In a light-colored saucepan, cook sugar (dry or wet—use your usual method) to a deep amber. Off heat, whisk in butter, then cream. Return to low heat and simmer a minute until smooth and slightly thick. Stir in a pinch of salt if you like it salted. Let cool until warm and pourable—not hot.

4. Prepare the Apple Filling
Peel, core, and thinly slice apples (about 1/8 inch thick). Toss with lemon juice, then add sugar, spices, cornstarch, and salt. Mix until evenly coated.

5. Assemble the Pie
Layer the apple mixture into the chilled (or partially baked) pie crust, drizzling homemade caramel between the layers as you go. Reserve some caramel for serving after baking. Top evenly with the chilled crumble.
Pro Tip: Make sure your caramel is slightly cooled but still pourable—too hot and it will soak into the crust, too cool and it will clump.

6. Bake
Bake at 390°F (200°C) for 10 minutes, then reduce to 375°F (190°C) and bake for another 40–50 minutes. Tent with foil halfway through if needed.
7. Cool & Serve
Let cool for at least 30 minutes so the filling sets. Serve warm with extra caramel drizzle and a scoop of vanilla ice cream.
Variations
- Salted Caramel Dutch Apple Pie – Use salted caramel sauce for a sweet-salty twist.
- Nutty Caramel – Add chopped pecans or walnuts to the crumble.
- Spiced Caramel – Stir a pinch of cardamom or allspice into the caramel for extra depth.

Tips for Success
- Keep crust and crumble ingredients cold for the best texture.
- Don’t overfill the pie—apples shrink as they bake.
- Use cornstarch instead of flour for a glossy filling.
- Layer caramel throughout the apples, not just on top, for even flavor.
- Let the pie rest before cutting so caramel doesn’t run out.
Troubleshooting
| Problem | Cause | Fix |
|---|---|---|
| Caramel disappears into filling | Too hot when added | Cool caramel before drizzling |
| Caramel burns | Too much on top early in bake | Reserve some to drizzle after baking |
| Runny filling | Not enough cornstarch or underbaked | Increase cornstarch, bake longer |
| Soggy crust | Filling too juicy | Blind-bake crust, assemble just before baking |
No posts
Frequently asked questions
This pie will keep at room temperature for about two days. You can also keep it in the fridge for up to a week if wrapped well.
Not traditionally, but this variation adds it for extra flavor and gooey texture
Caramel Dutch apple pie includes a caramel layer in the filling or drizzled on top.
Yes—freeze unbaked, then bake from frozen, adding extra time.
You want a moist apple pie with slices of apples, not apple sauce. Of course, that means that you want to use nice, juicy apples. Some apples, like MacIntosh apples, become mushy when cooked and become apple sauce. Granny Smith apples stay firm even after they have been cooked. And the added advantage of granny smith is that they are sour and work best to cut into the sugar. So use nice firm apples.
Yes—choose a thick, high-quality sauce for best results.
Homemade caramel sauce gives the richest flavor, but store-bought works if you’re short on time.
Caramel Dutch Apple Pie
When it comes to fall desserts, you can’t go wrong with a caramel Dutch Apple Pie! It’s one of the simplest pies to make and has a delicious apple filling topped with a crunchy crumb topping and of course the best ever caramel sauce.
Video
Ingredients
- 1 cup (200 g) Sugar
- 3 tbsp Water
- 2 tbsp Corn syrup
- 4 tbsp (56 g) Butter
- ½ cup (120 ml) Heavy cream
- 1 tsp Vanilla extract
- ½ tsp Salt (Up to 1 tsp for salted caramel)
- 1 ½ cup (190 g) All-purpose flour
- 4 oz (113 g) Unsalted butter (1 stick, 1/2 cup) chilled, cubed
- ½ tsp Salt
- 4 tbsp (60 ml) Chilled water
- 8 large Apples Peel, core, and chop
- ½ cup (110 g) Brown sugar light
- 4 tbsp All-purpose flour
- ½ tsp Ground cinnamon
- ¼ tsp Ground ginger
- ¼ tsp Ground nutmeg
- ½ tsp Salt
- 2 tbsp Lemon juice
- ½ cup (113 g) Butter
- 1 cup (125 g) All-purpose flour
- ½ cup (110 g) Brown sugar
- ¼ tsp Salt
- ½ tsp Ground ginger
- ¼ tsp Ground cinnamon
- ¼ tsp Ground nutmeg
Method
- Make the crumble – Mix brown sugar, salt, spices, and flour in a bowl. Cut in cold butter until you have a mix of big and small crumbs. Chill.Pro tip: Grate the butter straight into the flour for perfect pebbly crumbs.½ cup Butter , 1 cup All-purpose flour, 1/2 cup Brown sugar, 1/4 tsp Salt, 1/2 tsp Ground ginger, 1/4 tsp Ground cinnamon, 1/4 tsp Ground nutmeg
- Make the pie crust – In a food processor, pulse flour, salt, and cold butter to sandy crumbs, add cold water just until it clumps. Shape into a disc, chill 20–30 minutes, roll, fit into a 9-inch pie dish, crimp, and chill again.Pro tip: Blind/partial bake until just set and lightly golden—this keeps the bottom crisp under the caramel.1 1/2 cup All-purpose flour, 4 oz Unsalted butter , 1/2 tsp Salt, 4 tbsp Chilled water
- Cook the homemade caramel – In a light-colored saucepan, cook sugar (dry or wet—use your usual method) to a deep amber. Off heat, whisk in butter, then cream. Return to low heat and simmer a minute until smooth and slightly thick. Stir in a pinch of salt if you like it salted. Let cool until warm and pourable—not hot.1 cup Sugar, 3 tbsp Water, 2 tbsp Corn syrup, 4 tbsp Butter, ½ cup Heavy cream, 1 tsp Vanilla extract, ½ tsp Salt
- Prepare the Apple Filling – Peel, core, and thinly slice apples (about 1/8 inch thick). Toss with lemon juice, then add sugar, spices, cornstarch, and salt. Mix until evenly coated.8 large Apples , 1/2 cup Brown sugar, 4 tbsp All-purpose flour, 1/2 tsp Ground cinnamon , 1/4 tsp Ground ginger, 1/4 tsp Ground nutmeg , 1/2 tsp Salt, 2 tbsp Lemon juice
- Assemble the Pie – Layer the apple mixture into the chilled (or partially baked) pie crust, drizzling homemade caramel between the layers as you go. Reserve some caramel for serving after baking. Top evenly with the chilled crumble.Pro Tip: Make sure your caramel is slightly cooled but still pourable—too hot and it will soak into the crust, too cool and it will clump.
- Bake – Place the pie on a lined baking sheet (caramel likes to bubble). Bake at 390°F/200°C for 10 minutes, then reduce to 375°F/190°C for 40–50 minutes, until the crumble is golden and the filling is bubbling at the edges. Tent with foil or use a pie shield if the crust or topping browns too fast.Pro tip: Visible bubbling = starch is activated and the filling will set.
- Cool & serve – Cool at least 30 minutes (a few hours is ideal) so the caramel and juices thicken. Warm slices are fabulous with a fresh drizzle of the remaining caramel and a scoop of vanilla ice cream.
Notes
Tips for Success
- Keep crust and crumble ingredients cold for the best texture.
- Don’t overfill the pie—apples shrink as they bake.
- Use cornstarch instead of flour for a glossy filling.
- Layer caramel throughout the apples, not just on top, for even flavor.
- Let the pie rest before cutting so caramel doesn’t run out.
Equipment you will need


Nutrition
Tried this recipe?
Mention @veenaazmanov_kitchen or tag #veenaazmanovkitchen!No posts
Don’t lose this recipe! Save it for Later!
📌 Save this Recipe for later on Pinterest so you can easily find it again.
⭐ Add Veena Azmanov Kitchen to your Google Preferred Sources.
It helps Google show you more of our recipes.
📧 Subscribe for new recipes delivered to your inbox.
🎥 Follow us for more recipes