The BEST Skinny Tiramisu EVER
 Prep Time 30 minutes Cook Time 10 minutes Total Time 4 hours 40 minutes

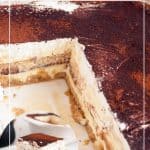
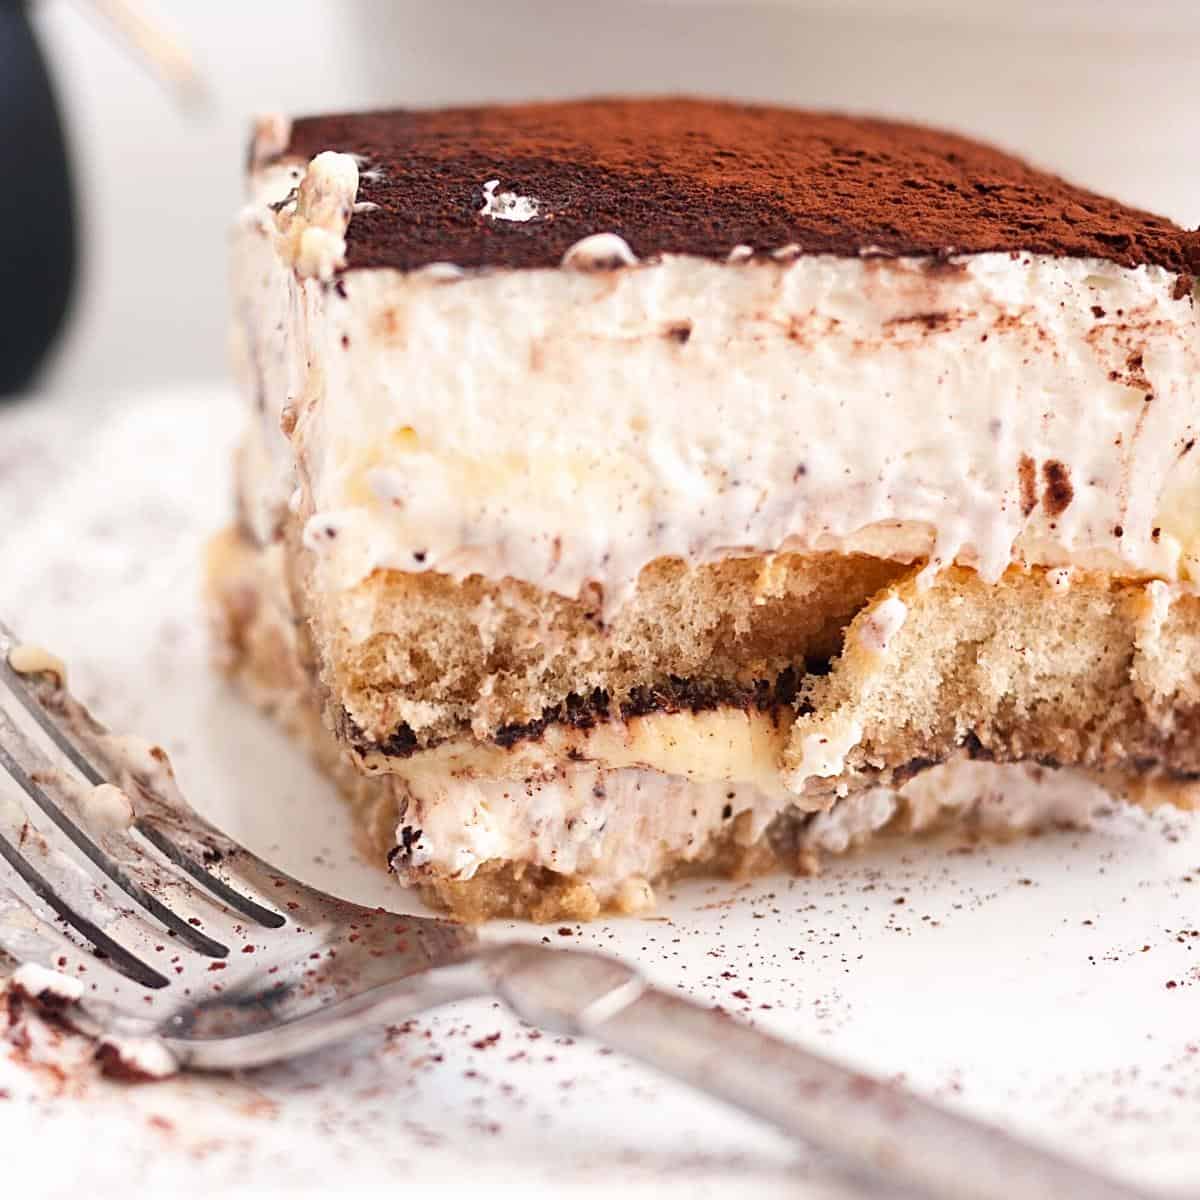
This skinny tiramisu is a rich and elegant dessert, bold in flavors of coffee and liqueur to warm you up in winter. Creamy and light layers of luxury that melt in the mouth make this a perfect crowd-pleasing dessert. The recipe tries to keep it simple, easy, and effortless, as close to classic Tiramisu as possible.
I’ll be honest — I’ve probably eaten more tiramisu in my life than most Italians. No shame. If it’s on the menu, I’m ordering it. If I see a new variation, I’m making it. Over the years, I’ve created all kinds — the classic, the boozy Baileys version (that one doesn’t last long in the fridge), and now… this skinny one.
Why? Because I still wanted that bold coffee kick, that creamy mascarpone goodness, and those perfectly soaked ladyfingers — but without feeling like I needed a nap and a side salad afterward.
This version skips the eggs and heavy custards and uses a lighter mascarpone cream. The flavor is still rich and satisfying, but it’s easier on the waistline — and on my conscience, if I go back for seconds (which, let’s be real, I do).
And while it’s technically called “skinny,” it doesn’t taste like it’s missing anything. In fact, most people don’t even realize it’s the lighter version unless I tell them. I just serve it up with a smile and watch it disappear.
So yes, this is my “still-love-dessert-but-also-trying-to-be-sensible” version of tiramisu — and it definitely still gives me that little “pick me up.”
Why is this tiramisu skinny?
- Light on ingredients – As you can see, the original classic tiramisu is made with lots more cream cheese, whipped cream, egg yolks, and other ingredients. These can add up and make the dessert rather heavy. In contrast, this one still has some original ingredients and flavors, minus the added high-fat ingredients.
- Simplicity—The recipe is simple and easy. In all these years, I’ve never had this one split or curdle on me.
- Original flavors are intact- I have served my skinny tiramisu on many occasions to family and friends, and they are always surprised that this is a skinny version because it does not lack flavor. BEST OF ALL – It still holds its shape, unlike the low-fat Tiramisu, which you cannot slice!!
- Versatile—There is still plenty of room to make it skinnier or more indulgent. I’ve reduced the quantity of cream cheese but used mascarpone to keep the authentic flavor. Also, I’ve used an eggless pastry cream thickened with cornstarch instead of egg yolks. This is an absolute game-changer! And I’ve used less whipped cream in the recipe. You can stabilize the whipped cream if you choose to use skinnier ingredients.

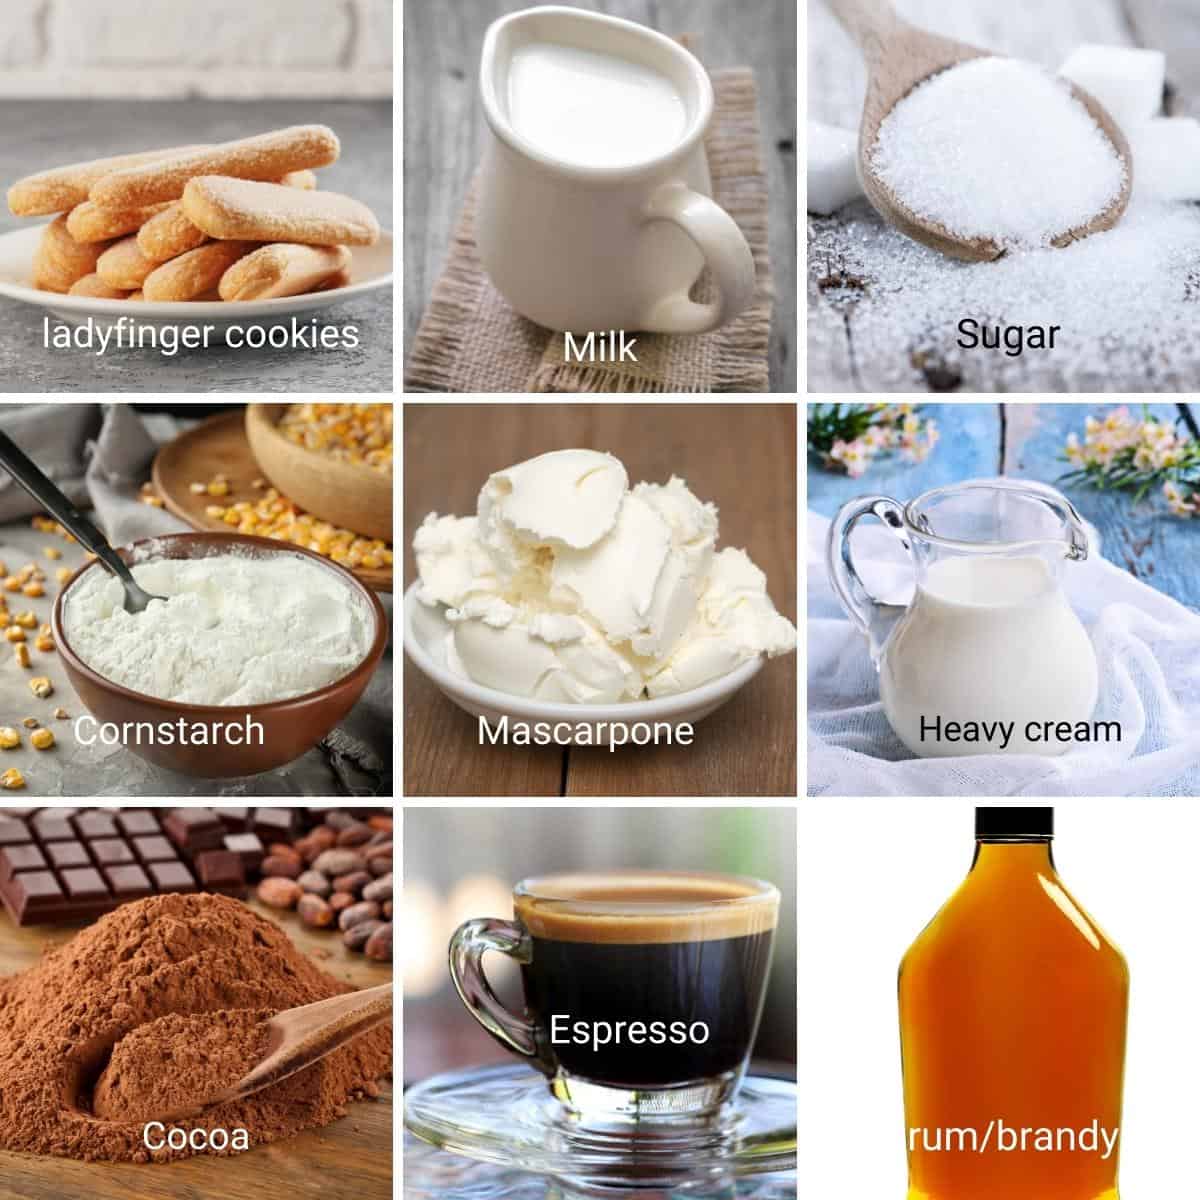
Ingredients and substitutes
- Vanilla pastry cream – I use eggless pastry cream to keep it light. The cornstarch in this recipe helps as a thickening agent.
- Cream cheese – We’ve used just a little for that tiramisu flavor. However, you can also substitute it with cream cheese containing at least 20% fat.
- Sugar – I’ve used a combination of regular fine-grain white sugar and powdered sugar to help them dissolve easily in the recipe.
- Liqueur -Tiramisu can be made with or without alcohol. I prefer to use rum, brandy, or coffee liqueur, such as Amaretto or Kahlua. You can also use marsala wine.
- Ladyfingers – Traditional tiramisu is made with ladyfingers, making it an easy, no-bake dessert. But if you can’t find lady-finger biscuits, you can also use sponge cake layers. Try a vanilla or chocolate sponge cake.
- Coffee – I like to use strong espresso, but regular coffee will add a lighter coffee flavor.
- Cocoa – While the rest of the recipe does not include cocoa powder, we dust the tiramisu with cocoa, adding a subtle chocolate flavor.
Step-by-step: Skinny tiramisu recipe
Pastry cream
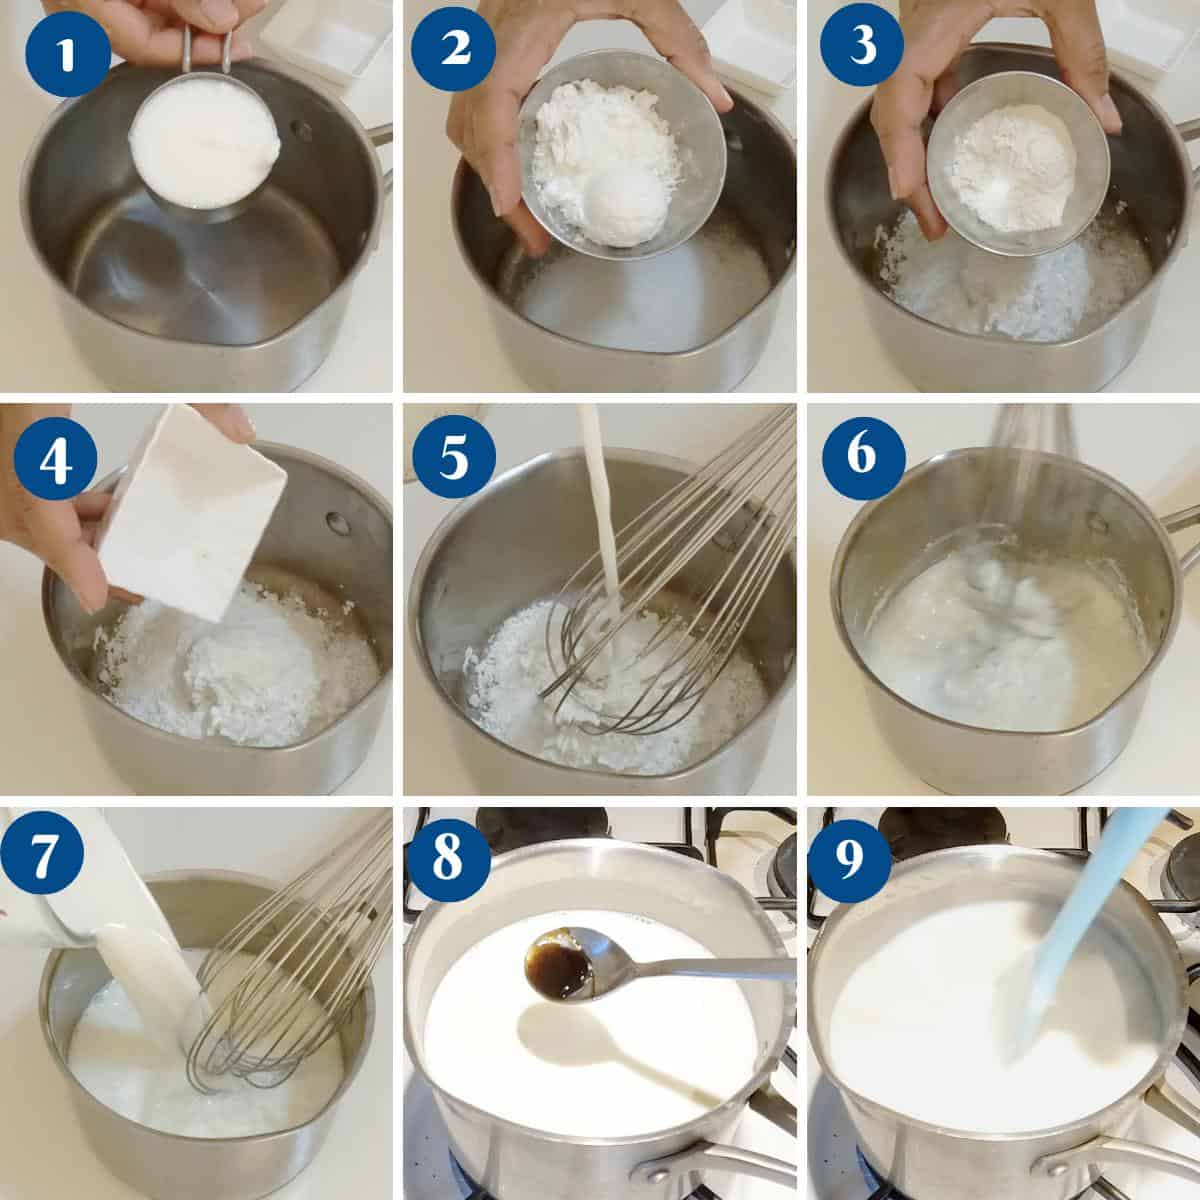
- Combine – In a heavy-bottom saucepan, combine the sugar, cornstarch, and vanilla extract. Gradually pour the milk, using a whisk to combine. Make sure there are no lumps.
- Thicken – Place the saucepan over medium heat and cook, stirring constantly. The milk will thicken as it cooks. When the milk thickens and coats the back of a wooden spoon, cook for one to two minutes more.
Pro tip – Keep the heat on medium to low, adjusting to prevent the milk from sticking to the bottom. - Cool – Pour into a bowl and cover with plastic wrap. Make sure the plastic touches the top surface of the custard to prevent skin from forming at the top. Cool to room temperature.
Prepare
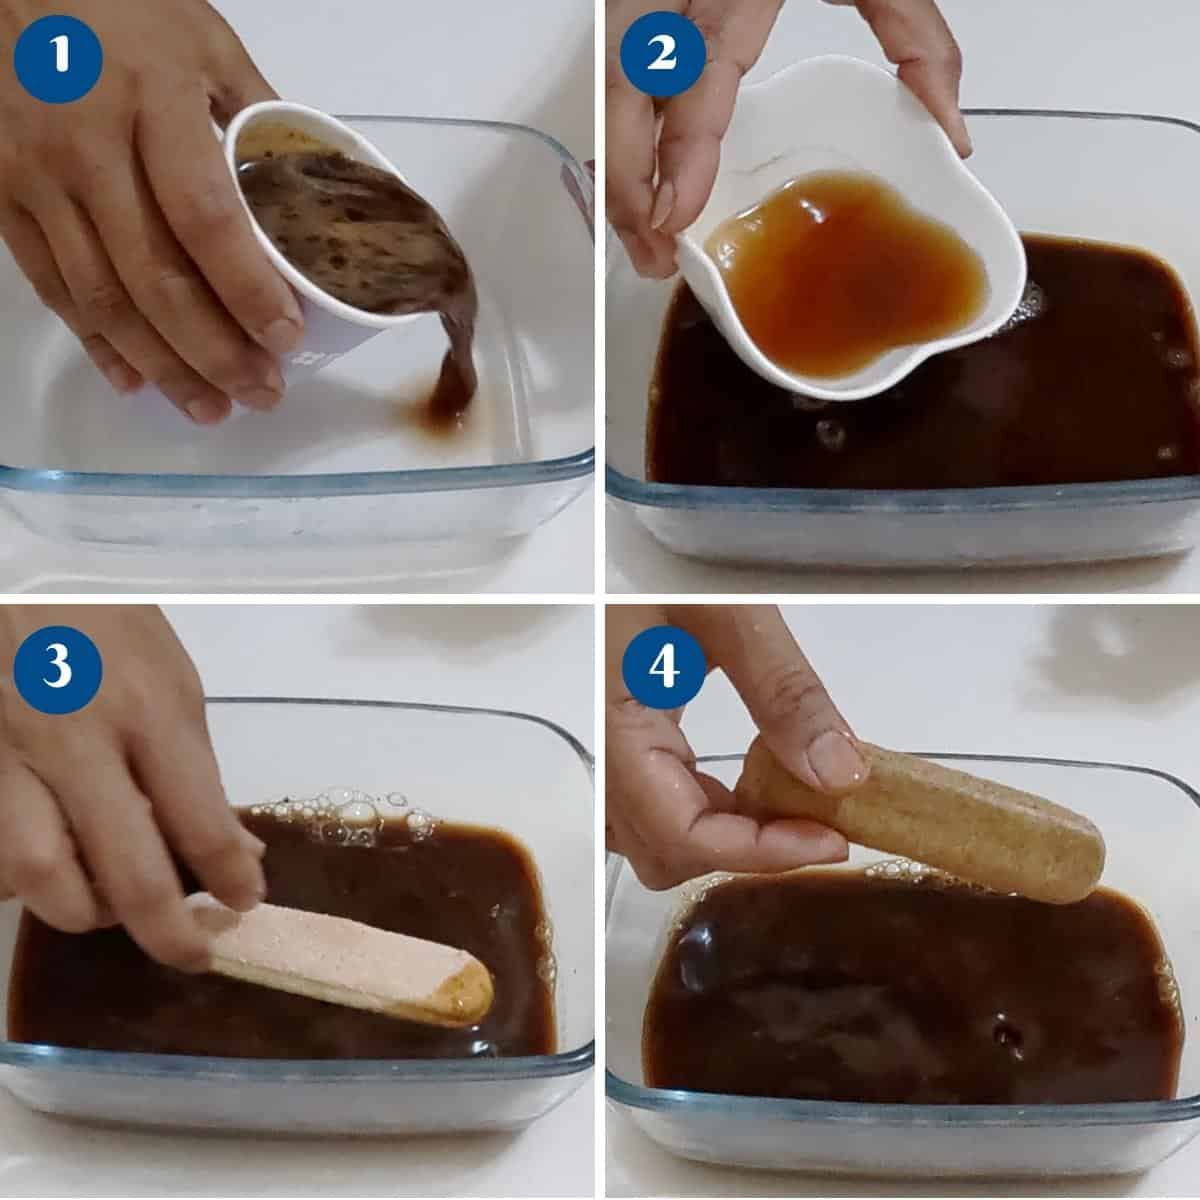
- Coffee mixture – combine hot coffee, liquor, and cocoa powder – set aside to cool
- Whipped cream – Whip the heavy cream with powdered sugar until stiff peaks form.
- Mascarpone cream – In a large bowl, cream the mascarpone and cream cheese with a whisk to remove lumps. Add the cooled pastry cream and combine well. Then, fold in the whipped cream.
Pro tip – You want a smooth mixture, but don’t overmix, as cream cheese can become grainy.

Assemble
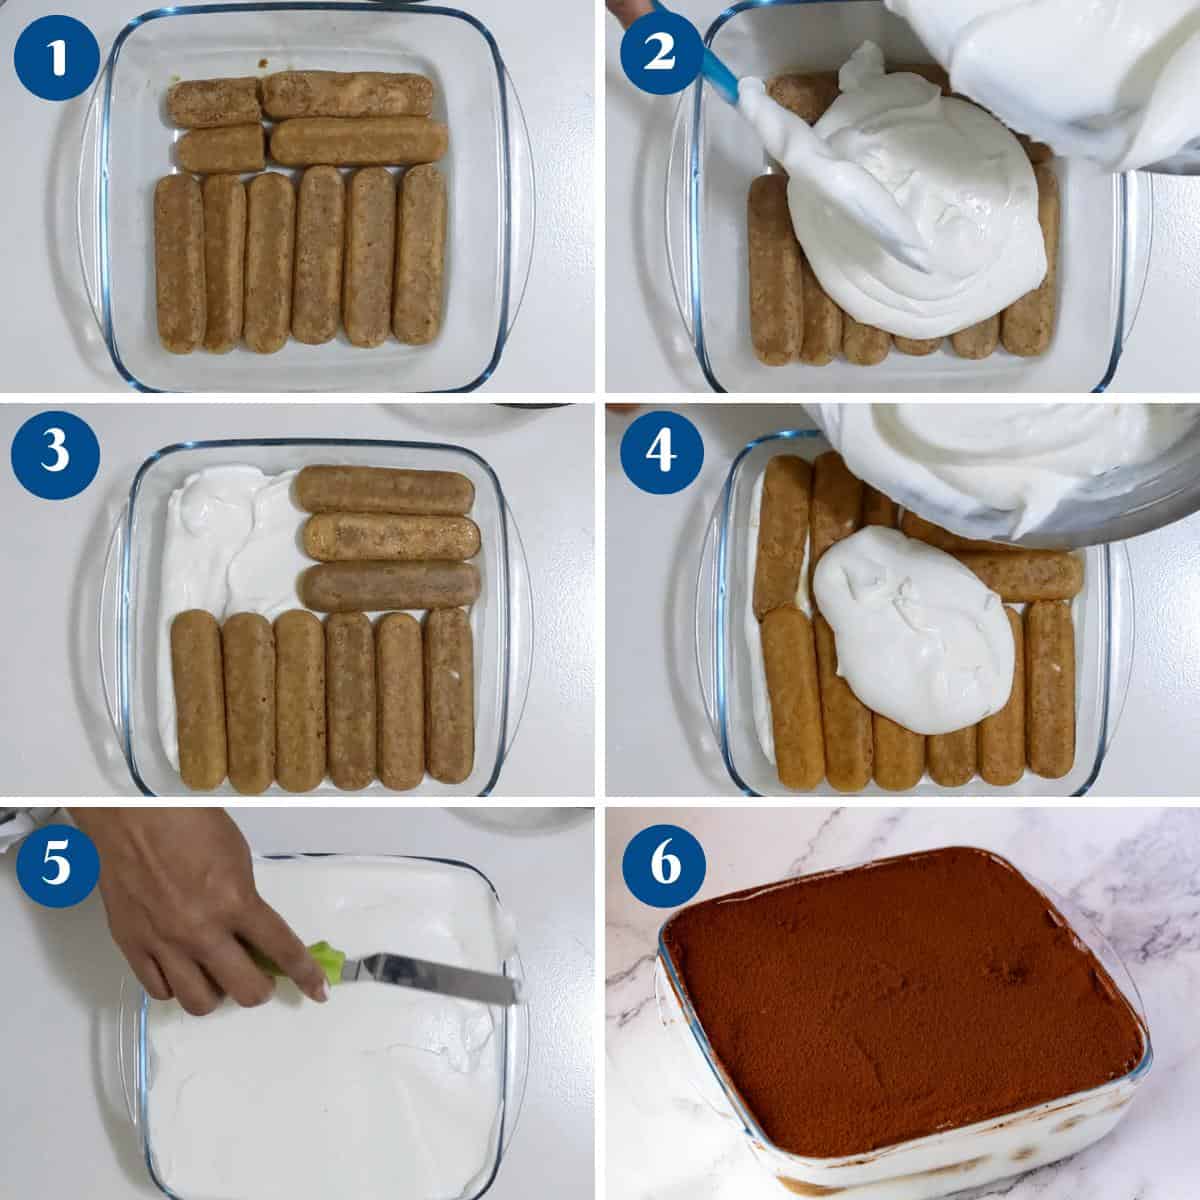
- Layer
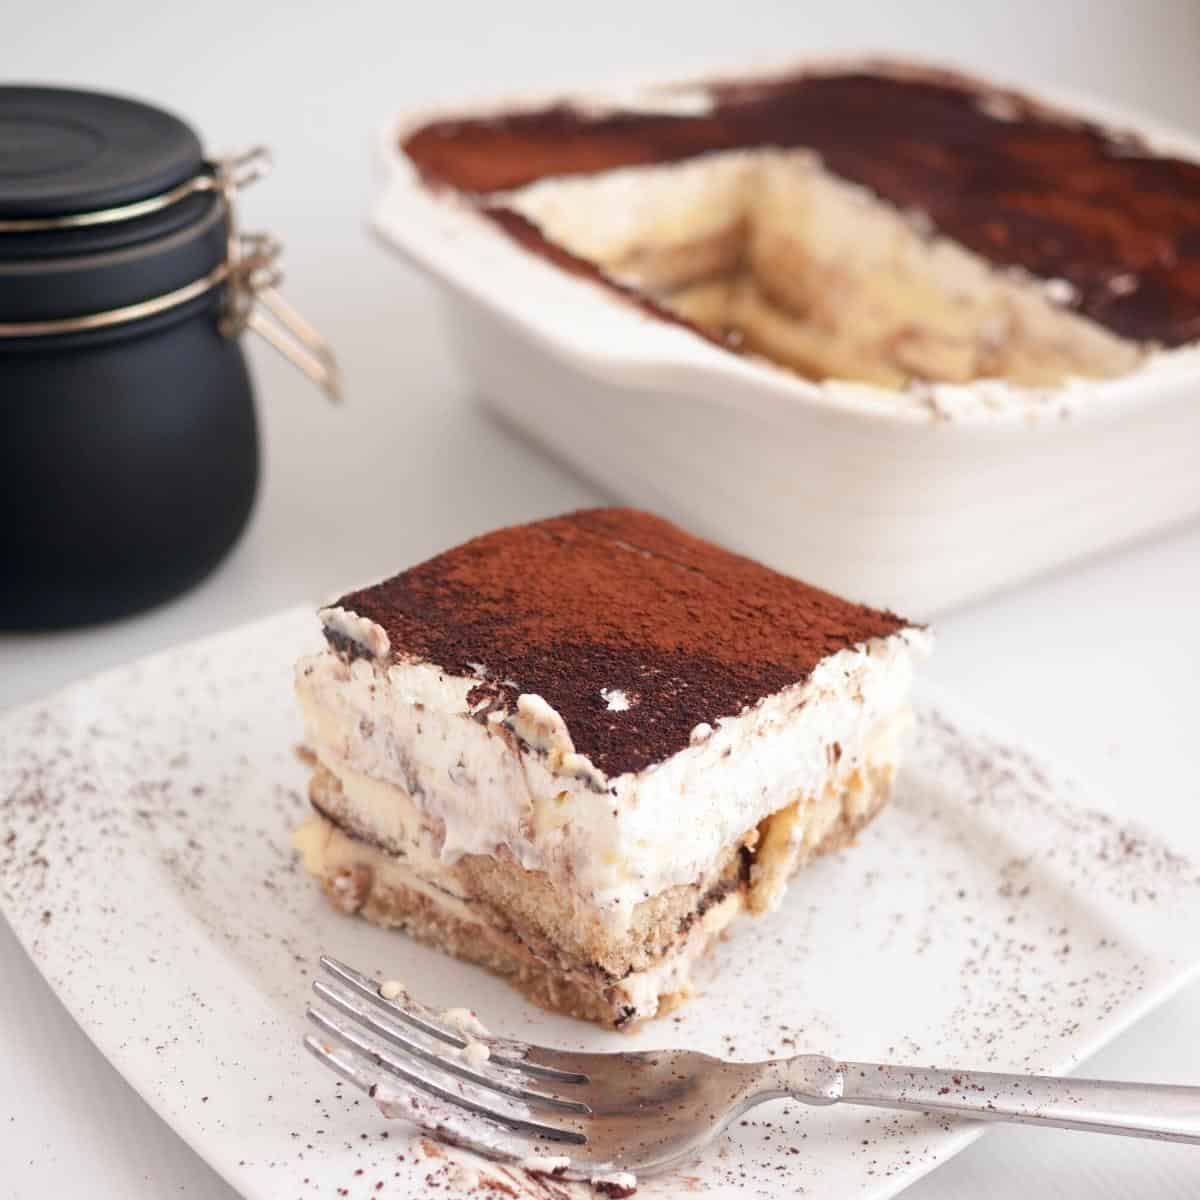
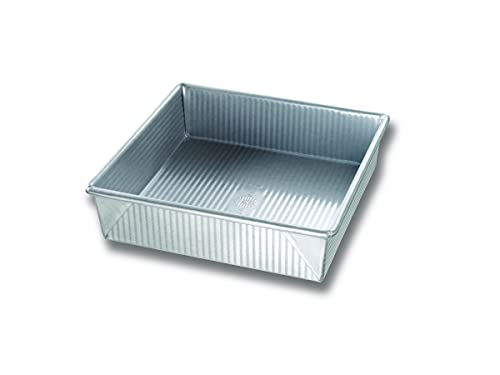
- Dip each ladyfinger briefly in the coffee liquid and layer them into an 8 x 8 square baking pan.
- Top with half the mascarpone cream mixture and smooth evenly with an offset spatula.
- Top with more ladyfingers dipped in coffee.
- Then, pour the remaining mascarpone cream mixture on top. Smooth well with an offset spatula.
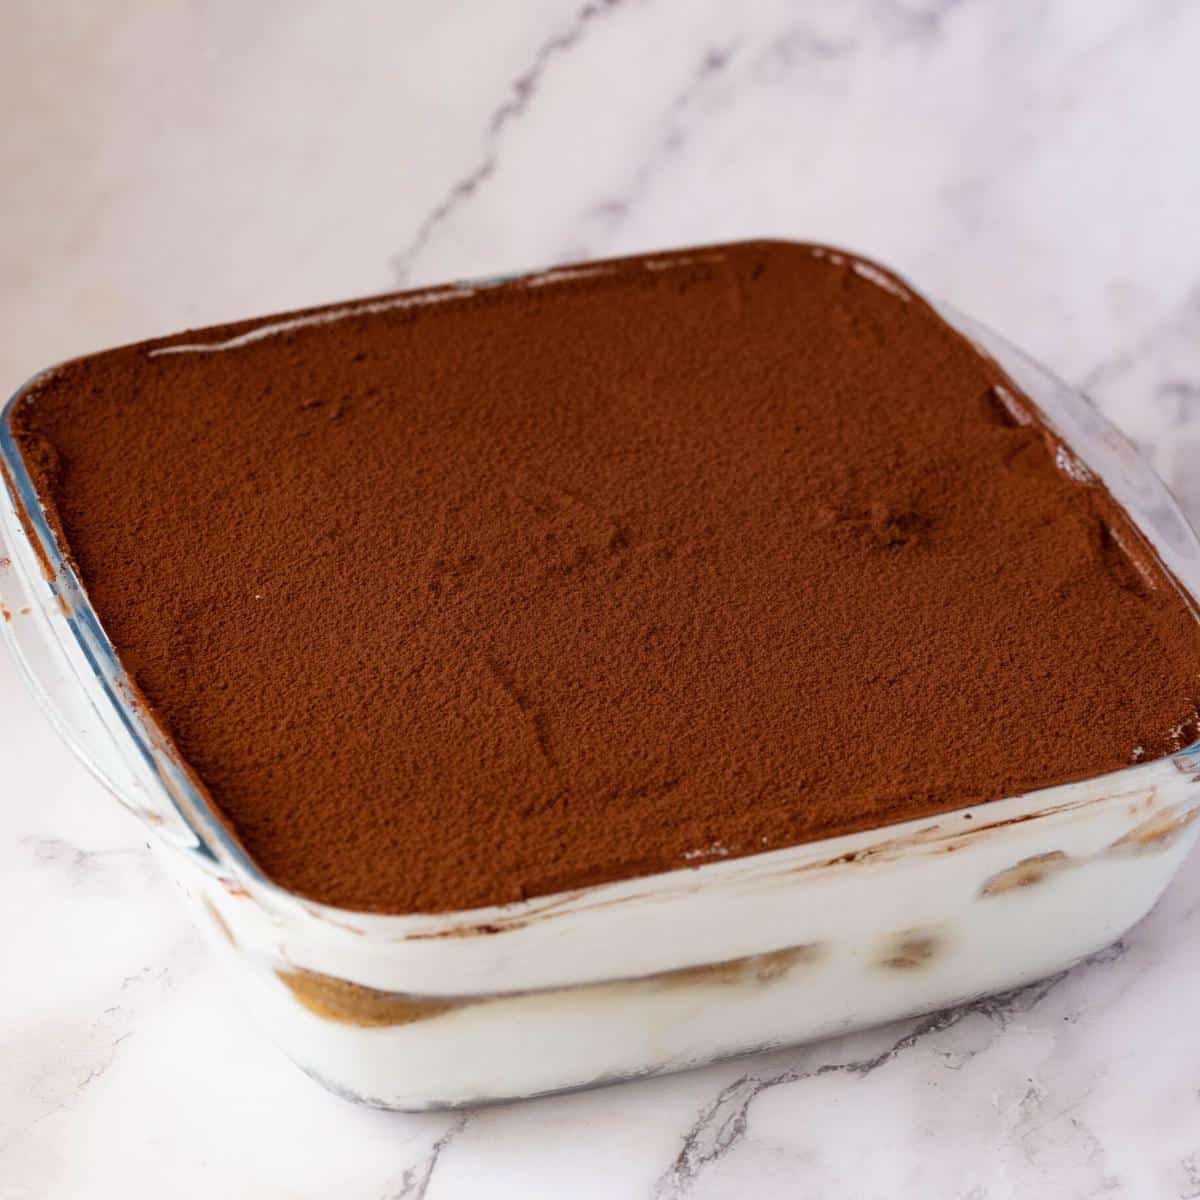
- Chill – Place the dish in the refrigerator to chill for at least 4 to 6 hours, preferably overnight.
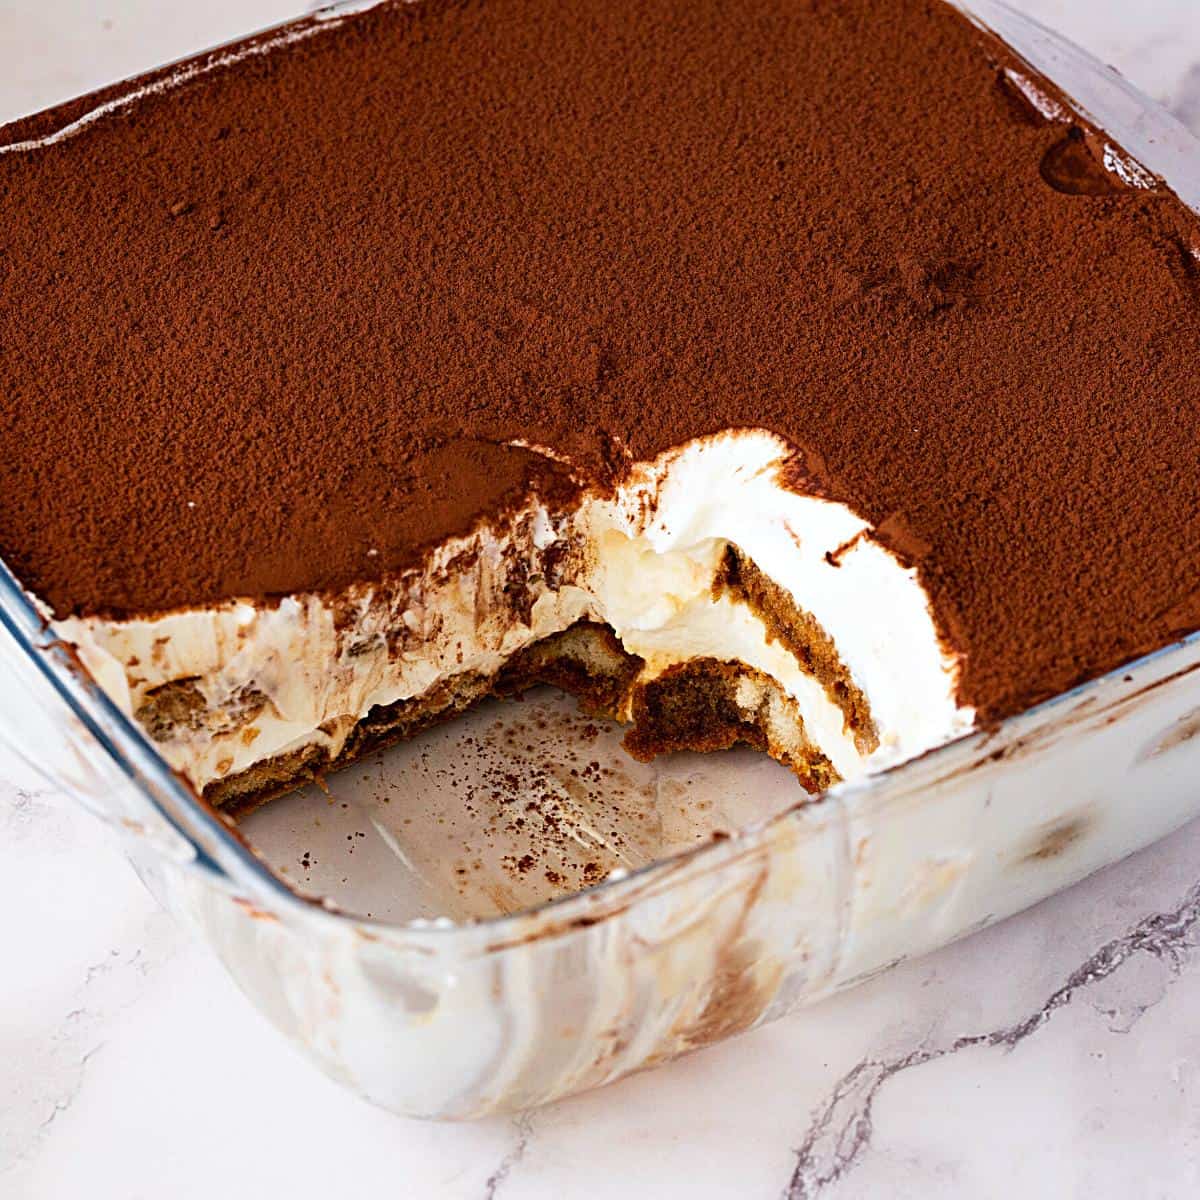
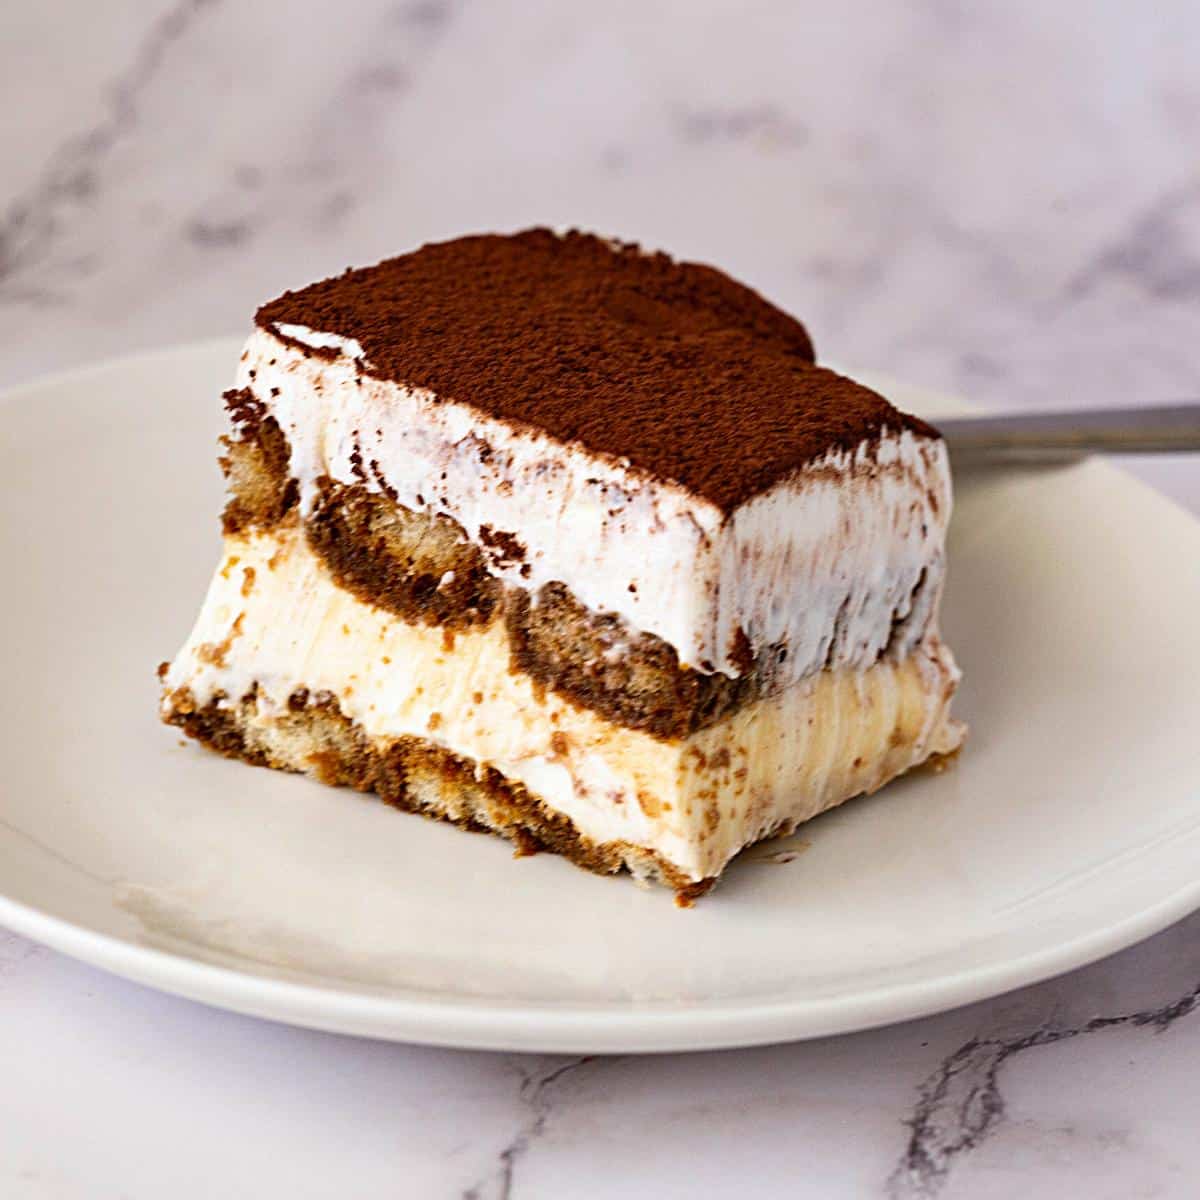
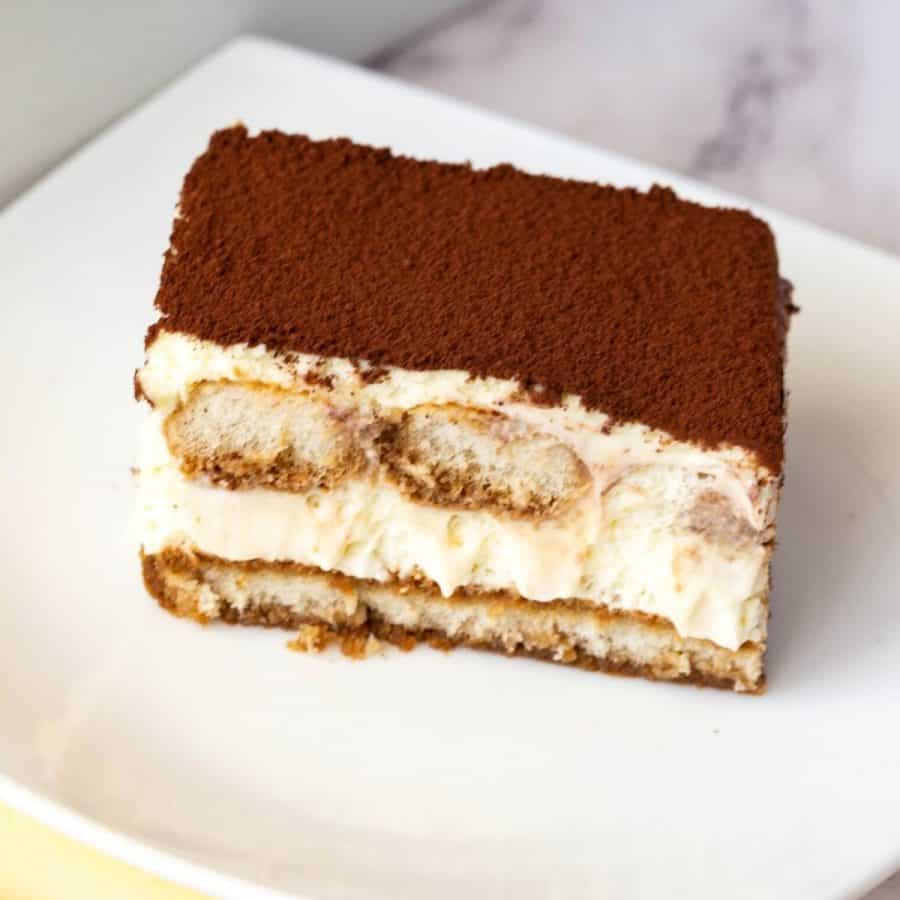
- Cocoa powder – Dust the top generously with cocoa powder before serving.
Pro tip – Wipe the knife between each cut to make clean slices. - Enjoy!
The BEST Skinny Tiramisu EVER
This skinny tiramisu is a rich and elegant dessert, bold in flavors of coffee and liqueur to warm you up in winter. Creamy and light layers of luxury that melt in the mouth make this a perfect crowd-pleasing dessert. The recipe tries to keep it simple, easy, effortless as close to Classic Tiramisu as possible.
Video
Ingredients
- 2 cup (470 ml) Milk
- ¼ cup (50 g) Sugar
- 4 tbsp (60 g) Cornstarch
- 2 tsp Vanilla extract or bean paste
- ⅛ tsp Salt
- 4 oz (113 g) Mascarpone cream cheese at least 30% fat
- 8 oz (228) Cream cheese 9% fat
- 1 cup (240 ml) Whipping cream
- 2 tbsp Powdered sugar or more to taste
- 1 tsp Vanilla vanilla extract
- 1 cup (240 ml) Brewed coffee or espresso
- ¼ cup (60 ml) Marsala Cream de cacao, brandy or rum
- 26 Ladyfinger biscuits
- ¼ cup (20 g) Cocoa powder for dusting
Method
- Combine – In a heavy-bottom saucepan combine the sugar, cornstarch, and vanilla extract. Gradually pour the milk, using a whisk to combine. Make sure there are no lumps2 cup Milk, ¼ cup Sugar, 4 tbsp Cornstarch, 2 tsp Vanilla extract, ⅛ tsp Salt
- Thicken – Place the saucepan over medium heat and cook stirring constantly. The milk will thicken as it cooks. When the milk thickens and coats the back of a wooden spoon. Cook for one to two minutes more.
- Cool – Pour into a bowl and cover with plastic wrap. Make sure the plastic touches the top surface of the custard to prevent a skin from forming at the top. Cool to room temperature.
- Coffee mixture – combine hot coffee, and alcohol – set aside to cool1 cup Brewed coffee, ¼ cup Marsala
- Whipped cream – Whip the heavy cream with powdered sugar until stiff peaks form.1 cup Whipping cream, 1 tsp Vanilla vanilla extract, 2 tbsp Powdered sugar
- Mascarpone cream – In a large bowl cream the mascarpone and cream cheese with a whisk to remove lumps. Add the cooled pastry cream and combine well. Then fold in the whipped cream.4 oz Mascarpone cream cheese, 8 oz Cream cheese
- Layer – Dip each ladyfinger briefly in the coffee liquid and layer them into a 8 x 8 square baking pan. – Top with half the mascarpone cream mixture and smooth evenly with an offset spatula. – Top with more ladyfingers dipped in coffee. – Then, pour the remaining mascarpone cream mixture on top. Smooth well with an offset spatula.26 Ladyfinger biscuits
- Chill – Place the dish in the refrigerator to chill for at least 4 to 6 hours preferably overnight.
- Cocoa powder – Dust the top generously with cocoa powder before serving.¼ cup Cocoa powder
- Enjoy!
Notes
- Quality Ingredients: Use high-quality mascarpone cheese, heavy cream, and strong, freshly brewed coffee or espresso. Quality ingredients make a noticeable difference in the final taste and texture.
- Cook correctly– The cornstarch in this pastry cream is the thickening agent. So, make sure to cook the pastry cream until it thickens well. Cooking will also remove that raw floury taste.
- Timing is important – Cool the pastry cream until cooled but not set. If it thickens too quickly, it will become lumpy and not blend well with the cream cheese and whipped cream.
- High-fat ingredients – We do not use a lot of cream cheese or whipped cream, but it is very important that these are high in fat to have that authentic tiramisu taste; otherwise, it will just be a layered dessert without the authentic tiramisu flavors.
- Proper Pan Preparation: Use a round springform pan to make it easier to remove the cake after it has set. Line the bottom with parchment paper for easier removal and cleaner slices.
- Cool Coffee: Ensure the brewed coffee is completely cooled before dipping the ladyfingers. Hot coffee can make the ladyfingers too soggy and cause them to fall apart.
- Quick Dips: Dip the ladyfingers quickly into the coffee mixture to avoid oversaturating them. A brief dip is enough to soak up the flavor without making them mushy.
- Layer Evenly: Spread the mascarpone cream evenly over the ladyfingers to create neat and uniform layers. This will give your cake a professional look and consistent flavor in every bite.
- Chill Thoroughly: Allow the assembled Tiramisu cake to chill for at least 4 hours, preferably overnight. This gives the dessert time to set and the flavors beautifully meld together.
- Finishing Touches: Dust the top with unsweetened cocoa powder just before serving to keep it looking fresh and prevent it from absorbing moisture. For an extra touch of elegance, add chocolate shavings, fresh berries, or a sprinkle of cinnamon.
- Serve Chilled: Tiramisu cake is best served chilled, so keep it in the refrigerator until just before serving to maintain its structure and taste.
Equipment you will need


Nutrition
Tried this recipe?
Mention @veenaazmanov_kitchen or tag #veenaazmanovkitchen!Storage & Shelf-life
- This tiramisu will stay in the fridge for 2 days before the whipped cream starts to lose volume.
- It will still be delicious, but the whipped cream will be soft, so it may not hold well as a slice.
- Classic Tiramisu Recipe or Tiramisu Cake – No Bake
- Mascarpone Cream Cake
- Tiramisu Ice Cream
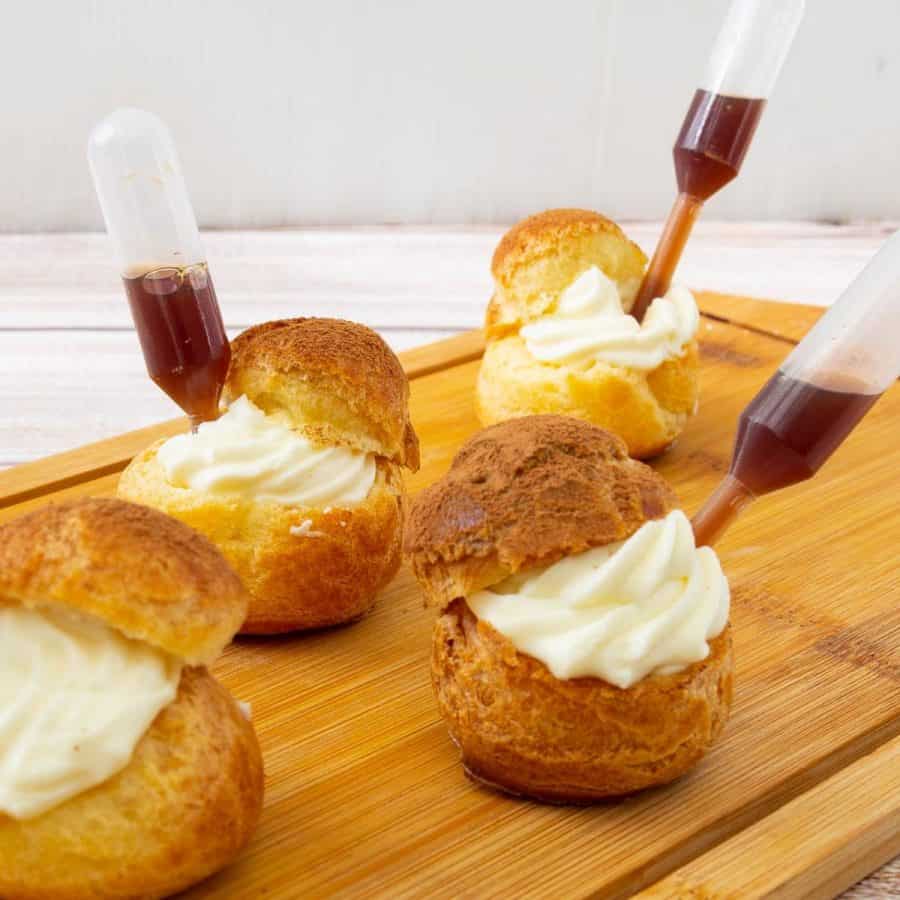
- Tiramisu Cream Puffs
- Fried Tiramisu Donuts – or Tiramisu-filled Doughnuts – Sufganiyot


Frequently asked questions
Tiramisu is best served within 48 hours, but leftovers will keep in the refrigerator for up to 4 or 5 days.
Yes, at all times. As you can see, all the ingredients in a tiramisu are made with dairy that needs to be refrigerated. So, any dessert made with dairy must also be stored in the fridge.
Tiramisu is traditionally made with alcohol, but you can still make a delicious version without it! Just use more coffee mixture and omit the liqueur in the mascarpone mixture.
This one is lower in calories but still has the rich flavor and taste of the classic tiramisu. The mascarpone cream layers in this one are thinner than the classic; otherwise, the layers will not hold.


- Blackberry Panna Cotta,
- Strawberry Panna Cotta,
- Mango Panna Cotta
- Bavarian Cream (Creme Bavaria ~ Creme Bavarois)
Don’t lose this recipe! Save it for Later!
📌 Save this Recipe for later on Pinterest so you can easily find it again.
⭐ Add Veena Azmanov Kitchen to your Google Preferred Sources.
It helps Google show you more of our recipes.
📧 Subscribe for new recipes delivered to your inbox.
🎥 Follow us for more recipes


Made this and loved it! It’ll be in my regular rotation as a guest! Question: does this recipe freeze well?
Hey, Nisha. Custards don’t freeze well; they tend to have a grainy consistency when thawed, so I don’t prefer to freeze custard-based desserts.
The preparation was easy and satisfying. The end result was a lighter more digestible version of a tiramisu. I would venture as far as to say this one is better than the classic. Becuase it doesn’t give you a sugar rush, and doesn’t leave you full. It’s light and filling but without the weight
That’s exactly what I was going for when developing this recipe … thank you so much for the lovely feedback.
How much powdered sugar in the whipping cream?
Just 2 tbsp powdered sugar Jaci. Thanks
Veena, to stabilize the whipped cream dissolve a tsp of gelatin in a little coffee or the cream, using a microwave for quick heating. (This is on the internet) Then add it to the cream when whipping. It prevents that weeping.
Going to try your recipe this week!
I have made this recipe twice. It’s a great alternative to reduce some of the calories and fat. I used Swerve 0 calorie powdered sugar in place of regular powdered sugar, and that worked out well. It didn’t have enough of a coffee flavor the first time so I sprinkled instant espresso powder in between the two layers and that helped. Be careful not to overmix the pastry cream once it coats the back of the spoon. No more than 1-2 minutes as the recipe says otherwise it gets clumpy and difficult to work with. I think I would prefer mixing the pastry cream and the cream cheese layers together next time. Thanks for the recipe!
Thank you for the lovely feedback, Lex. I am so happy you enjoyed this recipe. I’m sure your notes will help those going to try.
Do you use full fat milk for the pastry cream or can I use reduced fat or fat free milk?
You can use reduced-fat too, Charisse. But, the pastry cream will not be thick and rich like this. Thanks
So I made this recipe only I used Bailey’s Almond coffee liquor and it came out excellent! Thank you for the amazing recipe looking forward to tinkering with it!!
Thank you, Giuliano. I am happy you enjoyed this.
this is so delicious! it doesn’t taste exactly like original tiramisu of course, but the amazing flavors make up for it! i like this take on tiramisu, and i highly recommend it as it is MUCH healthier. either way my whole family devoured it and certainly enjoyed it, awesome recipe! 🙂
Thanks, Kaelyn. Happy you enjoyed it.
why can’t we mix the cheese mixture, whipped cream and pastry cream together into one cheese-cream mixture?
You can if you want Mia