Triple Chocolate Pumpkin Tart Recipe
 Prep Time 40 minutes Cook Time 30 minutes Total Time 1 hour 10 minutes


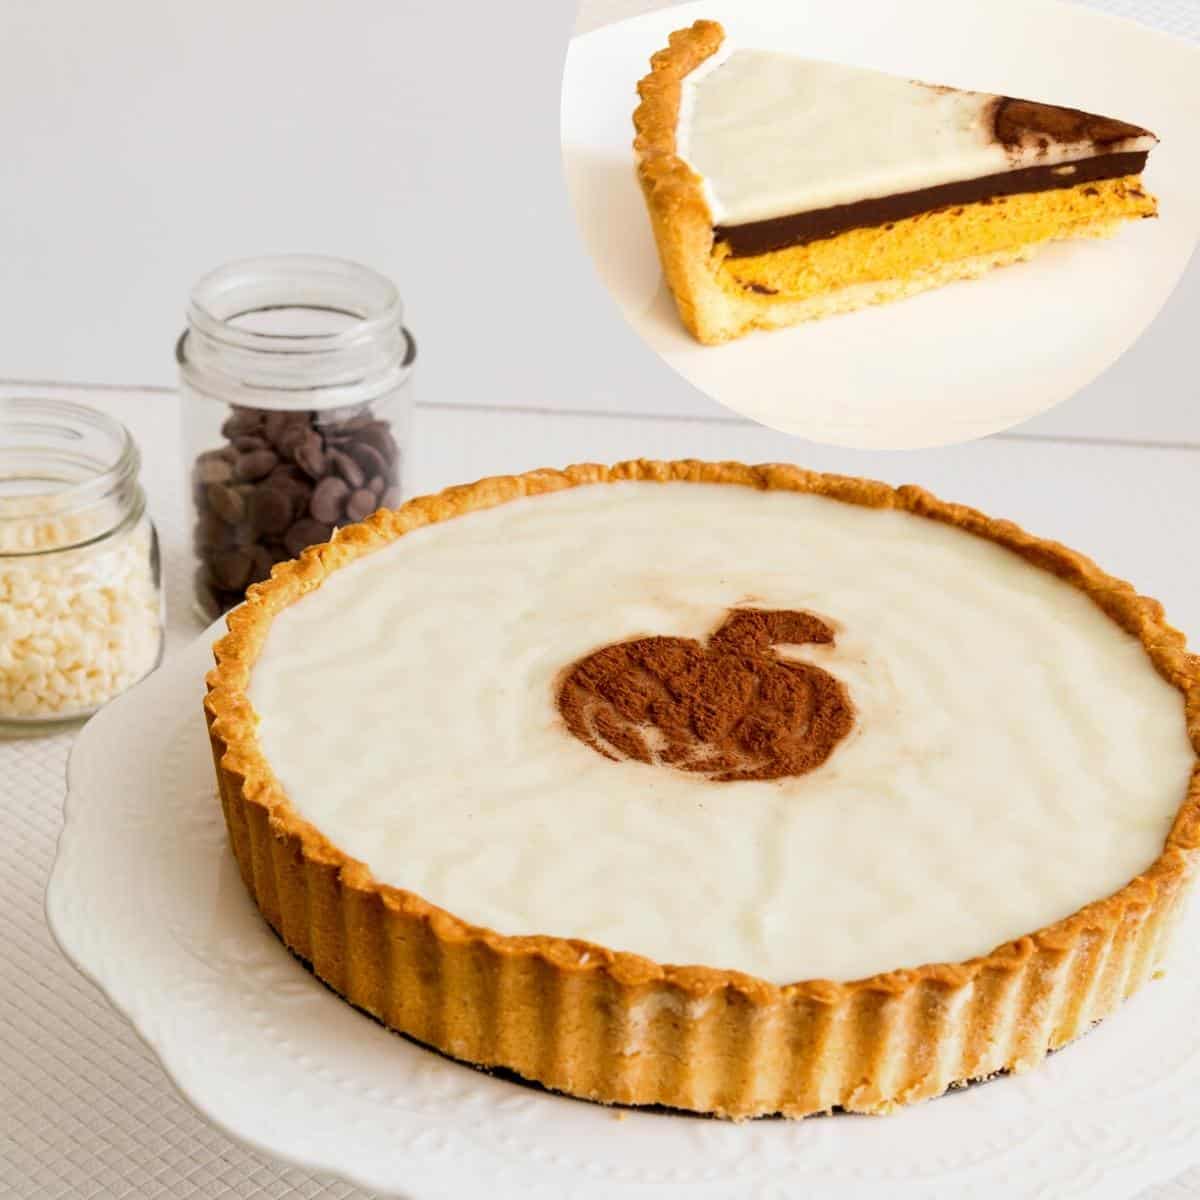
Celebrate the fall season with something different this Thanksgiving. This triple chocolate pumpkin tart has three layers of chocolate, both white and dark, infused with pumpkin puree and pumpkin spice in a homemade buttery shortcrust pastry.
Last week, I made this chocolate pumpkin tart to celebrate the Jewish New Year, and guess what?
Personally, I am a dark-chocolate person, so white chocolate on its own would be a bit sweet for me. So, I used 70% dark chocolate for the second layer, which cuts down on the sweetness.
Why make this tart
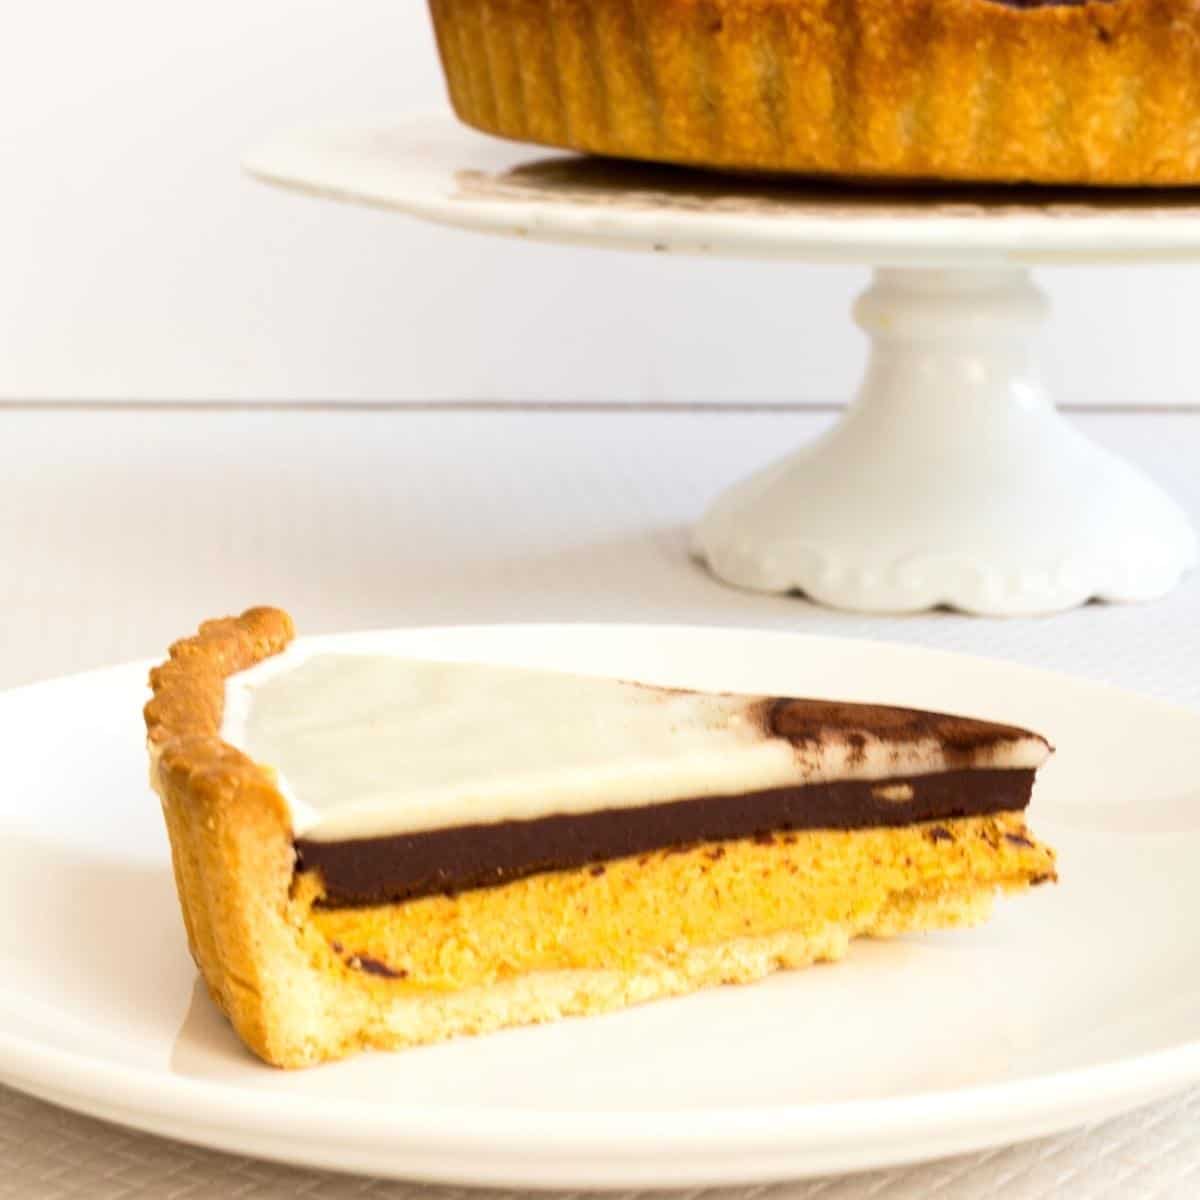
The recipe is simple and easy, and can be made ahead of time. As the name suggests, there are three layers of chocolate, or chocolate ganache to be more precise.
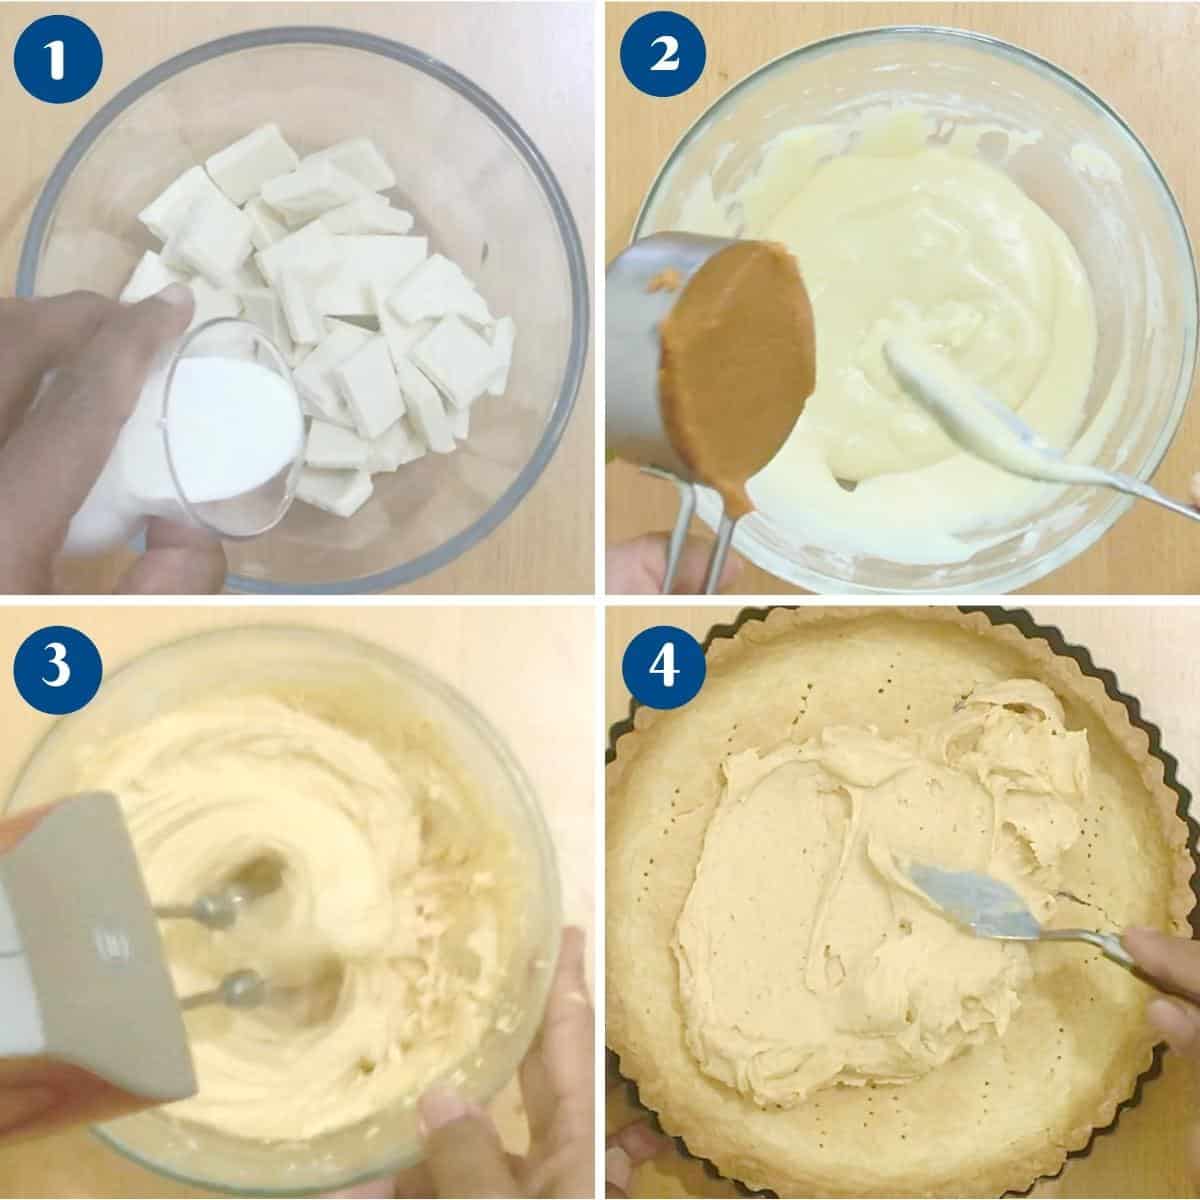
- The first layer of white chocolate is infused with pumpkin puree and then whipped to create a light and airy filling, aka whipped chocolate pumpkin ganache
- The second layer is dark chocolate, and I highly recommend you use a good-quality dark chocolate. The bitterness in the dark chocolate cut into the sweetness of the other two white chocolate layers.
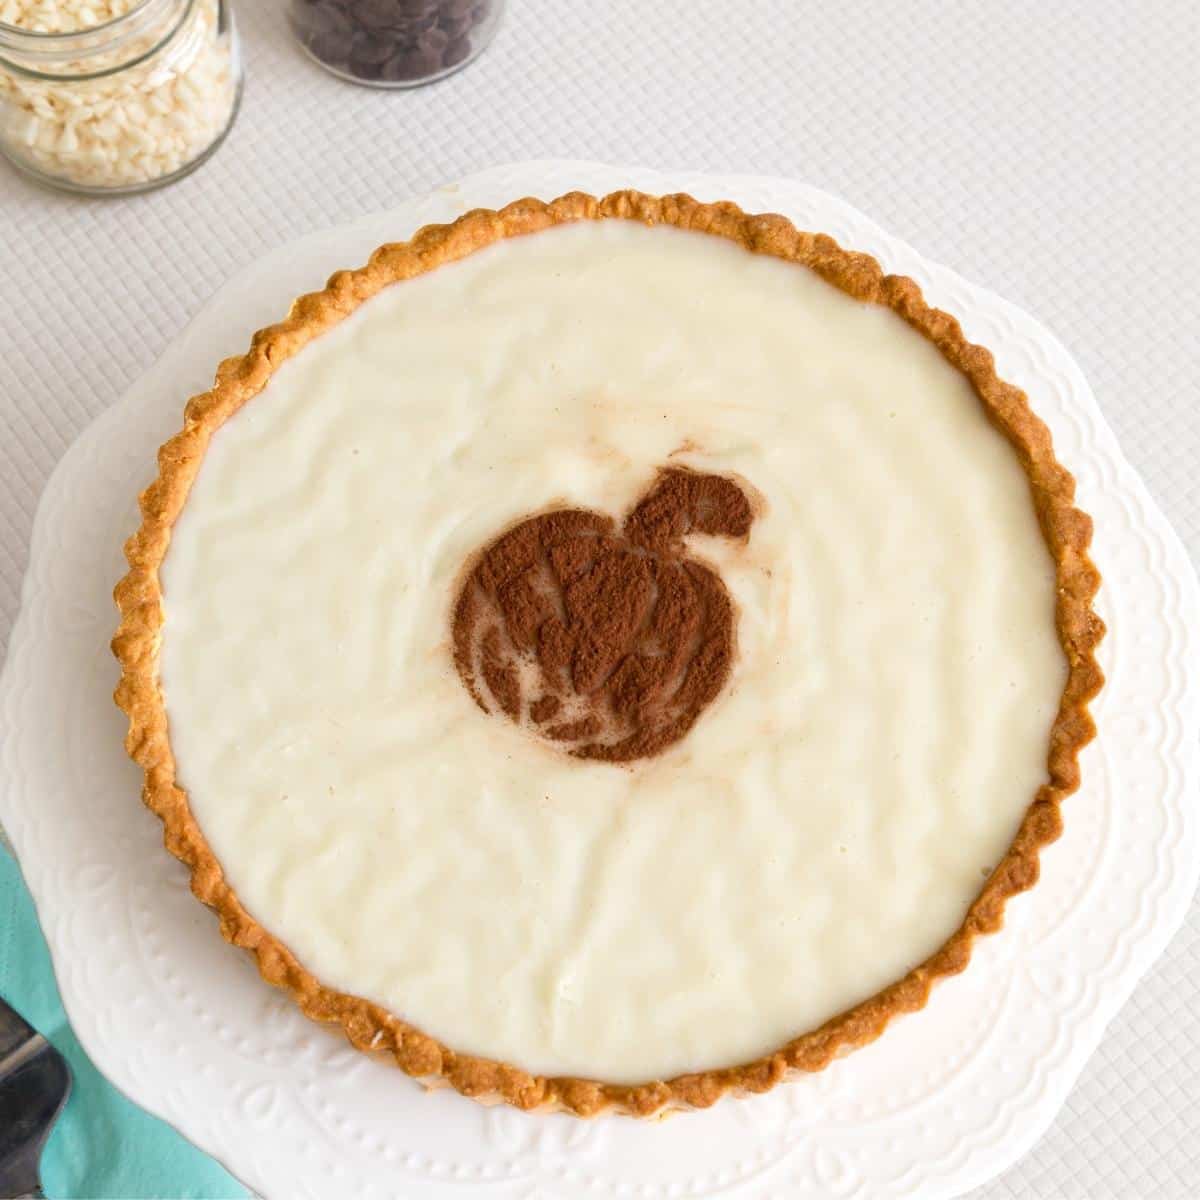
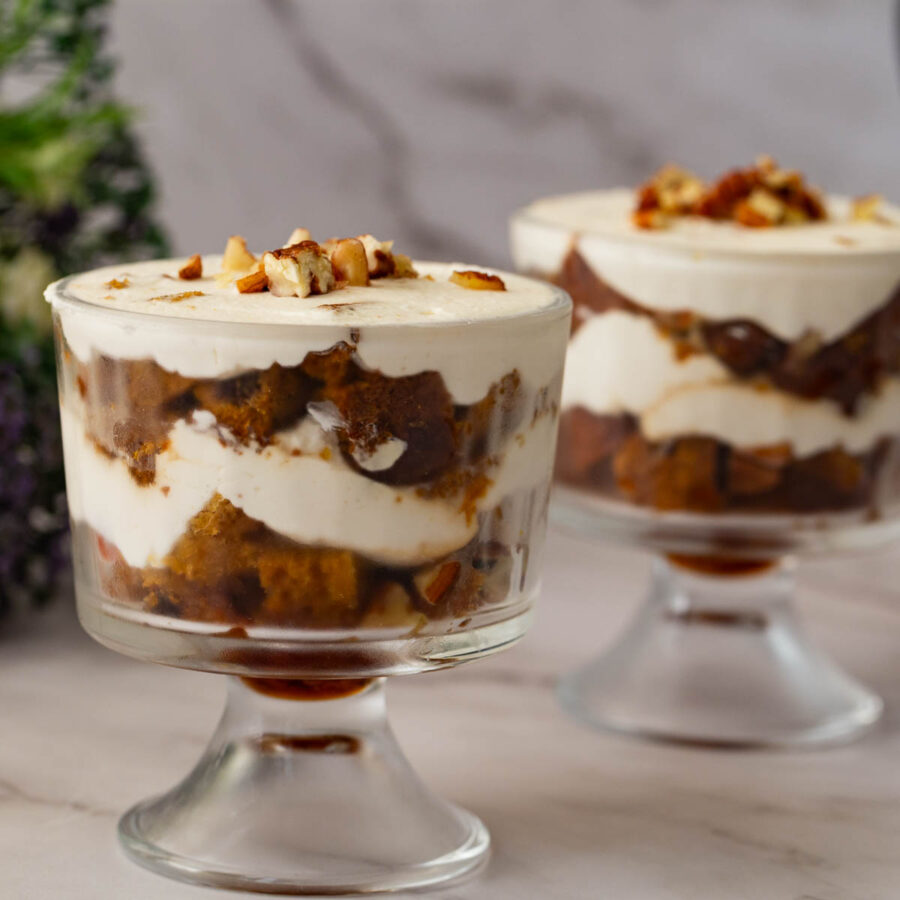
- The final layer is again a plain white chocolate ganache, which is then stenciled with cocoa powder to create an image of a pumpkin to celebrate the festive season.
Ingredients and substitutes
- Pumpkin puree – I used homemade pumpkin puree, but store-bought works just as well.
- White chocolate – yes, white chocolate is sweet and rich and works really well with the pumpkin flavor.
- Dark Chocolate – You can adjust the percentage of dark chocolate depending on how sweet you want this tart. I used 70% dark chocolate this time. The first time I made it, I used 90% cocoa, and the kids didn’t quite like the second layer, but the 70% worked just right for us all this time.
- Pastry – I am using homemade shortcrust, but you can use store-bought ready-to-roll pastry.

Step-by-step: Pumpkin Tart
- Shortcrust pastry – Add the flour, salt, and sugar to the food processor and pulse for 30 seconds. Then add the chilled cubed butter and pulse for 30 seconds, until you have a breadcrumb-like consistency. Combine the egg yolk and ice water, add to the mixture, and combine well, but do not overmix. Pour the crumbly mixture on a floured surface and gather it into a ball. Flatten the ball into a disc and chill for 30 minutes.
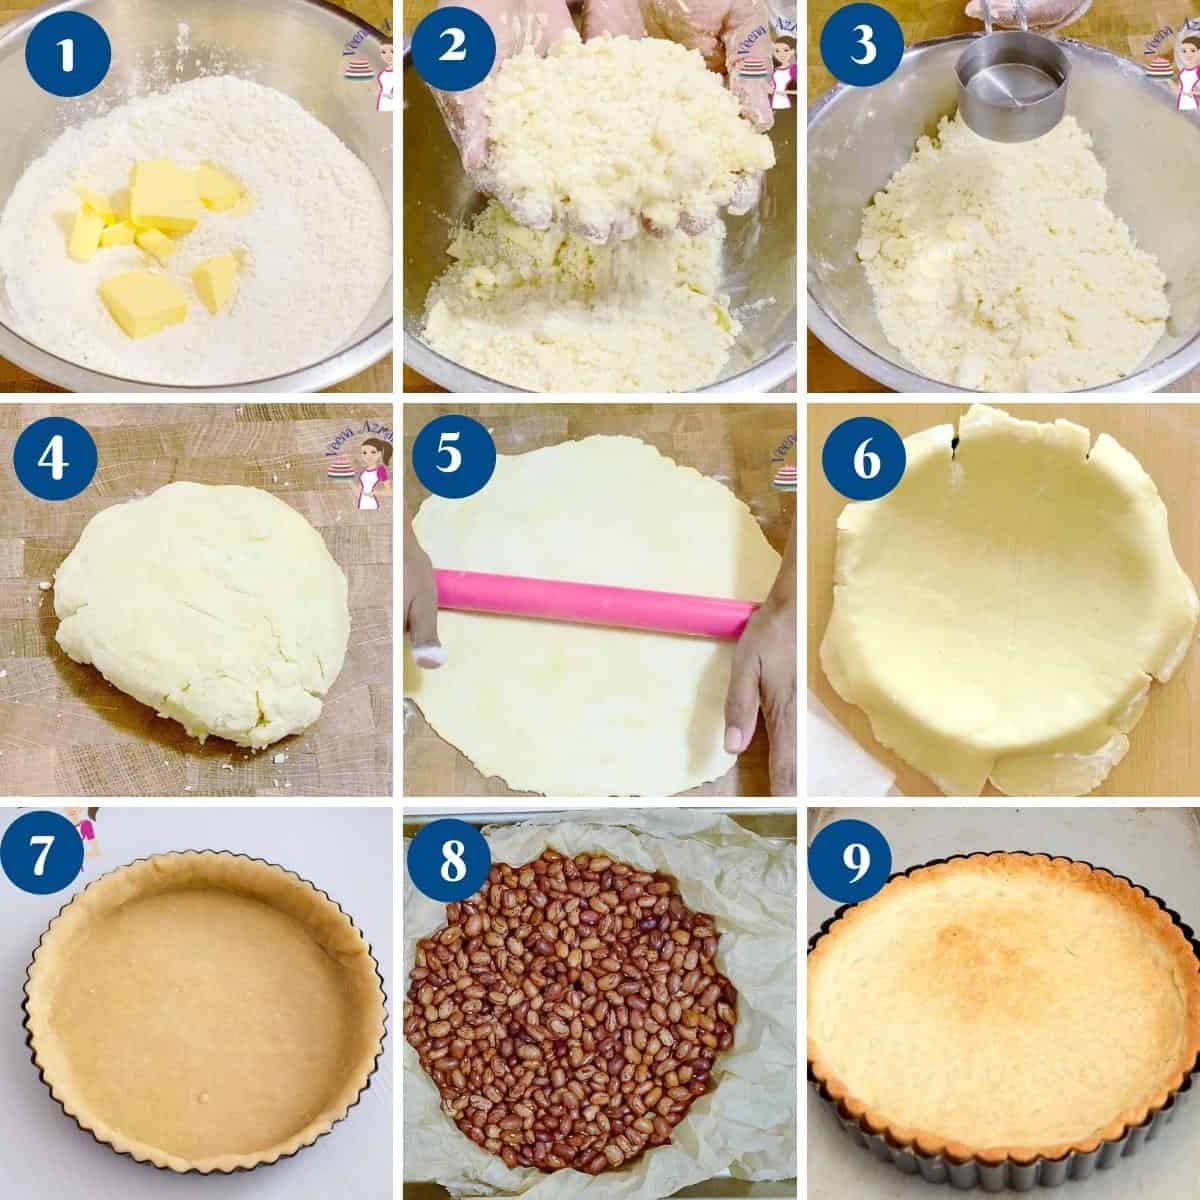
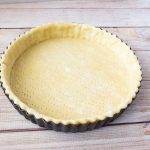
- Line pan – When chilled, lightly roll on a floured surface to about 1/8-inch thickness. Line a 9-inch tart pan with the pastry. Gently press the dough into the tart pan, making sure to press it down into the pan’s shape. Trim the excess dough at the edges with a rolling pin or thumb. Chill the tart shell for 15 to 30 minutes.
- Preheat the oven to 375°F / 190°C / Gas Mark 5.
- Bake crust – Prick the pastry with the tines of a fork to prevent the dough from puffing. Line the crust with parchment paper and fill it with baking beans or pie weights. Bake for 15 to 20 minutes until the edges lightly begin to brown. Remove the parchment paper and weights. Bake the empty shell for 10 to 15 minutes more until lightly golden. Cool on a cooling rack until completely cold before you add any filling.
- Layer 1: Whipped pumpkin ganache – Heat the cream to an almost-boil. Pour over the finely chopped white chocolate. Let stand for a minute, then stir until smooth. Add the pumpkin puree and the pumpkin spice. Stir well and refrigerate until chilled (at least 4 hours). When chilled, whip the ganache with a whisk or electric mixer until it is light and fluffy. Spread it evenly in the fully baked and cooled shortcrust pastry base. Chill in the fridge for at least an hour or more until set.
- Layer 2: Dark chocolate ganache – Heat the cream to an almost boil. Pour over the finely chopped dark chocolate. Let it stand for a minute, then stir until smooth. Pour in the tart over the set first layer. Chill until set for an hour or more.
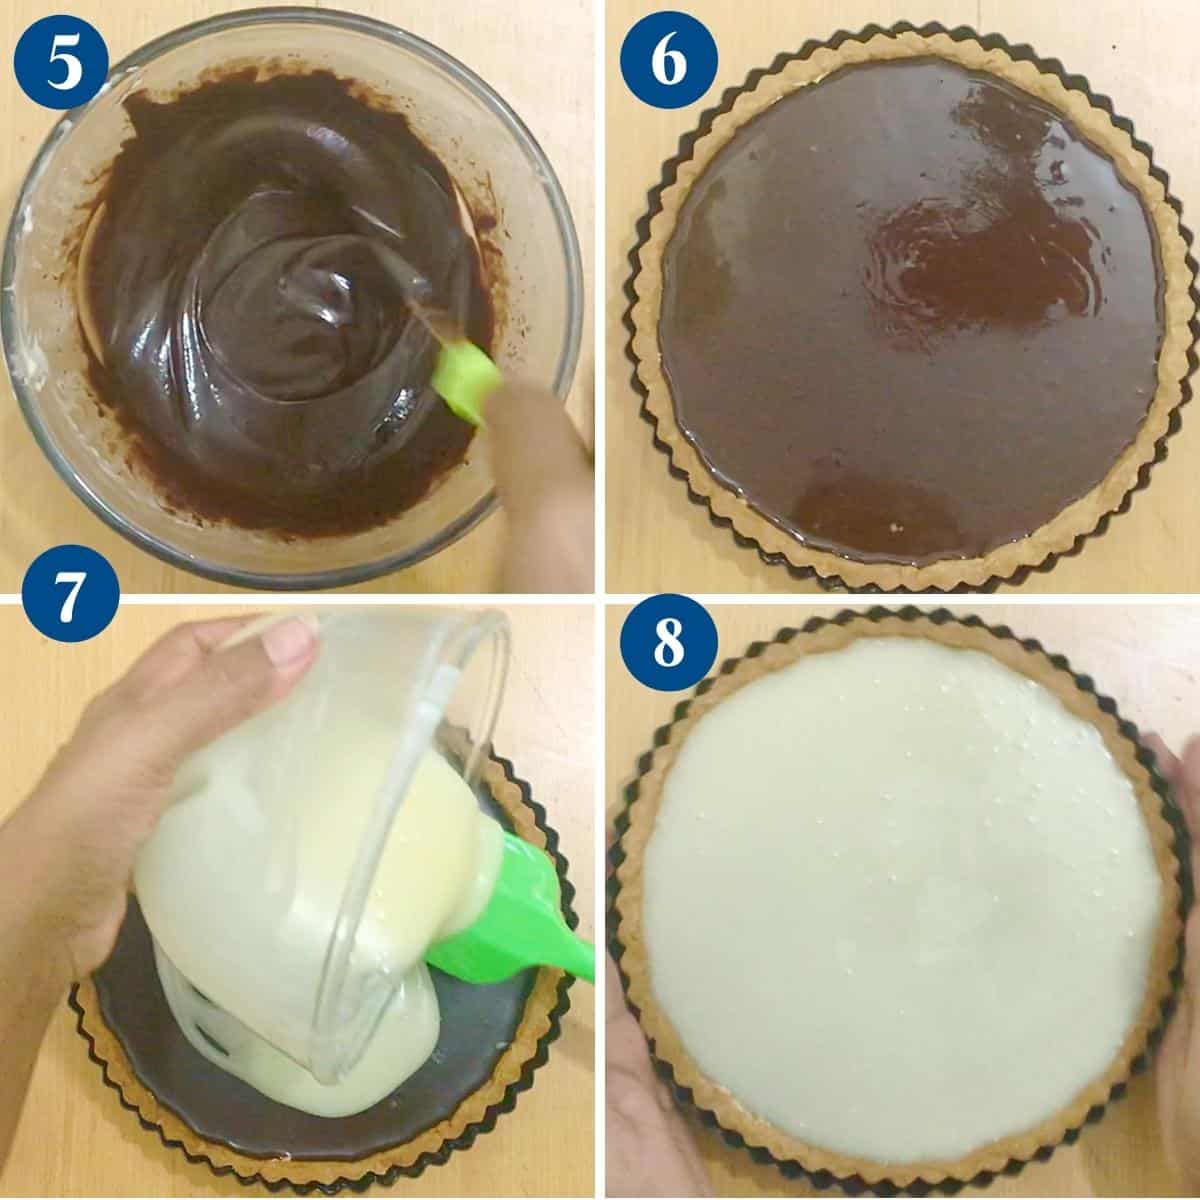
- Layer 3: White chocolate ganache – Heat the cream to an almost boil. Pour over the finely chopped dark chocolate. Let stand for a minute, then stir until smooth. Pour in the tart over the chilled second layer (dark chocolate ganache layer). Chill again for at least 2 hours.
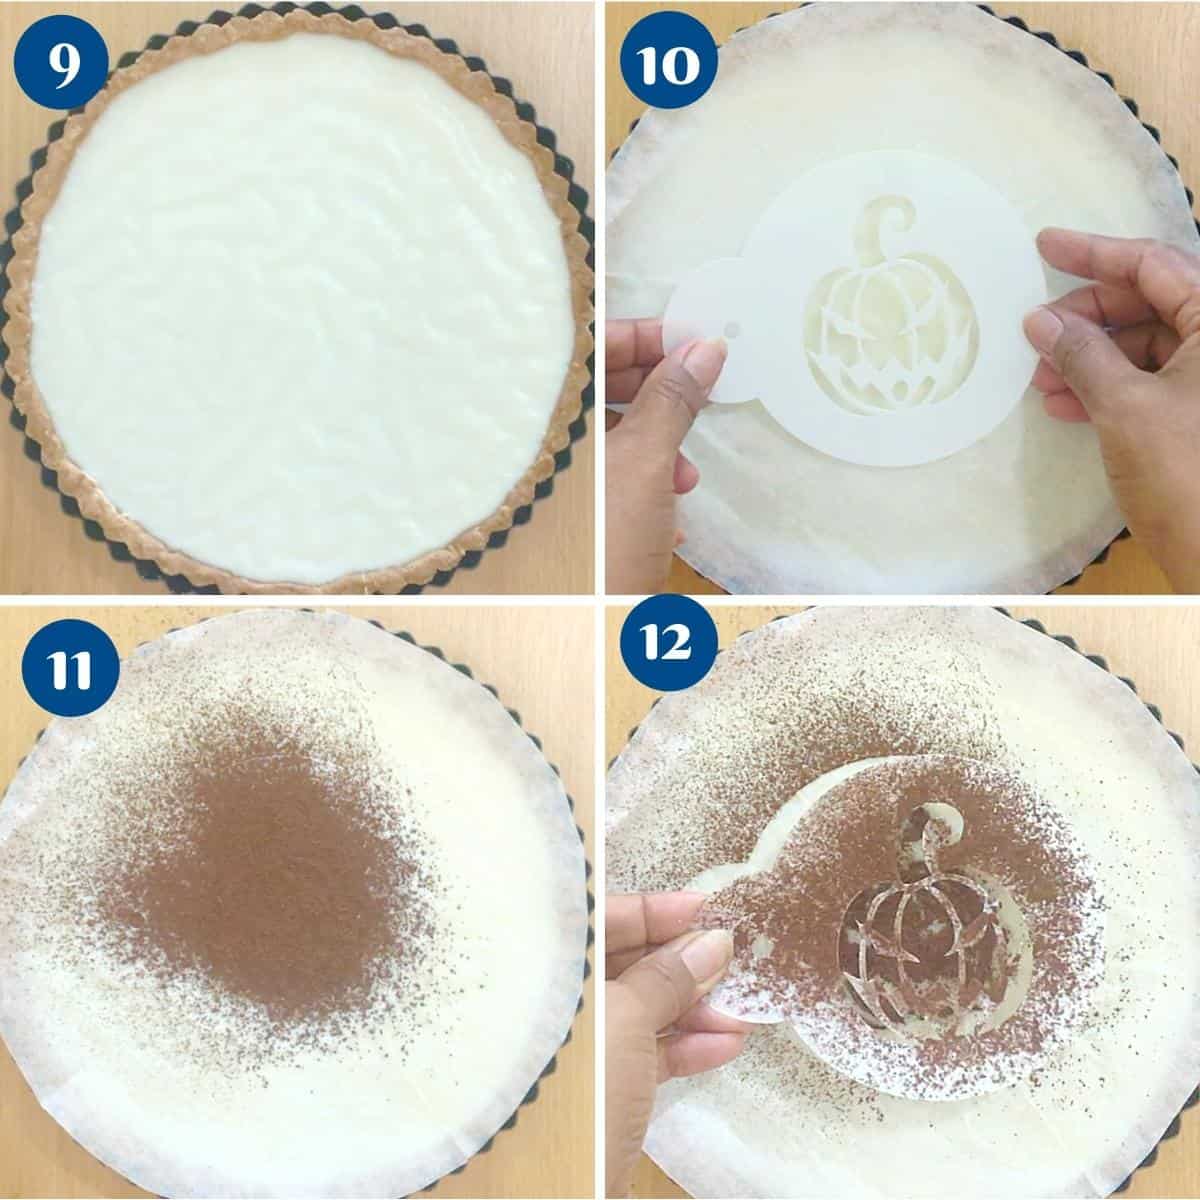
- Decorate – I used a pumpkin stencil and dusted it with cocoa powder. Carefully remove the stencil, and voila! You have a pumpkin stencil design on top of your chocolate pumpkin tart. Or you can sprinkle some cocoa powder on the edges of the white chocolate surface for a quick finish.
- Halloween Brownies
- Stenciled Halloween Sugar Cookies
- Eyeball Halloween Cookies
- How to Decorate Pumpkin Cupcakes


Frequently asked questions
Pumpkin, being a fruit, is a perishable ingredient. This tart will keep in the fridge for 3 to 4 days.
Each filling takes just 5 minutes and can be made up to 2 days in advance. Whip the bottom layer just before adding it to the crust. Thaw the top two layers in the microwave for 10 seconds until they reach a pourable consistency again.
You can prepare the tart up to 2 days ahead. Fill the crust and chill in the fridge to set, but make sure to bring them to room temperature before serving.
Room temperature. Chocolate tastes better at room temperature, not warm or cold from the fridge. So, I prefer to serve this at room temperature.
You certainly can. The fillings will be good for about 24 mini tartlets. You can half the recipe as well. Or try my other mini tarts
Pumpkin Pie Chocolate Mini Tarts
White Chocolate Pumpkin Caramel Tart
Cinnamon Caramel Apple Tart
Blueberry cream cheese tarts
Cream Cheese Chocolate Mousse Tarts
Triple Chocolate Pumpkin Tart
Celebrate the season of fall with something different this Thanksgiving. This triple chocolate pumpkin tart has three layers of chocolate both white and dark infused with pumpkin puree and pumpkin spice in a homemade buttery shortcrust pastry.
Video
Ingredients
- 1 ½ cup (190 g) All-purpose flour
- 4 oz (113 g) Butter unsalted (1 stick)
- ¼ tsp Salt
- ¼ cup (50 g) Sugar
- 1 Egg yolk large
- 4 tbsp ice water as needed
- 6 oz (170 g) White chocolate
- ½ cup (120 ml) Whipping cream
- ½ cup (120 ml) Pumpkin pure
- 1 tsp Pumpkin spice
- 7 oz (200 g) Dark chocolate
- ½ cup (120 ml) Whipping cream
- 6 oz (170 g) White chocolate
- ½ cup (120 ml) Whipping cream
- Cocoa powder for decorating
Method
- Shortcrust pastry – Add the flour, salt, and sugar to the food processor and pulse for 30 seconds. Then, add the chilled cubed butter and pulse for 30 seconds until you have a breadcrumb consistency. Combine the egg yolk and ice water, add to the mixture, and combine well, but do not overmix. Pour the crumbly mixture on a floured surface and gather it into a ball. Flatten the ball into a disc and chill for 30 minutes.1 ½ cup All-purpose flour, 4 oz Butter unsalted, ¼ tsp Salt, ¼ cup Sugar, 1 Egg yolk, 4 tbsp ice water
- Line pan – When chilled, lightly roll on a floured surface to about 1/8-inch thickness. Use your 9-inch tart pan as a guide to see how big you need to roll it. Also, ensure the pastry is not too thick; otherwise, there will be no space for your filling. Gently press the dough into the tart pan, making sure to press down into the shape of the pan. Trim the excess dough at the edges with a rolling pin or thumb. Chill the tart shell for 15 to 30 minutes.
- Preheat the oven at 375°F / 190°C / Gas Mark 5.
- Bake crust – Prick the pastry with the tines of a fork to prevent the dough from puffing. Line the crust with parchment paper and fill it with baking beans or pie weights. Bake for 15 to 20 minutes until the edges lightly begin to brown. Remove the parchment paper and weights. Baking the empty shell for 10 to 15 minutes more until lightly golden. Cool on a cooling rack until completely cold before you add any filling.
- Layer 1 Whipped pumpkin ganache – Heat the cream to an almost boil. Pour over the finely chopped white chocolate. Let stand for a minute, then stir until smooth. Add the pumpkin puree and the pumpkin spice. Stir well and refrigerate until chilled (at least 4 hours). When chilled, whip the ganache with a whisk or electric mixer until it is light and fluffy. Spread it evenly in the fully baked and cooled shortcrust pastry base. Chill in the fridge for at least an hour or more until set.6 oz White chocolate, ½ cup Whipping cream, ½ cup Pumpkin pure, 1 tsp Pumpkin spice
- Layer 2 Dark chocolate ganache – Heat the cream to an almost boil. Pour over the finely chopped dark chocolate. Let stand for a minute then stir until smooth. Pour in the tart over the set first layer. Chill until set an hour or more.7 oz Dark chocolate, ½ cup Whipping cream
- Layer 3 – White chocolate ganache – Heat the cream to an almost boil. Pour over the finely chopped dark chocolate. Let stand for a minute, then stir until smooth. Pour in the tart over the chilled second layer (dark chocolate ganache layer). Chill again for at least two hours or more.6 oz White chocolate, ½ cup Whipping cream
- Decorate – I used a pumpkin stencil and dusted it with cocoa powder. Carefully remove the stencil, and voila! You have a pumpkin stencil design on top of your chocolate pumpkin tart. Or you can sprinkle some cocoa powder on the edges of the white chocolate surface for a quick finish.
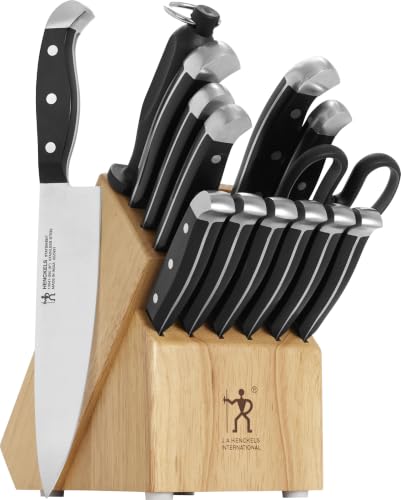
Equipment you will need


Nutrition
Tried this recipe?
Mention @veenaazmanov_kitchen or tag #veenaazmanovkitchen!Don’t lose this recipe! Save it for Later!
📌 Save this Recipe for later on Pinterest so you can easily find it again.
⭐ Add Veena Azmanov Kitchen to your Google Preferred Sources.
It helps Google show you more of our recipes.
📧 Subscribe for new recipes delivered to your inbox.
🎥 Follow us for more recipes


when you say 1/2 cup of whipping cream i think of heavy whipping cream in a carton but if you click on the word “whipping cream” it takes you to ur recipe for whipped cream. so i was confused. but recipe just says mix white chocolate and pumpkin puree to the cream it doesnt say to add that to whipped cream. I wanted to be sure that i do the right thing. nobody else in the comments is talking about it so i assume its just heavy cream you are talking about.
Lara – No, you do not need to whip the cream – just liquid heavy cream from the carton is fine.
The blog links by default the whipping cream to take you to the post that shows you how to make whipped cream, but in the recipe, you use only the liquid. I’ll see if I can change that.
Made this tart, this weekend. So delicious. NO one believed it had pumpkin.
Thank you, Victoria. So happy to hear you enjoyed this recipe so much. Thank you so much for coming back to write this feedback. Appreciate it very much.
This is just the type of dessert that we love. It’s a real show-stopper! I can almost taste how smooth and creamy it is and I know our family would really enjoy it. This has got to be one of the desserts I make for Thanksgiving.
Thanks, Marisa. I think you will enjoy these.
Your creations always look and sound so delicious! I love that you make your own pumpkin puree. I will definitely have to try that!
Thanks, Denise. Yes, I always make my own pumpkin puree. It’s so easy.