Rice Krispy Treats for Cake Decorating


Rice Krispy treats in cake decorating can be a huge blessing. This simple, easy, and effortless recipe can be made in minutes and used in any part of cake decorating. Whether you want to create a small section, elevate the cake, or use it for cake sculpting a whole section defying gravity. The possibilities are endless with these delicious treats that kids and grown-ups can enjoy.

If you’ve ever seen one of those cakes shaped like a full sphere, a giant cartoon character head, or something gravity-defying and thought, “How in the world…?” — I’m here to tell you: it’s probably Rice Krispies Treats.
Back when I was making custom cakes full-time, I quickly learned that cake alone just wasn’t enough for some designs. You can’t exactly carve cake into perfect 3D shapes without it falling apart (or giving you a nervous breakdown). That’s when I discovered the magic of Rice Krispies Treats — lightweight, moldable, and, let’s be honest, kind of fun to play with.
I’ve used them for everything: animal heads, giant bows, arms, legs, weird cartoon noses, you name it. They’re especially perfect for sculpted cake toppers — when I needed something solid but not heavy enough to sink into the cake. You can even try carving into it with a knife. Plus, if the kids at the party decide to sneak a bite off the top? Hey, it’s still edible!
Making them is easy, shaping them takes a little practice, but once you get the hang of it — total game changer. Whether you’re a pro decorator or just playing around at home, they’ll make your cakes look next-level.
And trust me, once you start, you’ll never look at a cereal box the same way again. Once I even made round cake layers with Rice Krispies for a birthday boy, crumb-coated them with semi-sweet chocolate, frosting and rainbow sprinkles. No one knew it was not cake until we cut into it!!

The Benefits of Rice Krispy treats in cake decorating
- Versatility: Rice Krispy treats can be easily molded into different shapes and sizes, making them versatile in cake decorating. You can create various designs, such as figures, characters, or decorative elements, to enhance the overall look of your cake.
- Stability: Rice Krispy treats provide structural stability to your cake decorations. Unlike some other soft and delicate cake decorating materials, Rice Krispy treats are firm and can hold their shape well. This makes them ideal for creating three-dimensional elements or supporting cake structures.
- Easy to work with: Rice Krispy treats are simple and fun. They require minimal ingredients and can be made quickly. They also have a good texture for shaping and can be easily manipulated with your hands or simple tools.
- Edible and tasty: Rice Krispy treats are made with cereal and marshmallows, which give them a delicious taste that many people enjoy. When used in cake decorating, they add visual appeal and provide a yummy treat that both kids and adults can enjoy.
- Cost-effective: Rice Krispy treats are an affordable option for cake decorating. The ingredients needed to make them are inexpensive and readily available. They can be a budget-friendly alternative to more elaborate or expensive decorative materials.
- Adaptable to different themes: Rice Krispy treats can be customized to match various themes or occasions. They can be colored with food coloring, coated with icing, or decorated with sprinkles and other edible embellishments to fit the desired aesthetic of your cake.
The ice cream scoops on this ice cream sundae cake are made with RKT. Those scoops in a cake? Nah!! A big mess – but RKT – works like magic. You can see the tutorial in detail here – Ice-Cream Sundae Cake Tutorial.

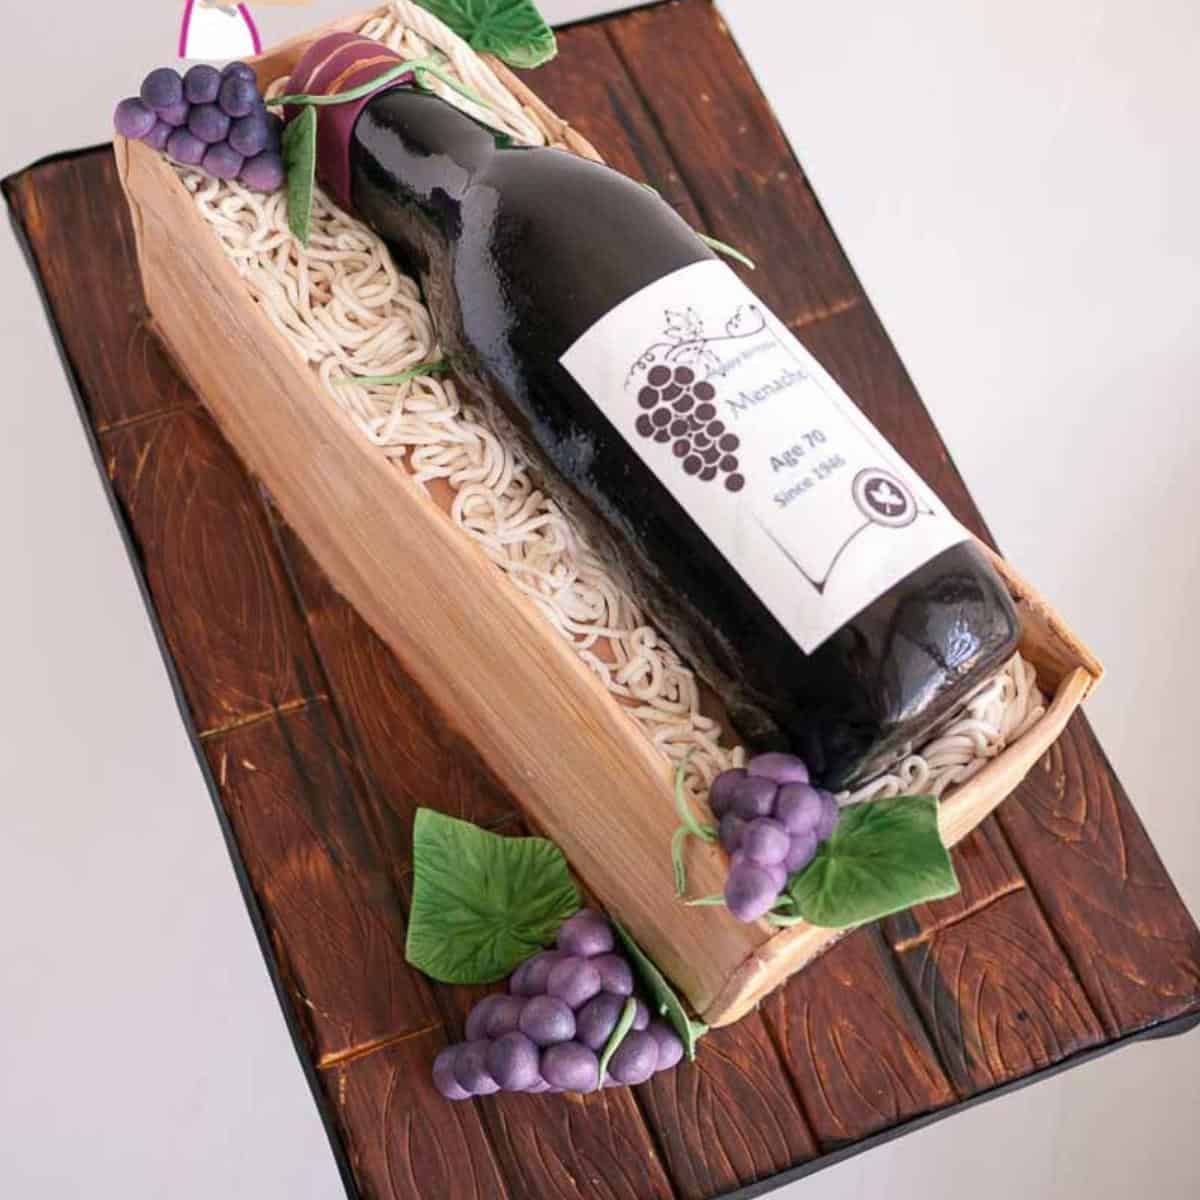
The neck of a wine bottle cake is very thin to use cake (I used cake – see video) but it would be a lot easier and more durable to use RKT instead.
Ingredients and substitutes
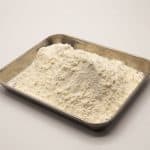
- Rice Krispies – Ideally, you want something that is light and easy to bind together. So, RKT works perfectly. And yet, if for some reason, you cannot use RKT – go with any cereal that’s light and can be squished together. Also, look for one that is not crisp, as it will just crumble into a powder.
For those of you in India, and can’t find Rice Krispy Cereals, you can use puffed rice (Poha). Puffed rice is almost the same as Rice Krispy’s. That might work well. - Marshmallow – You need something that has the ability to glue the Rice Krispy cereal together. And what better than marshmallows. It’s a huge sticky mess!! Nowadays, you can get vegetarian as well as vegan marshmallows.
And yet, if you cannot use marshmallows, I highly recommend using plain melted chocolate. Use only as much as you need to bring it all together. While it is as messy as marshmallows, it’s not as sticky. Mold it into a shape or a pan you need, then let it set in the fridge. Once the chocolate firms up – cut into the desired shape. Also, to work it into a shape, do it at intervals. Let the chocolate partially set then remold it into shape before it set even more. - Butter – This is not just for taste but also to help work with RKT efficiently! If you cannot use butter use vegetable shortening (ghee/dalda). Smear the bowl with butter so the marshmallows won’t stick to it. Rub your hands with butter or veg shortening so you won’t have sticky hands. If you live in a hot and humid place – use less butter in the mixture. Though it tastes good – the humidity will keep the final RKT softer.
- Melted chocolate – You can add melted chocolate to the rice krispy mixture or you can use the melted chocolate to fill in the gaps after you have molded the shape you want.
How to make rice Krispy treats for cake decorating
- Chocolate – Melt chocolate in a microwave-safe bowl until smooth and set aside.
- Prepare the workspace: Clear a clean, flat surface or a large baking sheet for shaping and cooling the Rice Krispy treats. You can cover the surface with parchment paper for easier cleanup.
- Melt the butter: In a large saucepan, melt the butter over low heat until fully melted.
- Add marshmallows to the melted butter and stir continuously until they are completely melted and well combined with the butter. Use a rubber spatula or wooden spoon for this step.
- Incorporate the cereal: Remove the saucepan from the heat and add the Rice Krispies cereal. Stir gently until all the cereal is evenly coated with the marshmallow mixture. You can also add the chocolate to the mixture now or you can use the melted chocolate to fill in any gaps later.
- Shape the treats: Transfer the mixture to the prepared surface and shape it into the desired form for cake decorating. Press and mold the mixture with your hands or a greased spatula. If you plan to cover a cake layer with Rice Krispy treats, shape it into a thin, even layer of the desired size.
- Let it cool: Allow the Rice Krispy treats to cool completely at room temperature. This usually takes about 30 minutes to an hour, depending on the thickness of the treats.
- Decorate the cake: Once the Rice Krispy treats have cooled and solidified, you can use them to decorate your cake. Place the treats on the cake or attach them to the sides using icing or ganache as an adhesive. You can also cut them into various shapes using cookie cutters.
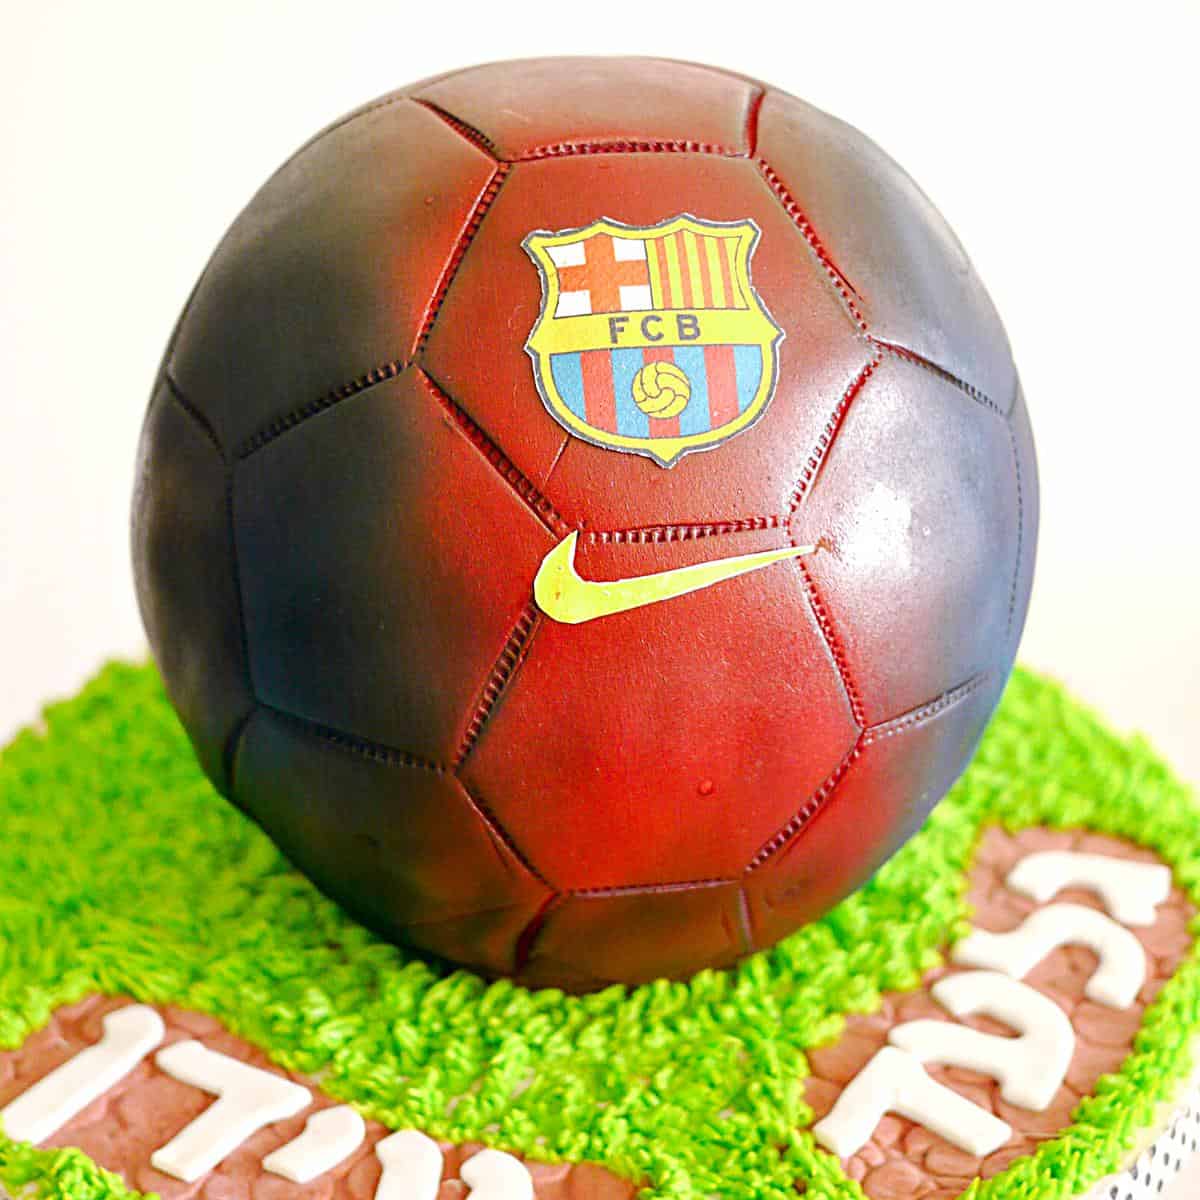
The bottom 1/3 of this Barcelona ball can be made with rice crispy treats or foam ball.
Tips for making Rice Krispy Treats (Rice Krispies)
- Use fresh marshmallows: Fresh marshmallows will melt more efficiently and provide a better texture to your treats. Make sure the marshmallows are soft and not stale for the best results.
- Melt the marshmallows slowly: When melting them, use low heat and stir constantly to prevent them from burning or sticking to the pan. A non-stick saucepan works well for this.
- Add the cereal gradually: Add the Rice Krispies cereal to the melted marshmallows, stirring gently. This ensures that all the cereal gets coated with the marshmallow mixture and avoids crushing the cereal too much.
- You can use a large enough mixing bowl: You can use a large mixing bowl to give yourself plenty of space to stir the marshmallow and cereal mixture. This makes it easier to combine everything evenly.
- Grease your hands or spatula: To prevent the sticky mixture from sticking to your hands or spatula, lightly grease them with butter, cooking spray, or oil. This will make pressing the mixture into the pan easier or shaping it for cake decorating.
- Press firmly: When transferring the mixture to the pan or shaping it, use a greased spatula or your hands to press it down firmly. Applying even pressure ensures that the treats stick together well and hold their shape.
- Let them cool: Allow the Rice Krispy treats to cool completely at room temperature before cutting them. This will give them time to set and firm up. You can speed up the process by placing them in the refrigerator for a shorter cooling time.
- Store properly: To maintain their freshness and texture, store the Rice Krispy treats in an airtight container or wrap them individually in plastic wrap. They can be stored at room temperature for 3-4 days.
- Get creative with additions: Rice Krispy treats can be customized by adding various mix-ins to the basic recipe. Mix in chocolate chips, sprinkles, chopped nuts, or dried fruits to add extra flavor and texture.
- Remember, Rice Krispy treats are pretty forgiving, so don’t be afraid to experiment and make them your own. Enjoy the process and have fun creating these delicious treats!
Tips for molding rice krispies sculpting
- Use fresh and gooey Rice Krispy treats: For easier shaping, use freshly made Rice Krispy treats while they are still warm and sticky. This will make them more pliable and easier to mold into shapes.
- Grease your hands and tools: To prevent sticking, lightly grease your hands and any tools used to shape the treats. You can use butter, cooking spray, or a little oil. This will help the treats release quickly and prevent them from sticking to your hands or tools.
- Please work quickly: Rice Krispy treats cool and hardens as they sit, so it’s essential to work quickly when you shape them. If the treats become too firm, you can warm them slightly in the microwave for a few seconds to soften them up again.
- Apply gentle pressure: Use gentle and even pressure when shaping the Rice Krispy treats to maintain their structure and prevent them from becoming too dense or tough. Avoid pressing too hard, resulting in flattened or distorted shapes.
- Create a base structure: If you’re shaping three-dimensional figures or structures, create a basic form or framework with Rice Krispy treats. Use smaller pieces to build up the desired shape, then smooth and shape the outer layer to achieve the final look.
- Use shaping tools and molds: Various shaping tools and molds can be useful for creating intricate details or achieving specific shapes. Silicone molds, cookie cutters, and sculpting tools can help you achieve precise and uniform shapes. Dust the molds or cutters with cornstarch or powdered sugar to prevent sticking.
- Let them set and cool: Once you’ve shaped the Rice Krispy treats into the desired forms, let them cool and set completely before handling or applying them to the cake. This will ensure that they retain their shape and structure.
- Decorate as desired: Once the Rice Krispy treats have cooled and hardened, you can decorate them further using icing, fondant, or other edible decorations. Add colors, textures, and details to enhance the overall appearance and match your cake’s theme.
- Chocolate – Use melted chocolate, modeling chocolate, royal icing, buttercream or fondant into minor dents or uneven parts to achieve a smooth finish.
- Cover – Then drape with fondant or modeling chocolate like a cake for a perfectly smooth finish.
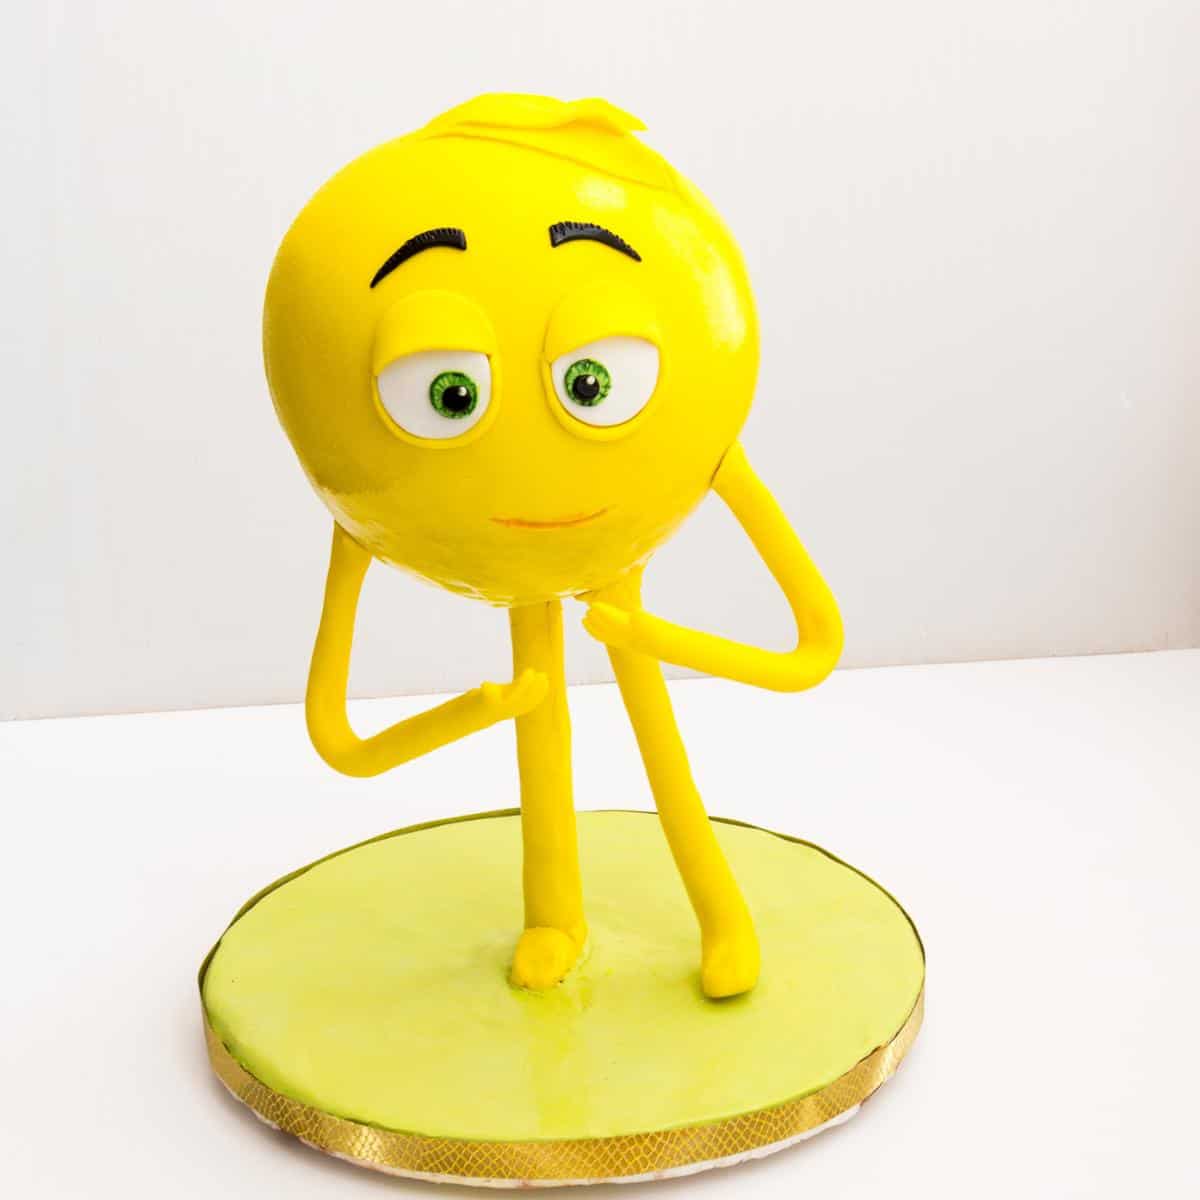
The bottom of this emoji cake below the cake board can be made with rice crispy treats or foam.
Rice Krispy Treats in Cake Decorating
Rice Krispy treats in cake decorating can be a huge blessing. This simple, easy and effortless recipe can be made in minutes and can be used in any part of cake decorating. Whether you want to create a small section, to elevate the cake, or use for cake sculpting a whole section defying gravity. The possibilities are endless with this delicious treats that can be enjoyed by kids as well as grown-ups.
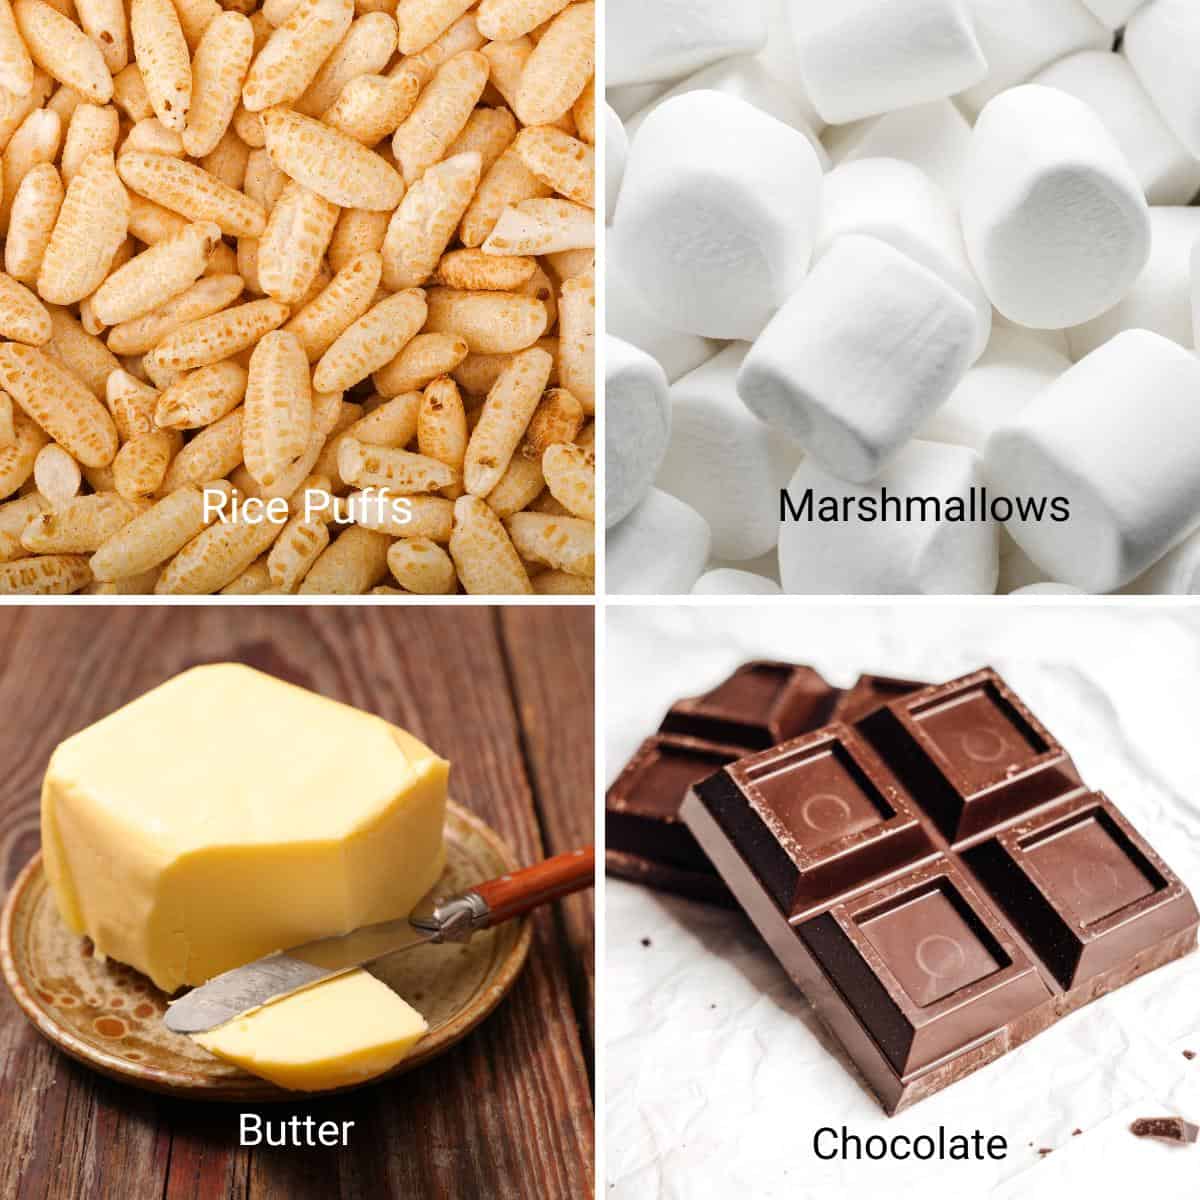
Ingredients
- 6 cup (162 g) Rice Krispy cereal
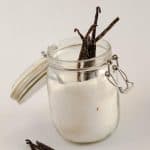
- 10 oz (280 g) Marshmallow (one package)
- 6 tbsp (2.00 tbsp) Unsalted butter room temperature
- 100 grams (4 oz) Chocolate (optional)
Method
- Chocolate – Melt chocolate in a microwave-safe bowl until smooth and set aside.100 grams Chocolate
- Prepare the workspace: Clear a clean, flat surface or a large baking sheet for shaping and cooling the Rice Krispy treats. You can cover the surface with parchment paper for easier cleanup.
- Melt the butter: In a large saucepan, melt the butter over low heat until fully melted.6 tbsp Unsalted butter
- Add marshmallows to the melted butter and stir continuously until they are completely melted and well combined with the butter. Use a rubber spatula or wooden spoon for this step. You can add the chocolate to the mixture now or use the melted chocolate to fill in any gaps later.10 oz Marshmallow
- Incorporate the cereal: Remove the saucepan from the heat and add the Rice Krispies cereal. Stir gently until all the cereal is evenly coated with the marshmallow mixture.6 cup Rice Krispy cereal
- Shape the treats: Transfer the mixture to the prepared surface and shape it into the desired form for cake decorating. You can press and mold the mixture with your hands or a greased spatula. If you plan to cover a cake layer with Rice Krispy treats, shape it into a thin, even layer of the desired size.
- Let it cool: Allow the Rice Krispy treats to cool completely at room temperature. This usually takes about 30 minutes to an hour, depending on the thickness of the treats.
- Decorate the cake: Once the Rice Krispy treats have cooled and solidified, you can use them to decorate your cake. Place the treats on the cake or attach them to the sides using icing or ganache as an adhesive. You can also cut them into various shapes using cookie cutters.
Notes
- Use fresh marshmallows: Fresh marshmallows will melt more easily and provide a better texture to your treats. Make sure the marshmallows are soft and not stale for the best results.
- Melt the marshmallows slowly: When melting them, use low heat and stir constantly to prevent them from burning or sticking to the pan. A non-stick saucepan works well for this.
- Add the cereal gradually: Add the Rice Krispies cereal to the melted marshmallows, stirring gently. This ensures that all the cereal gets coated with the marshmallow mixture and avoids crushing the cereal too much.
- Use a large enough mixing bowl: Use a large mixing bowl to give yourself plenty of space to stir the marshmallow and cereal mixture. This makes it easier to combine everything evenly.
- Grease your hands or spatula: To prevent the sticky mixture from sticking to your hands or spatula, lightly grease them with butter, cooking spray, or oil. This will make it easier to press the mixture into the pan or shape it for cake decorating.
- Press firmly: When transferring the mixture to the pan or shaping it, use a greased spatula or your hands to press it down firmly. Applying even pressure ensures that the treats stick together well and hold their shape.
- Let them cool: Allow the Rice Krispy treats to cool completely at room temperature before cutting them. This will give them time to set and firm up. You can speed up the process by placing them in the refrigerator for a shorter cooling time.
- Store properly: To maintain their freshness and texture, store the Rice Krispy treats in an airtight container or wrap them individually in plastic. They can be stored at room temperature for 3-4 days.
- Get creative with additions: Rice Krispy treats can be customized by adding various mix-ins to the basic recipe. Mix in chocolate chips, sprinkles, chopped nuts, or dried fruits to add flavor and texture.
- Remember, Rice Krispy treats are quite forgiving, so don’t be afraid to experiment and make them your own. Enjoy the process and have fun creating these delicious treats!
- Use fresh and gooey Rice Krispy treats: For easier shaping, use freshly made Rice Krispy treats while they are still warm and sticky. This will make them more pliable and easier to mold into shapes.
- Grease your hands and tools: To prevent sticking, lightly grease your hands and any tools used to shape the treats. You can use butter, cooking spray, or a little oil. This will help the treats release quickly and prevent them from sticking to your hands or tools.
- Please work quickly: Rice Krispy treats cool and hardens as they sit, so it’s important to work quickly when you shape them. If the treats become too firm, you can warm them slightly in the microwave for a few seconds to soften them up again.
- Apply gentle pressure: Use gentle and even pressure when shaping the Rice Krispy treats to maintain their structure and prevent them from becoming too dense or tough. Avoid pressing too hard, resulting in flattened or distorted shapes.
- Create a base structure: If you’re shaping three-dimensional figures or structures, create a basic form or framework with Rice Krispy treats. Use smaller pieces to build up the desired shape, then smooth and shape the outer layer to achieve the final look.
- Use shaping tools and molds: Various shaping tools and molds can be useful for creating intricate details or achieving specific shapes. Silicone molds, cookie cutters, and sculpting tools can help you achieve precise and uniform shapes. Dust the molds or cutters with cornstarch or powdered sugar to prevent sticking.
- Let them set and cool: Once you’ve shaped the Rice Krispy treats into the desired forms, let them cool and set completely before handling or applying them to the cake. This will ensure that they retain their shape and structure.
- Decorate as desired: Once the Rice Krispy treats have cooled and hardened, you can use icing, fondant, or other edible decorations. Add colors, textures, and details to enhance the overall appearance and match your cake’s theme.
- Chocolate – Use melted chocolate, modeling chocolate, royal icing, buttercream or fondant into minor dents or uneven parts to achieve a smooth finish.
- Cover – Then drape with fondant or modeling chocolate like a cake to get a smooth finish.
Equipment you will need


Nutrition
Tried this recipe?
Mention @veenaazmanov_kitchen or tag #veenaazmanovkitchen!Don’t lose this recipe! Save it for Later!
📌 Save this Recipe for later on Pinterest so you can easily find it again.
⭐ Add Veena Azmanov Kitchen to your Google Preferred Sources.
It helps Google show you more of our recipes.
📧 Subscribe for new recipes delivered to your inbox.
🎥 Follow us for more recipes


Hi Veena,
I’m needing to make an 8” sphere cake, if I use rice krispies for the bottom 1/3rd of the cake do i need a centre or dowel or should I use 3 dowels in the bottom half of cake with a cake board to support top half?
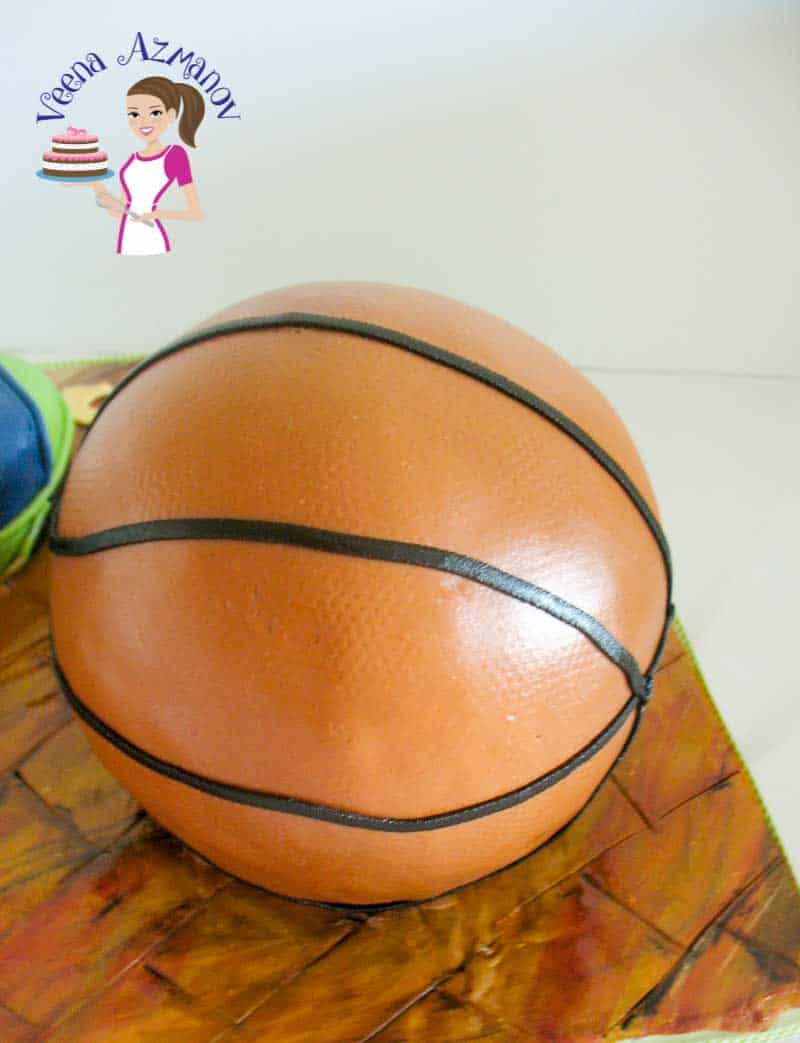
Also, how did you make the indents on the outer surface of the basketball?
You are very talented and I love learning from you.
Hi Aida,
Thank you so much for your kind words. I’m so glad you enjoyed the tutorial and found it helpful. 😊
For an 8-inch sphere cake, if the bottom 1/3 is made from rice krispie treats, that section is usually sturdy enough on its own and helps reduce the overall weight of the cake. I would still recommend placing the top cake portion on a small cake board with 3 dowels or bubble tea straws underneath for support. If the cake will be transported, a center dowel through the whole cake is always a good extra precaution.
For the football texture, I honestly can’t remember exactly which method I used for this one, but I usually either use a texture mat or scrunched-up aluminum foil pressed gently onto the fondant to create that pebbled football look. Both work really well and give a nice realistic texture.
Hope that helps and happy decorating! 😊
Hi Veena.
Hope you are well. I’m going to be making a cauldron cake. I thought I would use a half sphere tin as the bottom out of Krispie treats. As the cake was a flop. Will it hold all the cake?
kind regards
Janine
Hey Janine, Yes, it should hold well. Bake a spear cake. Let it cook completely. Use the same pan to make the bottom with Rice Crispies. Then trim as needed and stack the two together (RC on the bottom and cake on top) frost and decorate. All the best.
Thank you so much Veena. One last question. I’m going to ganache the krispie treat then put it in the freezer. I’m doing everything ahead for the 29th of November. Will it be fine? or shall I do it 3 to 4 days before assembling the cake.
Doing things ahead of time is not the issue.
Once the rice crispies are shaped, attach them to the cake with ganache – it holds better.
In fact, line your sphere pan with plastic wrap and stack it in the pan so it holds its shape straight –
Hello!
Can I add desiccated coconut to the marshmallow and Rice Krispie mixture? I need it to hold its shape but I also want a bit of flavor.
Thanks in advance
Yes, you can add desiccated coconut as well.
Fantastic! Thank you very much
Can this made made/ molded ahead of time? And if so… how do you store it until you’re ready to use? Tupperware on the counter? Fridge?
Thanks for your help!
Amy, you can make it ahead of time and store it in the fridge but you will not be able to manipulate or shape it once it is set. This will stay in the fridge for 4 to 5 days
Thank you so much!
Hi again, I forgot to mention that I skipped adding chocolate to my rice puffs. Do you think is this the reason it is getting hard? can I reshape again using melted chocolate? I am waiting for your reply so that I can restart?
Ah seems like you figured it out.
Hi veena,
I need your quick help. I am trying to make gravity defying tea kettle cake. for which i used puffed rice to make kettle. I made the structure of kettle using wire and wrapped puffed rice around it, covered it with plastic wrap and it is being almost a day but it has not gotten hard. I am able to press it. It should be rock hard before we carve or ganache it…right? And another question is: Do you think is this the right way of making kettle… or is there any other way of making gravity defying kettle? I am not using any screw to make cake board structure…just using straw and wire to hold kettle.
Thanks in advance
Sorry for the late reply Bhavi. You can make a kettle as gravity-defying – its’ light but only marshmallows will be too soft. There is nothing to to firm it up. You need to add melted chocolate to the rice puffs as well. That will become firm and solid. See my recipe for rice Krispy treats
Hi,
I am making a 2 tier cake and on top of the tiers there will be a rice krispy treat ship. How do i put dowels to support the rice krispy treats?
And should i pass the centre dowel through the rice krispy ship as well?
Unless the ship is very heavy you do not need too much support. You can use dowels under the ship and anchor the ship on top of the cake with a skewer as well.