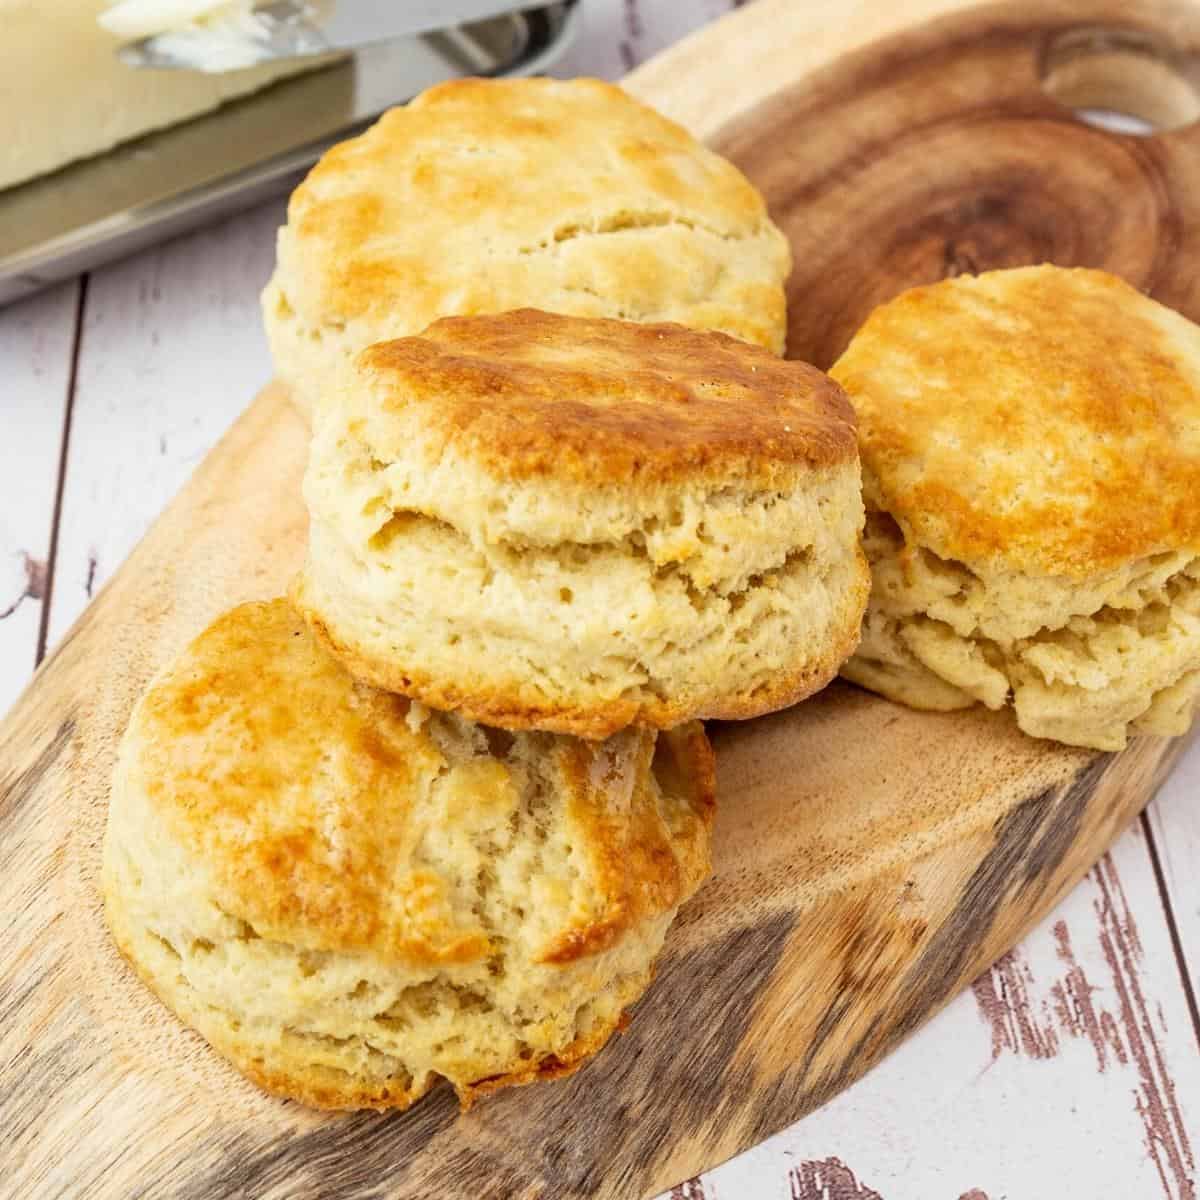
Homemade Biscuits


Who doesn’t love the smell of freshly baked, homemade biscuits from the oven? If you’ve ever wondered how to make those delicious, classic biscuits from scratch, you’ve come to the right place.

Everyone loves a good biscuit. Whether you are looking for a savory sideshow for your dinner or a delicious snack, classic homemade biscuits provide the perfect combination of flaky, buttery layers that can’t be replicated. As the famous southern cook Edna Lewis once said, “When I think of biscuits, I think of something good to eat and a warm feeling of comfort. Almost every bowl of soup in our home goes with biscuits in winter.
Why make these biscuits
- First and foremost, this recipe has been carefully crafted and tested to ensure foolproof results. It considers the right balance of ingredients, the correct measurements, and the ideal baking techniques. By following this recipe, you can be confident that your biscuits will turn out light, fluffy, and golden brown, just like a pro would make them.
- One of the standout features of this recipe is its simplicity. You can quickly whip up a batch of mouthwatering biscuits with just a few essential ingredients you already have in your pantry.
- There’s no need for any complicated or hard-to-find ingredients, making this recipe accessible to both seasoned bakers and beginners alike.
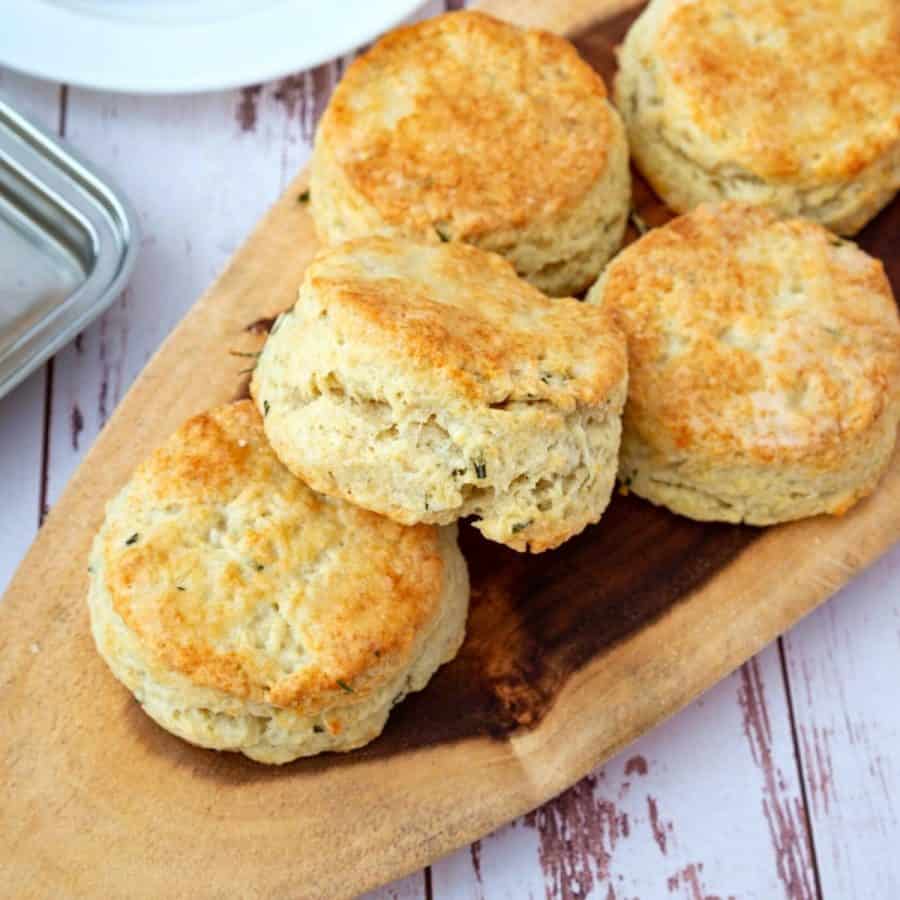
- Another reason why this recipe stands out is its versatility. While the classic biscuit is always a crowd-pleaser, this recipe allows for variations and substitutions, allowing you to experiment with different flavors and add-ins. Whether you prefer a savory biscuit with herbs and cheese or a sweet version with cinnamon and sugar, this recipe can easily be adapted to suit your taste preferences.
Ingredients and substitutes
- First and foremost, let’s talk about the star of the show: flour. All-purpose flour is commonly used in biscuit recipes, balancing gluten development and tenderness. However, if you prefer a lighter and fluffier texture, you can choose cake flour. On the other hand, if you desire a heartier biscuit with more structure, consider using bread flour.
- Next up is the fat, which adds richness and moisture to your biscuits. Butter is the traditional choice, lending its distinct flavor, but don’t be afraid to experiment with alternatives. Shortening or lard can produce biscuits with a tender and flaky texture. You can even use coconut or olive oil for a healthier twist, although the flavor profile will differ slightly.
- Regarding leavening agents, baking powder and baking soda are the go-to options. Baking powder helps your biscuits rise by interacting with moisture and heat. If you find yourself out of baking powder, fear not! You can create a substitute by combining baking soda and cream of tartar. Remember, this homemade substitute is a quick fix and may not yield the same results as store-bought baking powder.
- Sugar is not a common ingredient in traditional biscuit recipes, but a touch of sweetness can sometimes enhance the overall flavor profile. Adding a small amount of granulated or brown sugar can do the trick if you prefer a slightly sweeter biscuit. If you’re watching your sugar intake, feel free to omit it altogether.
- Lastly, but certainly not least, is the liquid component. Traditionally, biscuits call for milk, buttermilk, or heavy cream. Each option brings its unique characteristics to the table. Milk provides a neutral base, whereas buttermilk adds tanginess and tenderness. Heavy cream offers richness and helps create a more tender biscuit. If you find yourself without these options, you can substitute them with yogurt or sour cream mixed with a bit of water.
Step-by-step: Classic biscuits
- Start by preheating the oven at 450°F / 230°C Gas Mark 8
- The first step in baking homemade biscuits is gathering your ingredients. You’ll need all-purpose flour, baking powder, salt, cold butter, and cold milk.
- Once you have your ingredients ready, it’s time to combine them. In a large bowl, whisk together the flour, baking powder, and salt until well combined. Then, using a pastry cutter or your fingertips, cut the cold butter into the dry ingredients until the mixture resembles coarse crumbs. This step ensures the butter is evenly distributed throughout the dough, creating those sought-after pockets of buttery goodness.
- Next, it’s time to add the liquid ingredients. Add the egg and combine well. Then, make a well in the center of the dry ingredients and pour in the milk. Gently stir the mixture until just combined. Be careful not to overmix, as this can result in tough biscuits. The dough should be slightly sticky but manageable.
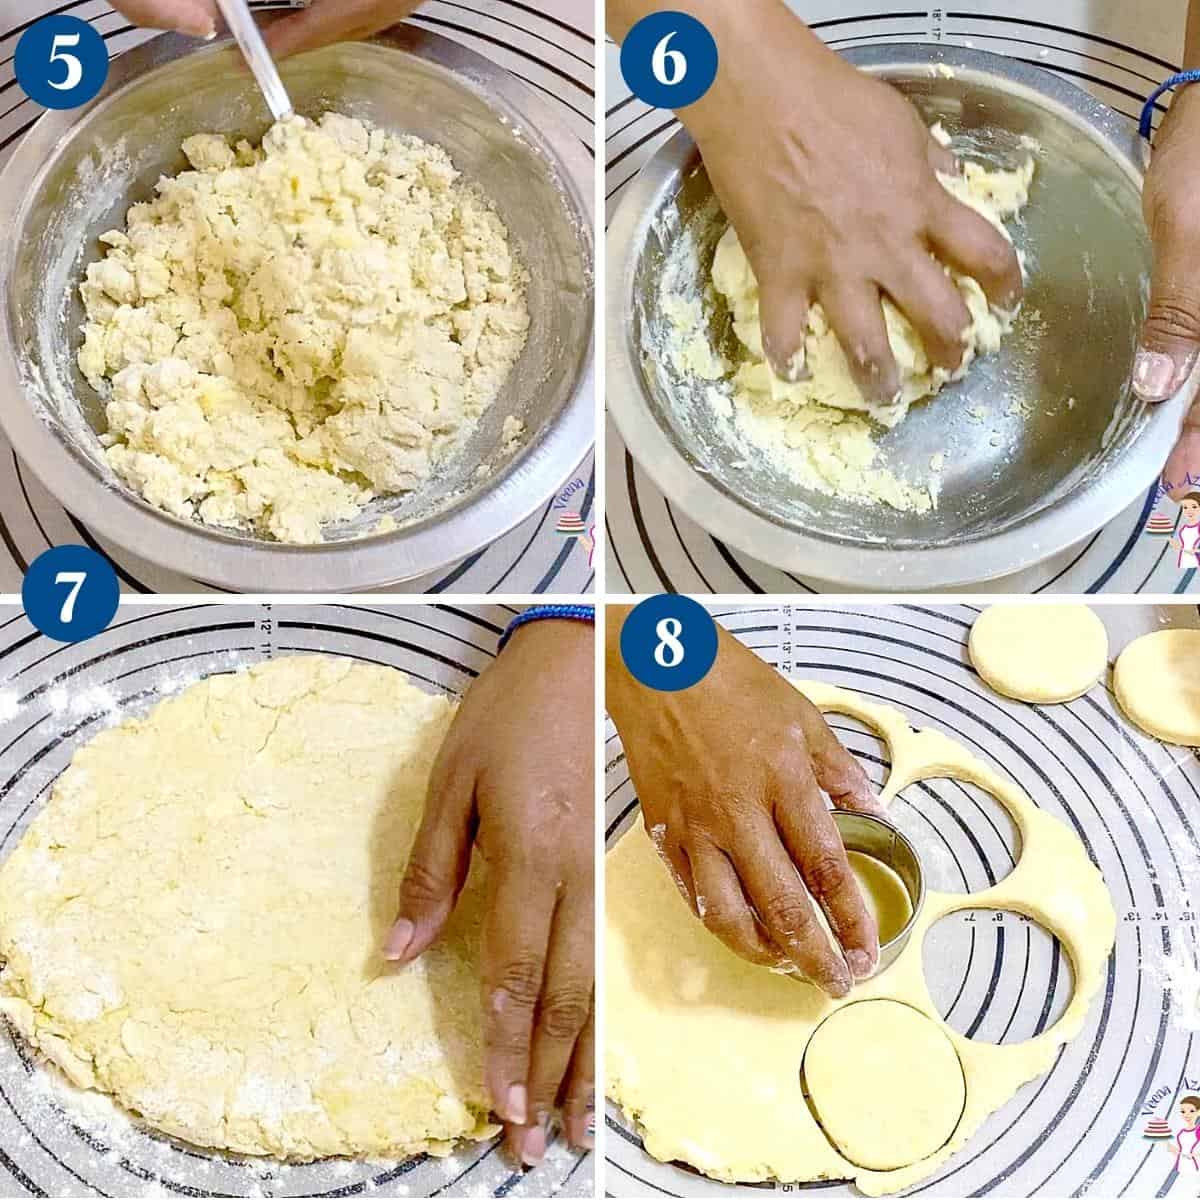
- Now comes the fun part – shaping the biscuits! Lightly flour a clean surface, and turn the dough out onto it. Shape it into a ball and flatten it. Roll it lightly, and then fold it in half and then into quarters. Do that at least once or twice more.
- Gently pat the dough into a rectangle about 3/4 inch thick. Using a biscuit cutter, cut out the biscuits and place them on a baking sheet lined with parchment paper. If you don’t have a biscuit cutter, you can use the rim of a glass or simply shape them by hand into rustic rounds. Handle the dough as little as possible to keep those flaky layers intact.
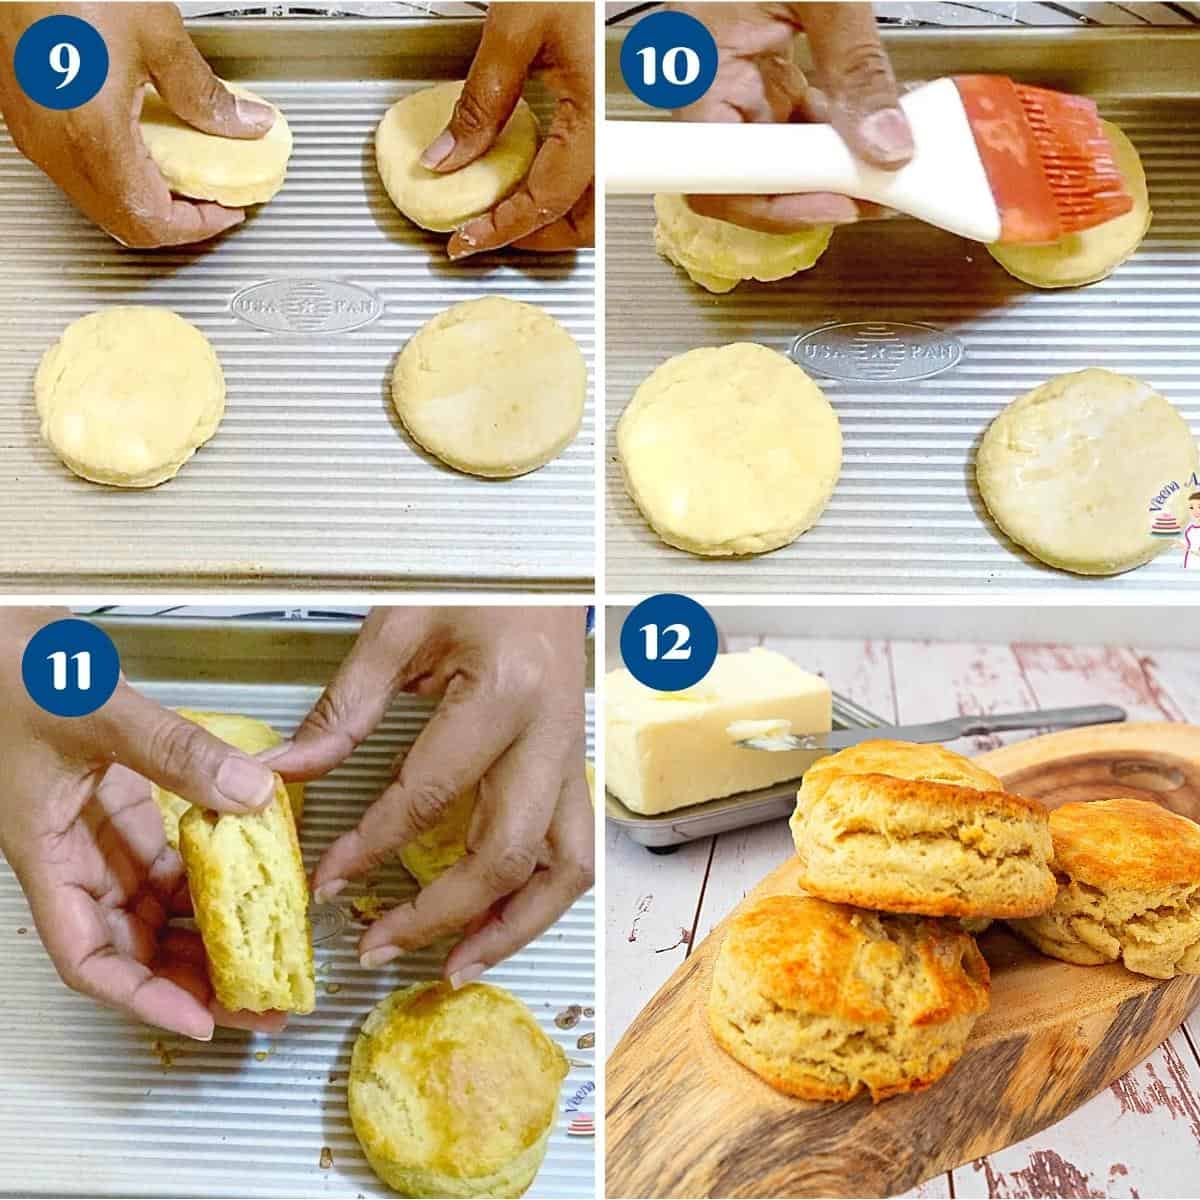
- Once you’ve shaped all your biscuits, it’s time to bake them to golden perfection on a baking tray lined with parchment (or an ungreased baking sheet). Brush them with milk or melted butter. Bake for 15 – 17 minutes or until the biscuits are puffy and golden brown on top. Keep an eye on them, as baking times may vary depending on your oven.
- As the heavenly scent of freshly baked biscuits fills your kitchen, you’ll know they’re ready to be enjoyed. Serve them warm with butter, jam, or your favorite gravy, and watch as your loved ones savor every bite.
Store and serve your biscuits correctly
- When it comes to storing biscuits, freshness is key. If you anticipate consuming them within a day or two, place the cooled biscuits in an airtight container or zip-top bag. For extended storage, individually wrap each biscuit tightly in plastic wrap and then transfer them to a freezer-safe container or bag. Proper packaging will prevent freezer burn and maintain their texture and flavor.
- To thaw frozen biscuits, remove them from the freezer and let them sit at room temperature for about 30 minutes. Once thawed, warm them in a preheated oven for a few minutes to restore their just-baked quality. However, if you’re short on time, a microwave can also do the trick, although the texture may differ slightly.
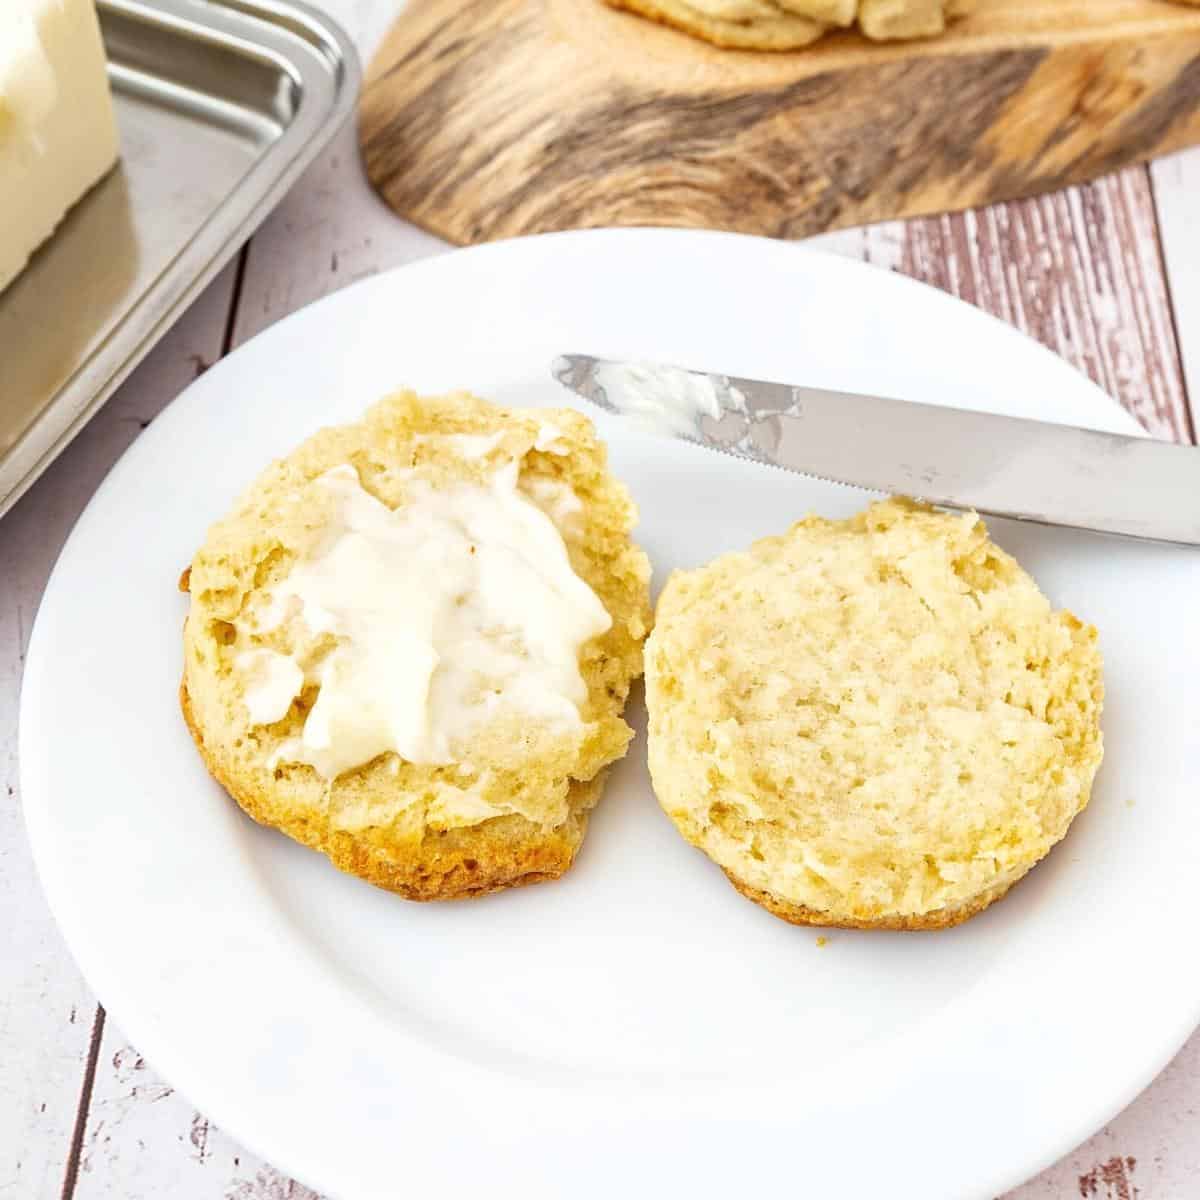
- When serving your biscuits, consider the occasion and the flavors you’ve chosen. A simple split biscuit slathered with butter and jam is a classic choice for a casual breakfast or brunch. If you’re aiming for something more elegant, try layering biscuits with slices of ham, cheese, and a dollop of Dijon mustard for a savory delight.
- But don’t limit yourself to traditional pairings; biscuits open up possibilities. Consider serving them alongside a bowl of homemade soup, using them as a base for mini sliders, or transforming them into the ultimate vessel for a Southern-style biscuit sandwich loaded with crispy fried chicken and tangy pickles.
- Homemade Buttermilk in Five Minutes
- Buttermilk Pancakes
- Recipe for Pumpkin Waffles
- Brioche French Toast
- Easiest Homemade French Toast
- Heart French Toast

Frequently asked questions
Biscuits are best served as soon as they are made fresh. However, biscuit dough can be kept in the fridge for up to 2 days. The dough can also be frozen for up to 3 months. Baked biscuits can be frozen for up to 3 months wrapped in freeze-safe bags. Thaw in the fridge (not counter) for best results.
The key to achieving a flaky texture is to use cold ingredients and handle the dough as little as possible. Ensure your butter or shortening is chilled before cutting it into the dry ingredients. The cold fat creates pockets of steam when it melts in the oven, resulting in flaky layers. Additionally, be gentle when mixing the dough and avoid over-mixing, which can lead to tough biscuits.
1. Follow the recipe correctly. This recipe uses more baking powder, which helps puff these up in the oven.
2. Use cold butter. This will make the biscuits flakier, lighter, and airier. When baking, the butter will create steam between those folds and lift the dough.
3. Use a very hot oven. A hot oven will ensure the butter steams rather than melts between those layers. Keep the biscuits flaky!
To prevent biscuits from spreading too much during baking, chilling the dough before shaping and baking is essential. After cutting out the biscuits, place them on a baking sheet and refrigerate for about 15 minutes. This helps solidify the fats in the dough, ensuring the biscuits hold their shape while baking.
To achieve even browning on your biscuits, brush the tops with a thin layer of melted butter or milk before baking. This helps create a golden crust and enhances the flavor. Additionally, rotate the baking sheet halfway through the baking time, as ovens may have hot spots that can cause uneven browning.
The butter in the biscuits must be cold; if the dough is too soft, place the biscuits in the fridge before baking. Similarly, if the oven is not hot, the butter will melt instead of creating steam between layers. This causes the biscuits to become flat.
Adding too much sugar can make the biscuits softer rather than crumbly. So do not add extra sugar.
Easy Homemade Biscuits
Who doesn't love the smell of freshly baked, homemade biscuits from the oven? If you've ever wondered how to make those delicious, classic biscuits from scratch, you've come to the right place.
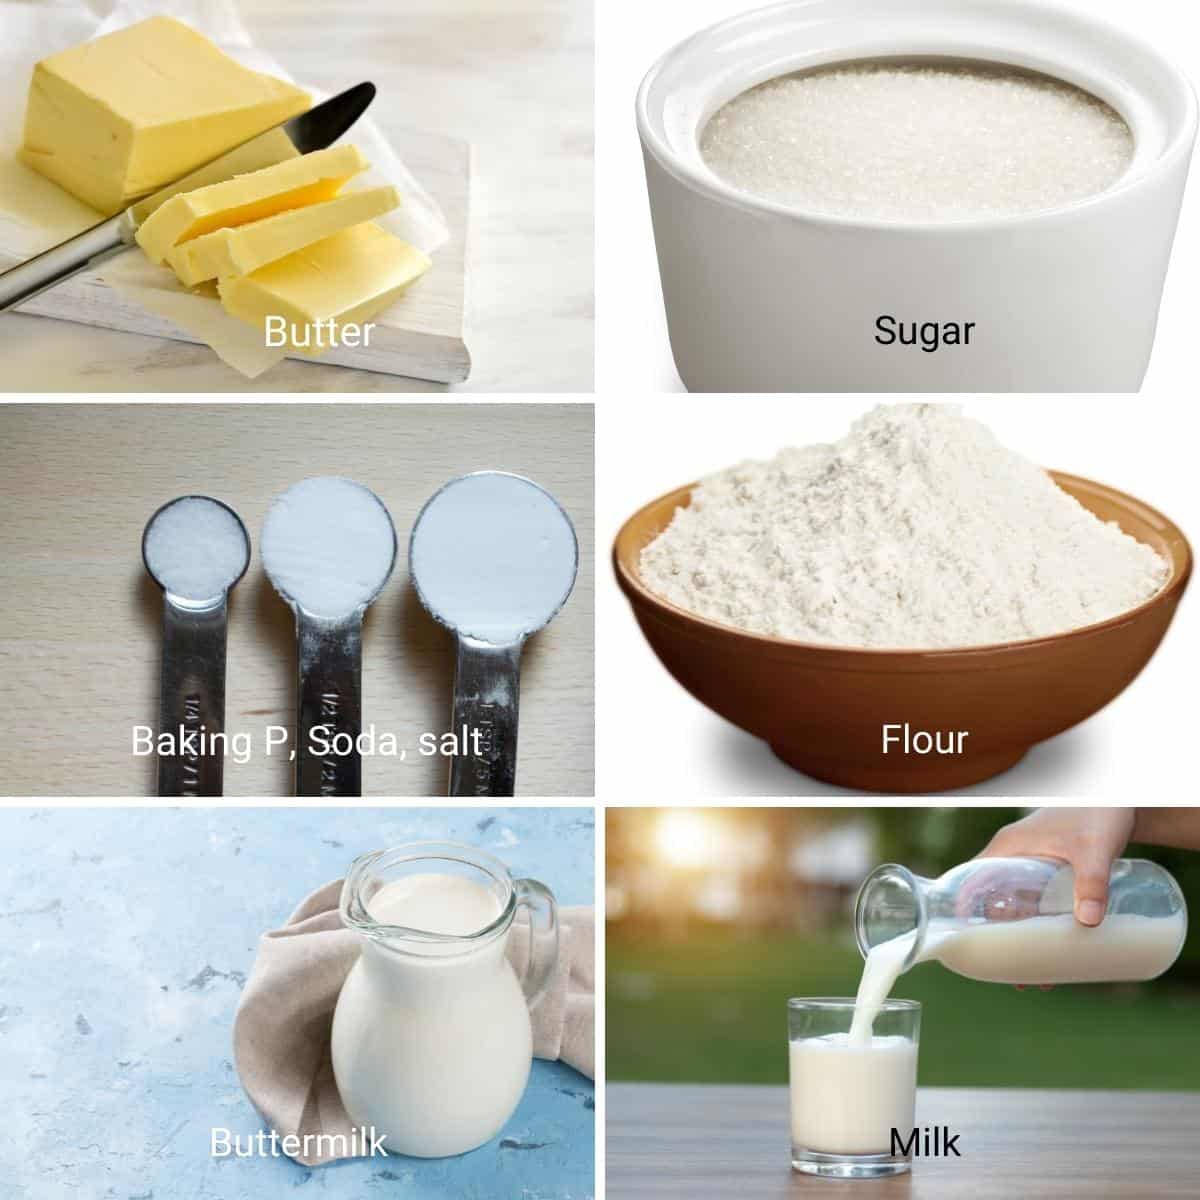
Ingredients
- 2 cups (250 g) All-purpose flour
- 1 tbsp Baking powder
- ¼ tsp Baking soda
- ½ tsp Salt
- 1 tbsp Sugar
- 6 tbsp (90 g) Butter unsalted, chilled, cubed
- 1 large Egg
- ½ cup (120 ml) Milk cold
Method
- Oven – Preheat the oven at 450°F / 230°C Gas Mark 8
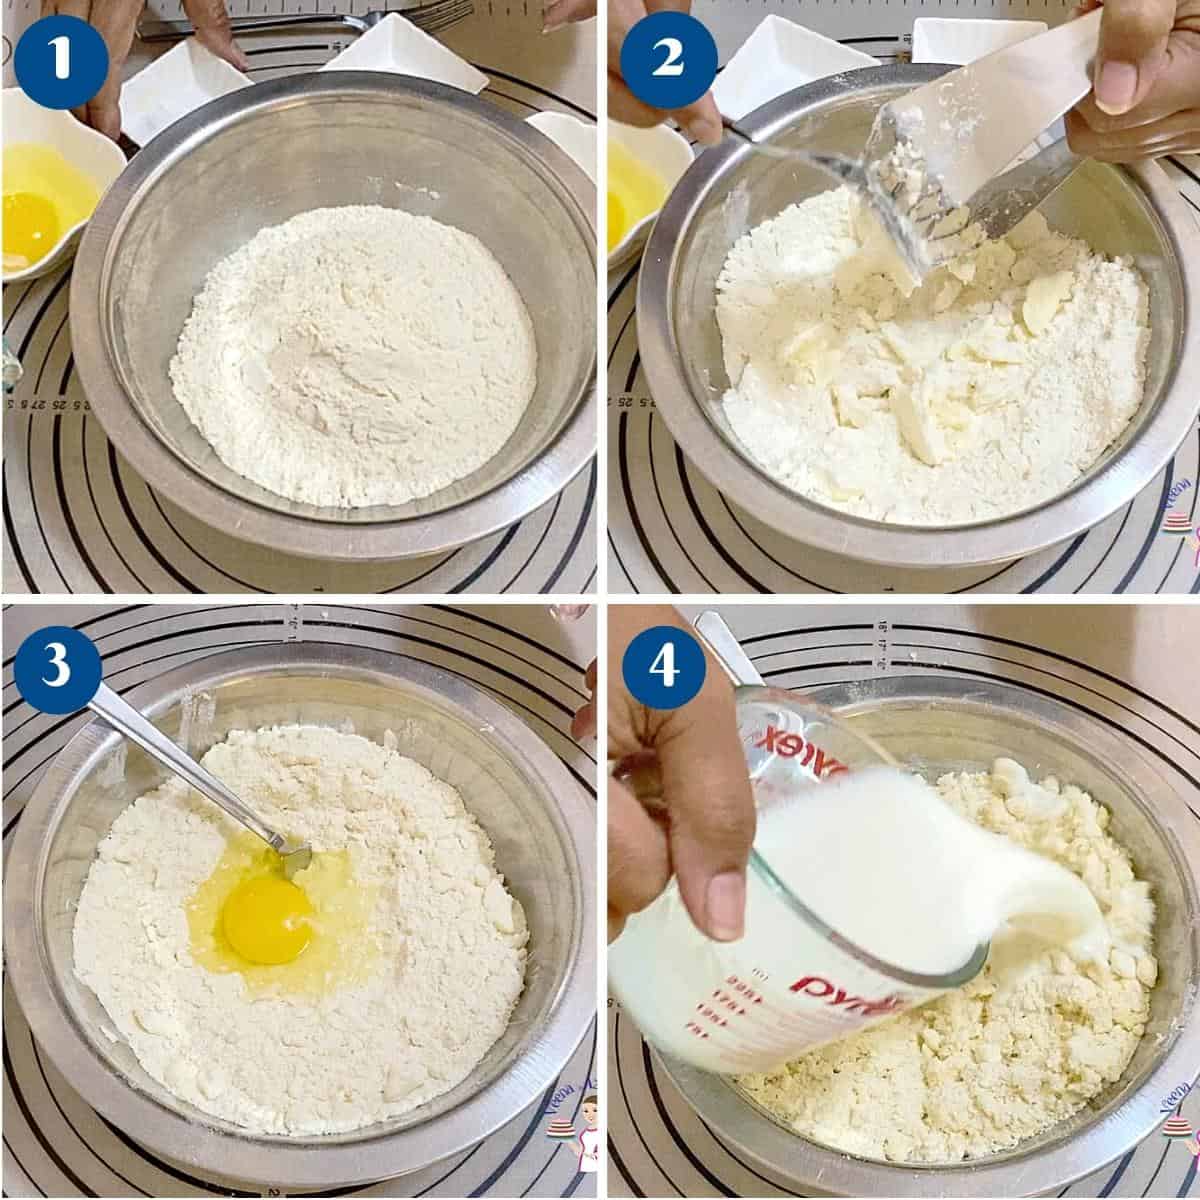
- Combine the flour, baking powder, baking soda, salt, and sugar in a bowl. Then, add the chilled, cubed butter.2 cups All-purpose flour, 1 tbsp Baking powder, ¼ tsp Baking soda, ½ tsp Salt, 1 tbsp Sugar
- Fat – Cut the butter into the flour using a pastry blender or a fork until it resembles a coarse breadcrumb consistency.6 tbsp Butter
- Liquid – Add the egg and combine, but do not overmix. Then, add the milk and mix well with a spoon or spatula. The mixture will still appear dry and crumbly, and that's ok. Bring the dough into a ball and transfer to a lightly floured surface.1 large Egg, ½ cup Milk
- Fold – Using a rolling pin, lightly roll the dough. Fold the dough into thirds, bringing the two sides over the center. Then, fold the top and bottom sides into the middle (see video). It is just like closing a box!! Repeat this once more or twice more to create more folds.
- Cut – Finally, roll the dough again to about a 1/2 to 3/4-inch thickness, and using a 3-inch cookie cutter, cut about 6 to 8 biscuits.
- Finish – Place the biscuits on a parchment or silicone-lined baking tray. Brush the tops of each biscuit with milk.
- Bake for about 15 to 17 minutes until the top is lightly golden. Remove from the oven and cool on a wire rack. Serve with butter on the side.
Notes
- The first tip for baking biscuits like a pro is to handle the dough with care. Once you have mixed the ingredients, it’s crucial not to overwork the dough. Overmixing can lead to tough biscuits instead of the light and fluffy texture we all love. Be gentle and use a light touch when combining the ingredients until they come together.
- The second tip is to make sure you have the right tools. While you don’t need anything fancy, having a good quality biscuit cutter or round cookie cutter will make a difference in achieving those perfectly shaped biscuits. It’s also helpful to have a pastry brush for brushing melted butter or egg wash on top of the biscuits before baking.
- My third important tip is that you DO NOT knead the dough. Stack and fold before you cut. If the butter gets soft to handle, chill the dough in the fridge for a few minutes, then continue to stack and fold before you cut.
- Next, paying attention to your baking temperature and time is essential. Biscuits require a hot oven to rise properly and develop that golden, crispy exterior. Preheat your oven to the recommended temperature stated in your recipe, and make sure it reaches that temperature before placing your biscuits in. Also, keep a close eye on the baking time, as overcooking can result in dry biscuits.
- Lastly, remember the finishing touches. Brushing milk or melted butter on top of your biscuits as soon as they come out of the oven will give them a beautiful sheen and enhance their flavor. You can also sprinkle some flaky sea salt or herbs on top for an extra touch of deliciousness.
Equipment you will need


Nutrition
Tried this recipe?
Mention @veenaazmanov_kitchen or tag #veenaazmanovkitchen!Don’t lose this recipe! Save it for Later!
📌 Save this Recipe for later on Pinterest so you can easily find it again.
⭐ Add Veena Azmanov Kitchen to your Google Preferred Sources.
It helps Google show you more of our recipes.
📧 Subscribe for new recipes delivered to your inbox.
🎥 Follow us for more recipes


Most important step: USE THAT PARCHMENT PAPER! I got lazy and used greased cookie sheets. The biscuits didn’t stick, but they all got burnt on the bottom.
These biscuits were delicious! So flaky and buttery. One of our go to’s now, thank you!!!
Thank you, Sam. Happy to hear that.
These biscuits were delicious! So flaky and buttery. One of our go to’s now, thank you!
Thank you so much Sam.
Lovely biscuits! Look so nice and crisp, just the way we like them! Would make a great addition to our dinner tonight!
Thanks Petro. I hope you try these
These look perfect for some butter and honey!
Absolutely, Michelle
Where does the egg go? I’ve read the instructions 3 times but it doesn’t mention the egg?
The egg goes in just before the milk, Tiffany. Thanks
Thank you for sharing this recipe. Can I add more butter if I want to have a strong butter taste and I want my scones to be very moist. What is the maximum amount of butter can I put?
You can add about 3 tbsp or 50 grams more butter. Too much butter will not just make it more flaky or buttery but also greasy. So be careful
I love making homemade anything, so much better than store bought! So excited to make these!
Absolutely, Beth.
These biscuits came out nice and flaky. I love the tip about grating the butter. Thanks!
Thanks, Angela. Happy you enjoyed these.
A really easy recipe to follow. Thanks for the step by step instruction photo’s.
You are welcome Beth.