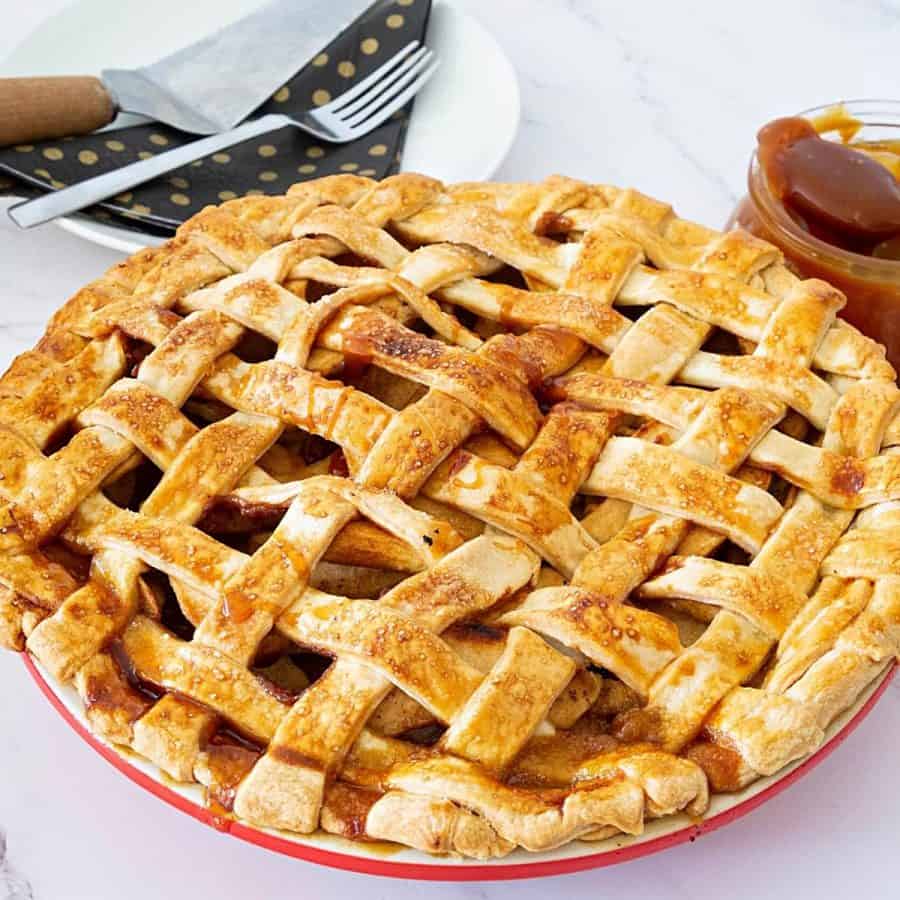
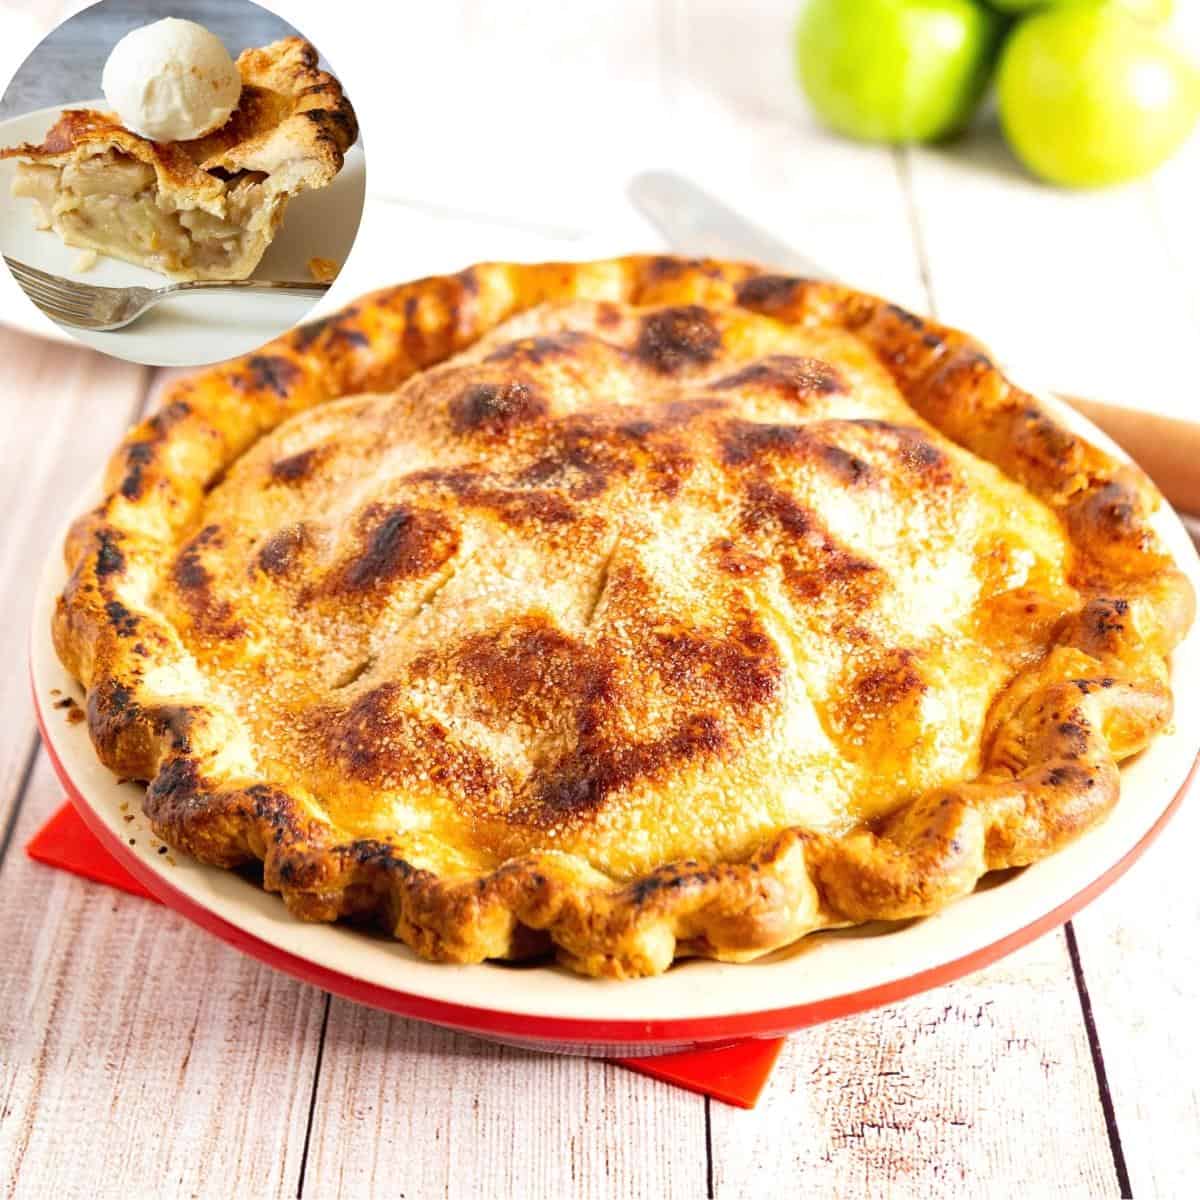
Best Homemade Apple Pie


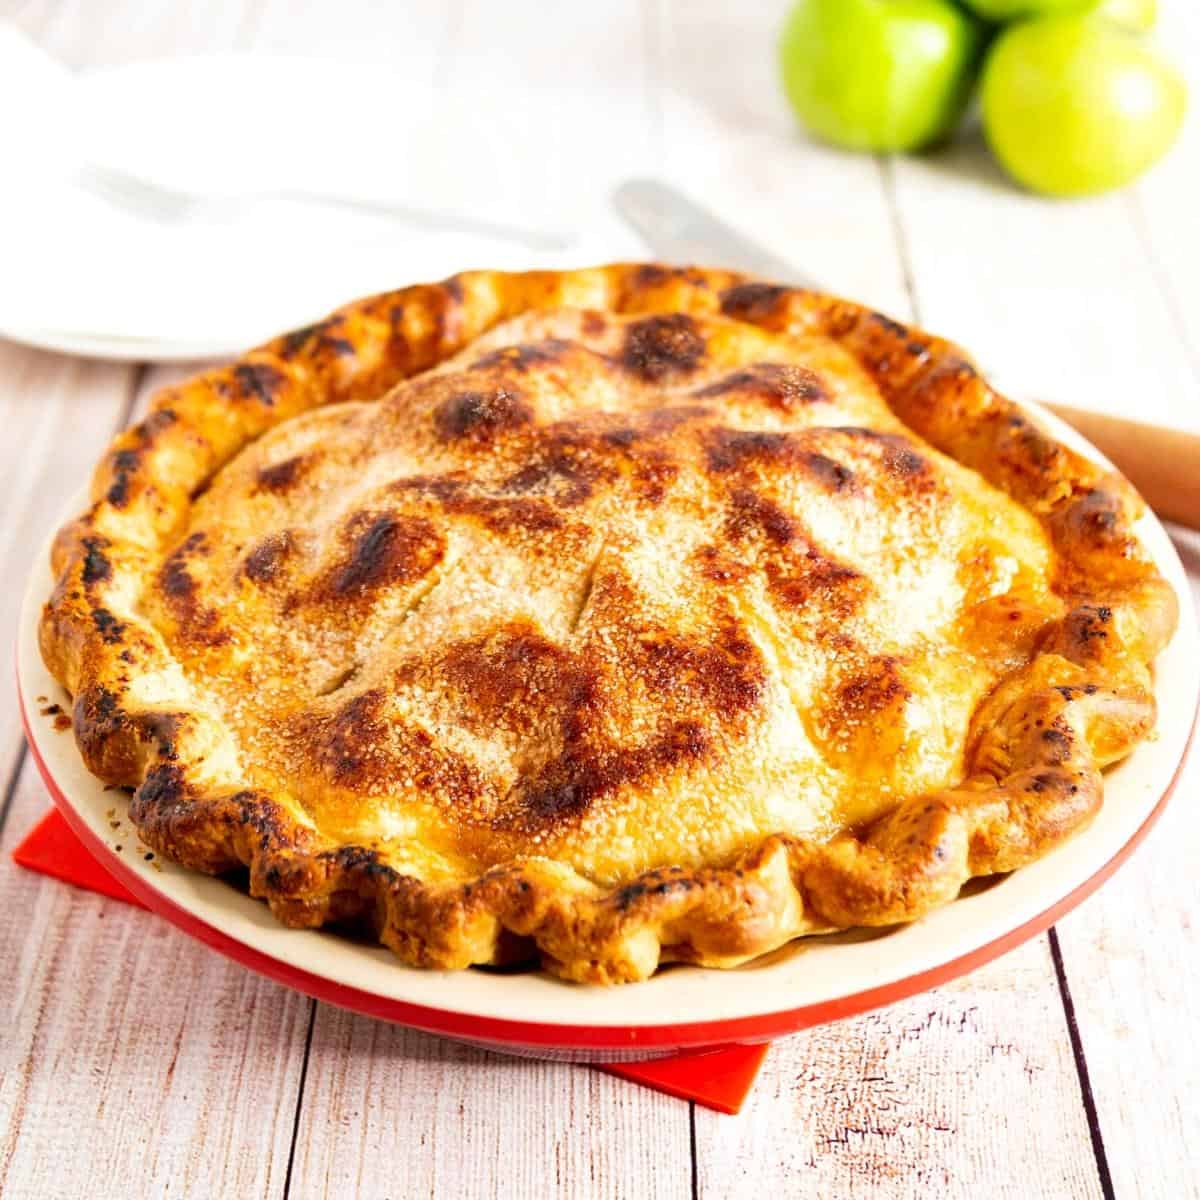
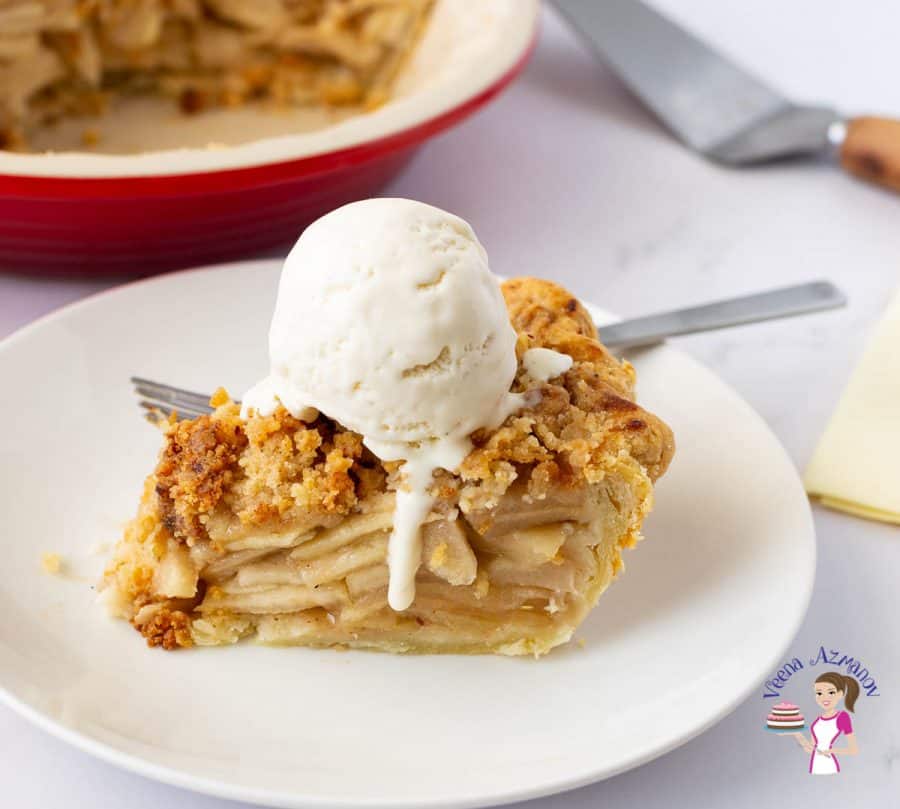
There’s nothing like a homemade apple pie cooling on the counter — golden, buttery crust, cinnamon-spiced apples, and that first warm slice with a scoop of vanilla ice cream.
This recipe keeps it simple: a flaky double crust, a sweet-tart apple filling, and five straightforward steps. Whether it’s Thanksgiving, a weekend bake, or just a craving, this pie delivers perfect slices every time.
I learned how to make apple pie from my mom — and she had a gift for it. Her pies were always flawless. No soggy bottoms, no slices swimming in a pool of apple juice. Just perfect, every single time.
I used to watch her, wondering how she pulled it off, and I knew I had to learn her secrets. Partly because I love baking… but mostly because I’ve always loved that moment when people take a bite, pause, and say, “Wow… this is amazing.”
So I practiced, learned from the best, and now I get to share it with you — my mom’s perfect apple pie recipe. And yes, you’ll notice… not a single pool of juice at the bottom of the pan.
Why You’ll Love This Recipe
- Perfect balance of flavors — tart Granny Smith with sweet Honeycrisp.
- Flaky double crust that holds its shape without getting soggy.
- Juicy, tender apples that aren’t mushy.
- Make ahead friendly — prep the crust days in advance.
- Classic comfort dessert that never goes out of style.
Best Apples for Apple Pie
The secret to a balanced filling is mixing apple varieties.
- Granny Smith – firm, tart, and reliable in baking.
- Honeycrisp – sweet, crisp, and juicy.
- Other options: Braeburn, Fuji, Pink Lady.
Using two or more types gives flavor depth and prevents a one-note sweetness.
Ingredients and substitutes
- Pie crust:
- All-purpose flour – creates structure without heaviness.
- Butter – unsalted, chilled; gives flaky texture. For dairy-free, use vegetable shortening or vegan butter.
- Salt – enhances flavor.
- Ice water – keeps the butter from melting before baking.
- Apple filling:
- Apples – see varieties above.
- Brown sugar – adds caramel notes.
- White sugar – balances sweetness.
- Lemon juice – brightens flavor and prevents browning.
- Cinnamon, nutmeg, ginger, allspice – classic warm spices; adjust to taste.
- All-purpose flour – thickens juices. Cornstarch or tapioca flour also work.
- Butter – dotted over filling for richness.
- Finish:
- Egg wash – for golden color.
- Sugar sprinkle – optional, adds crunch

Step-by-step: Easy Homemade Apple Pie in 5 Simple Steps
Step 1 – Make the pie crust
In a food processor, pulse flour, salt, and butter until crumbly. Add ice water and pulse until just combined (crumbly but holds together when pressed).
Divide into two discs (one slightly larger), wrap, and chill for 1 hour or up to 3 days.
Tip: Keep butter pieces visible in the dough — that’s what makes it flaky.

Step 2 – Prepare the pie base
Roll out the larger disc to fit a 9-inch pie pan, leaving 1 inch overhang.
Gently fit into the pan without stretching the dough. Chill while making the filling.

Step 3 – Make the apple filling
Preheat oven to 400°F / 200°C.
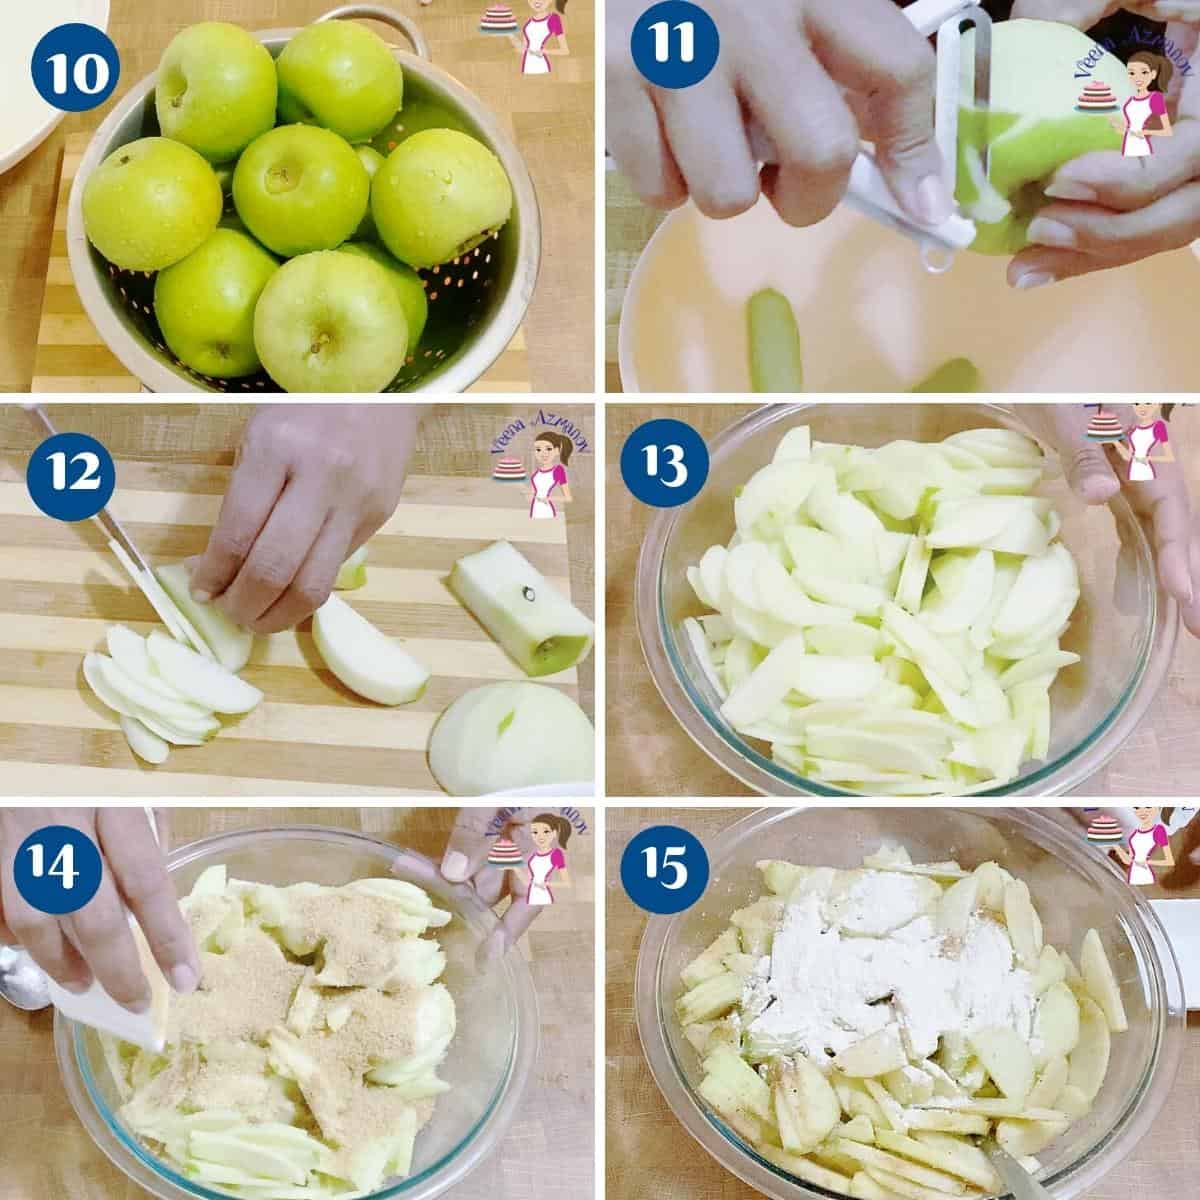
Peel, core, and slice apples about 1/8 inch thick. Toss with lemon juice, sugars, spices, salt, and flour.
Tip: Make filling right before baking so the apples don’t release too much juice.
Step 4 – Assemble the pie
Pile the apple mixture into the crust — mound it slightly in the center. Dot with butter.
Roll out the second disc for the top crust. Place over filling, trim to 1 inch, fold under, and crimp edges.
Brush with egg wash, sprinkle sugar, and cut 6–8 steam slits.

Step 5 – Bake
Place pie on a baking tray to catch drips.
Bake 15 minutes at 400°F / 200°C, then reduce to 350°F / 177°C and bake 35–40 minutes, covering edges if they brown too quickly.
Cool at least 3 hours before slicing.

Storage & Make Ahead
- Fridge: Store covered for up to 4 days.
- Freezer: Wrap well and freeze up to 3 months. Thaw overnight in fridge before serving.
- Make ahead: Crust can be made 3 days ahead or frozen; filling should be made fresh.

Tips for Success
- Keep dough cold at all times.
- Use a mix of tart and sweet apples for depth.
- Start with high heat to set crust, then lower to finish baking.
- Let pie rest — juices thicken as it cools.
Troubleshooting
| Problem | Possible Cause | Solution |
|---|---|---|
| Soggy bottom crust | Filling sat too long before baking | Make filling just before assembling |
| Runny filling | Not enough thickener or underbaking | Use proper flour/cornstarch ratio; bake fully |
| Overbrowned edges | High heat too long | Cover edges with foil or pie shield |
| Crust breaking | Dough too cold or too warm | Let rest 5–10 min before rolling if too hard; chill if too soft |


Frequently asked questions
This pie will keep at room temperature for about 2 days. You can also keep it in the fridge for up to a week if wrapped well.
Yes, but homemade gives the best flavor and texture.
All-purpose flour works well; cornstarch or tapioca flour give a clearer filling.
Yes — try a lattice or crumble topping instead.
You want a moist apple pie with slices of apples, not apple sauce. Of course, that means that you want to use nice juicy apples. Some apples, like MacIntosh apples, become mushy when cooked and turn into apple sauce. Granny Smith apples stay firm even after they have been cooked. The added advantage of Granny Smith is that they are sour and work best to cut into the sugar. So use nice, firm apples.
To prevent a messy overflow, leave some room for expansion when filling the pie with apples. You can also place a baking sheet underneath the pie to catch any drips. Additionally, using a lattice crust or cutting a few slits in the top crust allows steam to escape, reducing the chances of bubbling over.
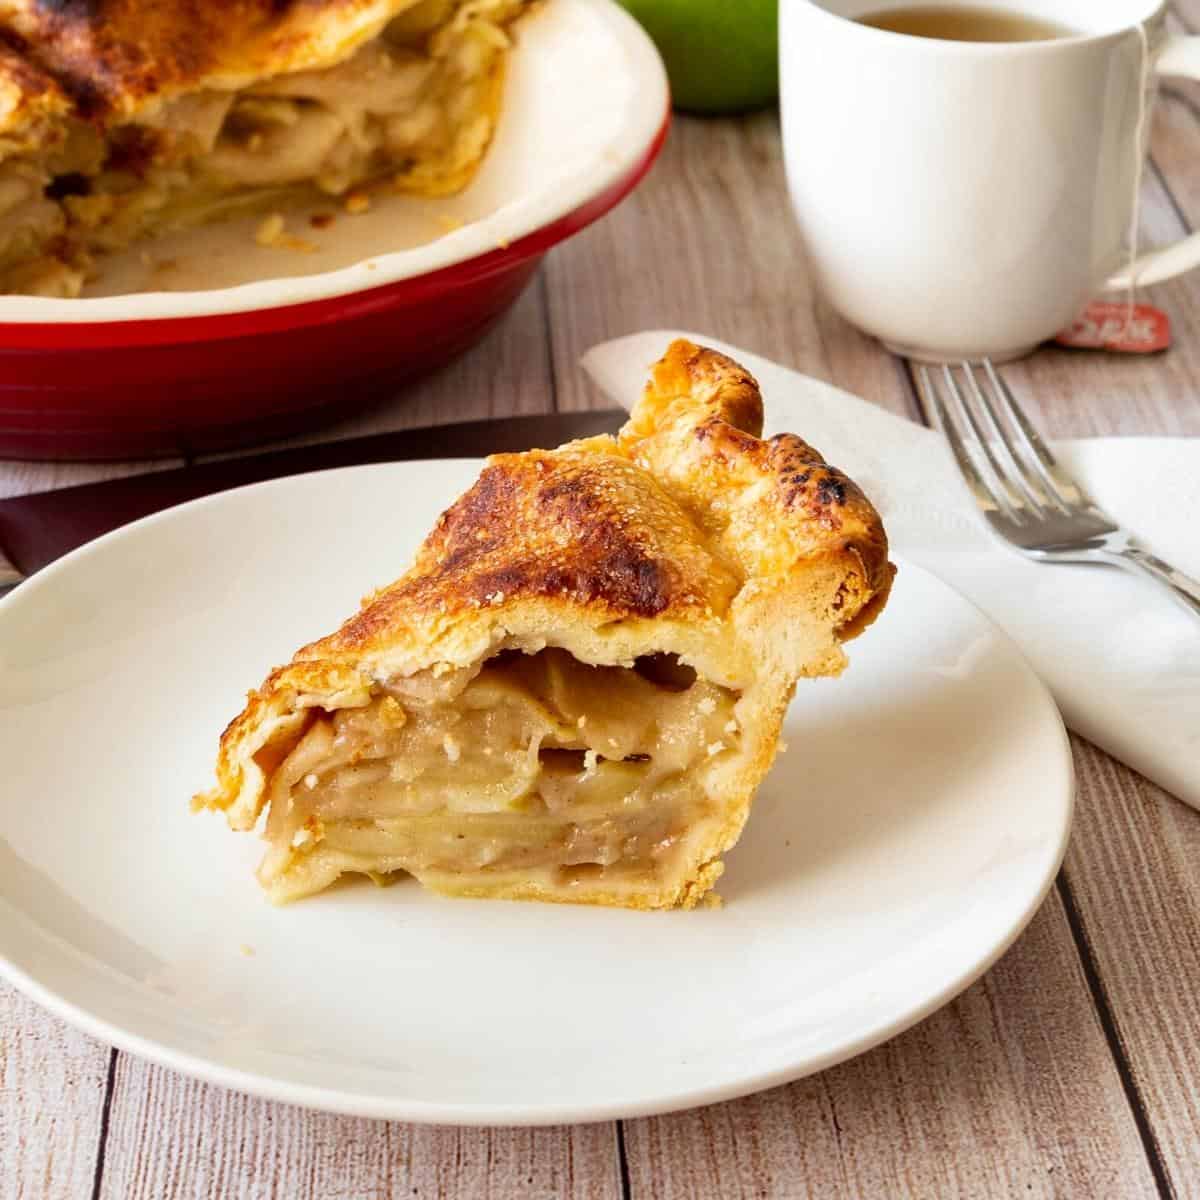
The secret is to let the juices have time to settle where they are.
If you cut into the pie while it’s hot, those juices will flow to the bottom of the pie, and you will have a big pool of juices at the bottom. If you cut it warm, you will have fewer juices at the bottom, and if you cut it at room temperature, you will have no juices. In fact, I recommend making the pie a day ahead of time.
How to Make Apple Pie
Are you tired of settling for mediocre apple pies from the store? The kind that looks promising but disappoints? Well, it's time to take matters into your own hands. By following these five easy steps, you can make the best apple pie that surpasses any store-bought version. Treat yourself and your loved ones to the ultimate comfort dessert with this flavorful homemade recipe from scratch.
Video
Ingredients
- 3 cups (375 g) All-purpose four
- 1 cup (227 g) Butter unsalted, chilled, cubed
- ½ tsp Salt
- 6 tbsp (90 ml) Water chilled
- 2½ lb (1 kg) Apples – Granny Smith or Braeburn & Honeycrisp or Fuji apples (or combination) Peeled, cored, and sliced
- ½ cup (110 g) Brown sugar
- ¼ cup (50 g) White sugar
- 2 tbsp Lemon juice
- 1 – 2 tsp Cinnamon Powder I used 1 tsp
- ¼ tsp Ground ginger
- ¼ tsp Nutmeg fresh grated
- ¼ tsp Allspice (optional)
- ¼ tsp Salt
- 3 tbsp (60 g) Cornstarch or tapioca flour
- 2 tbsp (30 g) Butter unsalted – chilled and cubed
- 1 Egg white for egg wash
- 2 tbsp Water for egg wash
- 2 tbsp Sugar for sprinkling (optional)
Method
- Step 1 – Make the pie crust – In a food processor, pulse flour, salt, and butter until crumbly. Add ice water and pulse until just combined (crumbly but holds together when pressed). Divide into two discs (one slightly larger), wrap, and chill for 1 hour or up to 3 days. Tip: Keep butter pieces visible in the dough — that’s what makes it flaky.3 cups All-purpose four, 1 cup Butter, ½ tsp Salt, 6 tbsp Water
- Step 2 – Prepare the pie base – Roll out the larger disc to fit a 9-inch pie pan, leaving 1 inch overhang. Gently fit into the pan without stretching the dough. Chill while making the filling.
- Step 3 – Make the apple filling – Preheat oven to 400°F / 200°C. Peel, core, and slice apples about 1/8 inch thick. Toss with lemon juice, sugars, spices, salt, and cornstarch. Tip: Make filling right before baking so the apples don’t release too much juice.2½ lb Apples – Granny Smith or Braeburn & Honeycrisp or Fuji apples, ½ cup Brown sugar, ¼ cup White sugar, 2 tbsp Lemon juice, 1 – 2 tsp Cinnamon Powder, ¼ tsp Ground ginger, ¼ tsp Nutmeg , ¼ tsp Allspice, ¼ tsp Salt, 3 tbsp Cornstarch, 2 tbsp Butter
- Step 4 – Assemble the pie -Pile the apple mixture into the crust — mound it slightly in the center. Dot with butter. Roll out the second disc for the top crust. Place over filling, trim to 1 inch, fold under, and crimp edges. Brush with egg wash, sprinkle sugar, and cut 6–8 steam slits.1 Egg white, 2 tbsp Water, 2 tbsp Sugar
- Step 5 – Bake – Place pie on a baking tray to catch drips. Bake 15 minutes at 400°F / 200°C, then reduce to 350°F / 177°C and bake 35–40 minutes, covering edges if they brown too quickly. Cool at least 3 hours before slicing.
Notes
Tips for Success
- Keep dough cold at all times.
- Use a mix of tart and sweet apples for depth.
- Start with high heat to set crust, then lower to finish baking.
- Let pie rest — juices thicken as it cools.
Equipment you will need


Nutrition
Tried this recipe?
Mention @veenaazmanov_kitchen or tag #veenaazmanovkitchen!- Caramel Apple Pie
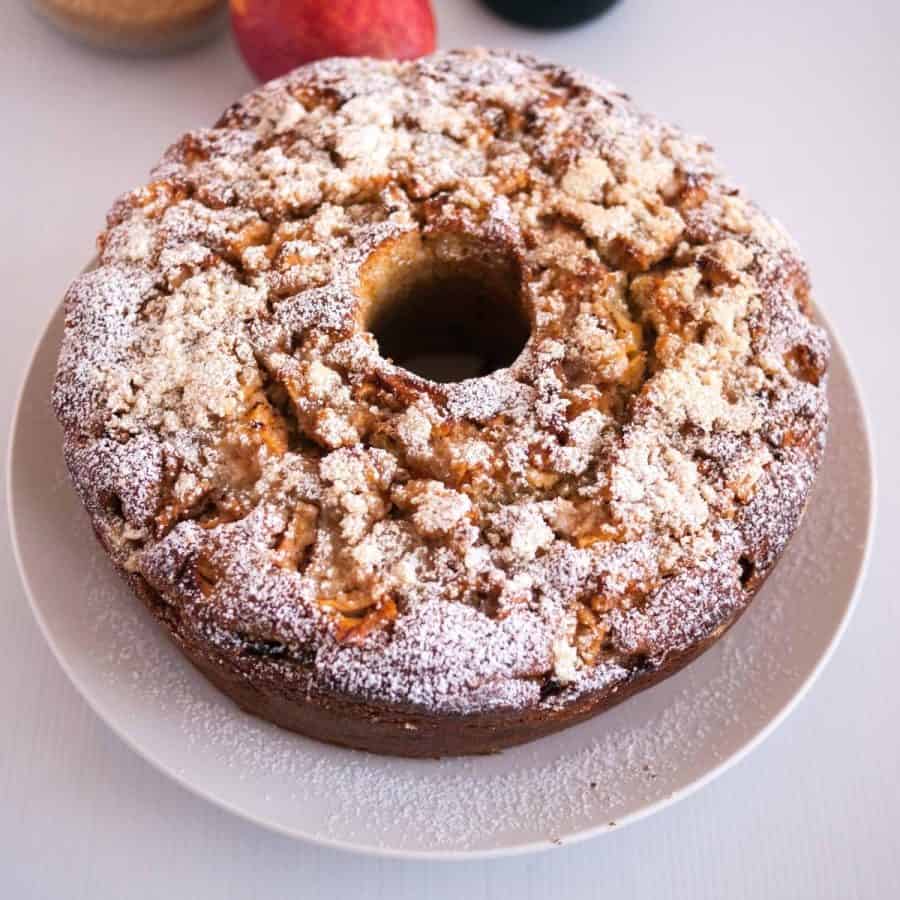
- Apple Crumble Tart
- Apple Strudel with Puff Pastry
- Apple Pie Bars with Crumble
- Maple Pumpkin Pie Recipe Flaky Homemade Crust
Don’t lose this recipe! Save it for Later!
📌 Save this Recipe for later on Pinterest so you can easily find it again.
⭐ Add Veena Azmanov Kitchen to your Google Preferred Sources.
It helps Google show you more of our recipes.
📧 Subscribe for new recipes delivered to your inbox.
🎥 Follow us for more recipes


very very informative recipe. mom in da old days very old days always used Granny Smith plus a McIntosh apple.
Veena, I make mine almost the same way but use Spy Apples, very much like GS apples but maybe more tart, make the best apple pies ever Gram always told me, Great Recipe, and one of my favorite pies ever. Apple orchard is only 500 meters from my house , so easy to get them now.
Stony
Best apple pie tutorial ever, Veena! You nailed it! I made your recipe, and it was simply perfect!
Thank you, Enriqueta. I am so happy to hear your feedback. So glad you enjoyed this pie.
Must be apple season, because I have so many I don’t know what to do with them. Love this classical apple pie recipe, keeping this for years to come.
A must make recipe! This came out perfectly and all of the tips were so helpful.
Thank you for the lovely feedback, Tristin. Happy you enjoyed this pie.