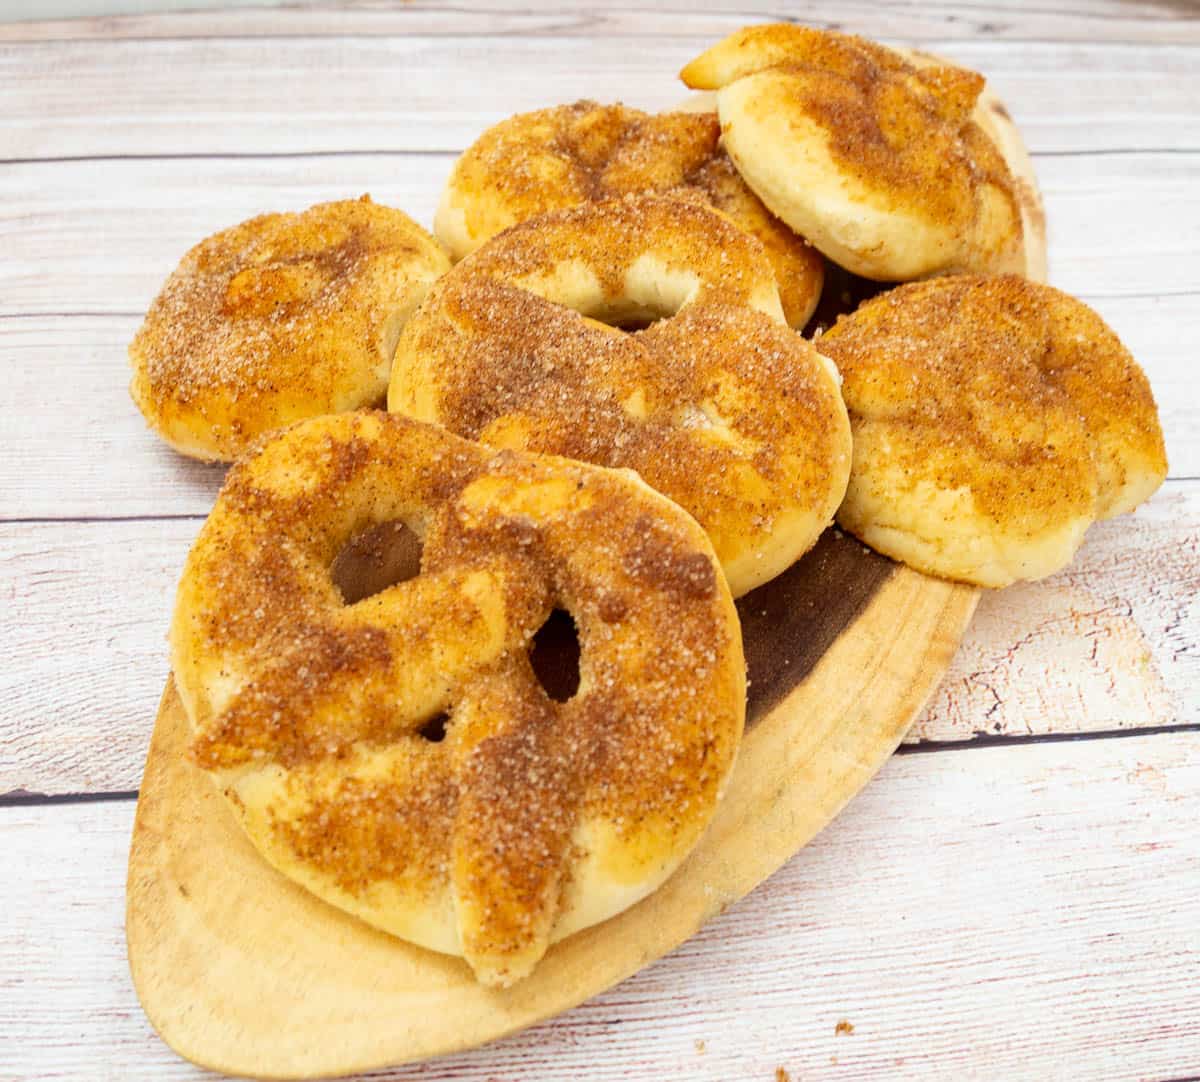
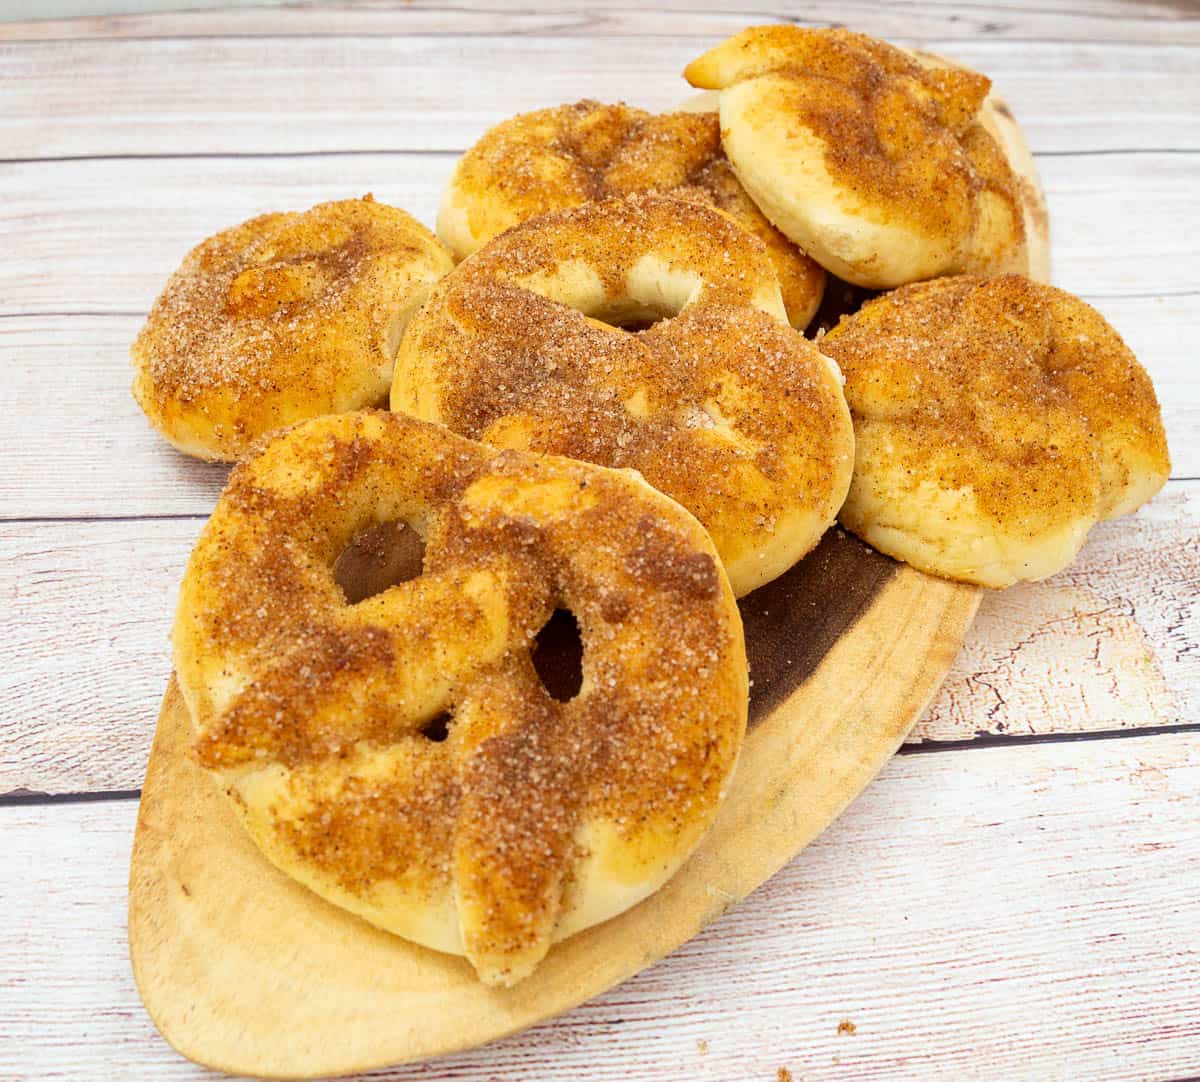
Cinnamon Sugar Pretzels


Give your classic pretzels a whole new look. These cinnamon sugar pretzels are soft, chewy, and messy. Loaded with cinnamon and sugar, they are boiled in water before baking.
About this recipe
If you’ve tried my no-fail pretzels recipe, then you are going to love this one too. It’s based on the same recipe but coated with cinnamon and sugar.
And, the possible toppings for homemade pretzels are endless. Sesame seeds, poppy seeds, pumpkin seeds, sunflower seeds, or zaatar, which is a Middle Eastern herb. But today we make them sweet, coated with cinnamon sugar. And, kids are going to LOVE these. You can also make these with my whole wheat pretzel recipes.
The actual active time for making these is only about 30 minutes, but the in-between time can be from an hour to overnight.
- Prepare the dough – 10 minutes
- Let the dough rise – 1 hour (up to overnight in the fridge)
- Shape – 10 minutes
- Proof – 30 minutes
- Poach – 10 minutes
- Bake – 15 minutes
- Coat – 5 mins

Ingredients and substitutes
- Flour – I like using bread flour for these pretzels. It gives a soft chew bread with a tender crust. But, for years, I have made this with all-purpose flour, and it also works wonderfully. So, use either bread or all-purpose flour.
- Water – As I said above, traditionally, pretzels are made with water, and yet the same amount of milk works just as well.
- Instant dry yeast – I like to use instant dry because I’ve always had great success with it. If you have to use active dry yeast, you will need 2 1/4 tsp or one packet. And, if you use fresh yeast, you will need about 21 grams. Also, it’s not necessary to activate the yeast, but I like to take the guesswork out and make sure my dough will rise.
- Oil – You can use any oil, but I like to use olive oil. And, coconut oil also works wonderfully.
- Sugar – The sugar here is not really to add sweetness, but you can add up to 1/2 cup of sugar to make sweet pretzels. And, if you prefer, you can substitute sugar with one tablespoon of honey.
The sugar and oil in the recipe help feed the yeast. Just as you need warm liquid to activate the yeast, you need sugar and fat to strengthen it and let it grow.
Step-by-step instructions
For the dough
- In the stand mixer bowl, combine flour and salt.
Pro tip – We add salt to the flour, not the yeast mixture. Salt can slow the process of yeast fermentation. - In a measuring cup, combine water, yeast, sugar, and oil.
Pro tip – You can add all these to the flour mixture directly, but I like to ensure everything is well combined first. - Then, add the yeast mixture to the flour mixture. Run the mixer on medium-high until all the flour is incorporated.
- Continue to knead for 3 minutes more at medium speed. The dough will be soft, slightly sticky, but elastic.
Pro tip – If you are doing this by hand, you will need to knead for about 5 to 6 minutes. - Transfer to a floured work surface and shape into a ball. Place in an oiled bowl – cover and let rise for 60 minutes or until doubled in volume.
Pro tip – If you want to slow the process of rising, place the bowl in a warm (switched-off) oven. Alternatively, you can slow the process of rising by leaving it in the fridge to slowly rise overnight.
Shape the pretzels
- Once doubled, transfer to a floured work surface.
- Divide the dough into two portions, then each portion into 6 (this makes 12 pretzels). See video.
Pro tip – This is just a guide; you may choose to make smaller or bigger pretzels. Divide the dough into fewer or more portions. - To shape the pretzel, roll each piece of dough into a long rope with pointed ends about 25 to 27 inches long (see video).
Pro tip – I like to do all the ropes to about 10 to 15 cm, then go and roll them again. Letting them rest in between helps the gluten relax, and the dough won’t resist.
- Shaping the pretzels
- Bring the two ends towards each other to make a circle on the top (see video).
- Then, twist the two ends and bring them back to the bottom of the circle towards you (see video).
- Press the ends of the dough to form the classic pretzel shape.
- Place all the pretzels on a flour baking tray. Cover and leave to proof for 30 minutes.
Water bath and bake
- Preheat the oven to 190 °C / 375°F.
- Bring the water and salt to a boil in a wide sauté pan. Then, add the baking soda. The water will start to bubble, and that’s normal.
- Boil each pretzel in the boiling water for 30 seconds, turning once in between. Remove with a slotted spoon and transfer to a baking tray.
Pro tip – The longer you poach, the more chewy the crust will be on these pretzels. I suggest no more than 30 seconds. - Wipe the baking tray of any excess moisture. Brush each pretzel with a beaten egg.
Pro tip – The excess moisture on the baking tray will create steam, which will bake a crispy crust. If you want a soft crust, wipe it dry.
- Bake the pretzels for 12 to 15 minutes until golden on top. Transfer to a cooling rack.
- While the pretzels are still warm, brush with melted butter and sprinkle generously with cinnamon sugar.
- Enjoy!
Frequently asked questions
Pretzels can be kept at room temperature for three days if well wrapped. Baked pretzels also freeze well for up to 3 months.
You can place the frozen pretzels in the microwave at 30-second intervals until warm. Alternatively, brush the pretzels with water, then bake for 20 minutes at 190 °C / 350°F. The water helps keep the crust soft.
Yes, you can make the pretzel dough up to 24 hours in advance. You can shape the pretzels with the chilled dough, but then prove them until they are at room temperature before you poach them.
Perhaps not, as the sugar might burn on the pretzels.
Cinnamon Sugar Pretzels
Give your classic pretzels a whole new look. These cinnamon sugar pretzels are soft, chewy, and messy. Loaded with cinnamon and sugar, they are boiled in water before baking.
Video
Ingredients
- 4 cups (500 g) All-purpose flour
- 1 ½ cup (360 ml) Water (1 1/2 cup) warm 110F /45C
- 2 ¼ tsp (7 g) Instant dry yeast
- 1 tsp Salt
- 1 tbsp Sugar
- 2 tbsp Oil
- 6 cups (1.5 liter) Water
- 6 tbsp (70 g) Baking soda
- ½ tsp Salt
- ½ Beaten egg
- 2 tsp Cinnamon powder
- ½ cup (110 g) Brown sugar
- 4 tbsp (60 g) Butter melted
Method
- In the stand mixer bowl, combine flour and salt.
- In a measuring cup, combine water, yeast, sugar, and oil.
- Then, add the yeast mixture to the flour mixture. Run the mixer on medium-high until all the flour is incorporated.
- Continue to knead for 3 minutes more at medium speed. The dough will be soft, slightly sticky, but elastic.
- Transfer to a floured work surface and shape into a ball. Place in an oiled bowl – cover and let rise for 60 minutes or until doubled in volume.
- Once doubled, transfer to a floured work surface.
- Divide the dough into 2, then each portion into 6 (this makes 12 pretzels). See video.
- To shape the pretzel, roll each piece of dough into a long rope with pointed ends about 25 to 27 inches long (see video).
- Shaping the pretzelsBring the two ends towards each other to make a circle on the top (see video). Then, twist the two ends and bring them back to the bottom of the circle towards you (see video). Press the ends of the dough to form the classic pretzel shape.
- Place all the pretzels on a flour baking tray. Cover and leave to proof for 30 minutes.
- Preheat the oven to 190 °C / 375°F.
- Bring the water and salt to a boil in a wide sauté pan. Add the baking soda. The water will start to bubble, and that's normal.
- Boil each pretzel in the boiling water for 30 seconds, turning once in between. Remove with a slotted spoon and transfer to a baking tray.
- Wipe the baking tray of any excess moisture. Brush each pretzel with a beaten egg.
- Bake the pretzels for 12 to 15 minutes until golden on top. Transfer to a cooling rack.
- While the pretzels are still warm, brush with melted butter and sprinkle generously with cinnamon sugar.
- Enjoy!
Notes
8 Tips for making the perfect pretzel every single time.
- I use all-purpose flour, which works better than bread flour. Easier to handle, too.
- If you want the dough to rise quicker than 60 minutes, place the bowl in a warm oven with the light on. This usually takes only 30 minutes for me.
- Let the pretzels proof for 30 minutes before you poach them in baking soda. These will ensure the inside is wonderfully light.
- The poaching liquid must be boiling when you add the pretzels. Adding salt to the baking soda helps it come to a rolling boil.
- The pretzels must float on the water, not sink. If they sink, it means the water is not hot enough. It’s best to wait.
- Wipe all excess moisture from the baking pan. This moisture can create steam in the oven when baking. The steam causes the crust to become hard.
- Brush the pretzels with egg wash – this will help the toppings stick.
- Browning – too much or not enough. You can tent the pretzels to prevent them from getting too brown.
Alternatively, if your oven is hot and the pretzels tend to become darker before they are baked, next time use only beaten egg white to brush the pretzels. Similarly, if your pretzels are not getting brown enough, you can use only beaten egg yolks to brush.
Make-ahead instructions
- You can prepare the dough a day ahead of time. Keeping pretzel dough overnight enhances its flavor. Bring it to room temperature before you shape and water bath it.
- Pretzel dough can be frozen for up to a month in the freezer.
- Baked pretzels will keep in the freezer for up to 3 months
- To reheat pretzels, bake frozen pretzels for 20 minutes at 170 °C/340°F.
Bread machine
Pretzel dough can be easily made in a bread machine. Pour all ingredients into the pan set to dough or manual. Start and let the dough run its cycle for about 9 to 10 minutes – continue with the recipe as shown above.Equipment you will need


Nutrition
Tried this recipe?
Mention @veenaazmanov_kitchen or tag #veenaazmanovkitchen!Don’t lose this recipe! Save it for Later!
📌 Save this Recipe for later on Pinterest so you can easily find it again.
⭐ Add Veena Azmanov Kitchen to your Google Preferred Sources.
It helps Google show you more of our recipes.
📧 Subscribe for new recipes delivered to your inbox.
🎥 Follow us for more recipes

Anything with cinnamon is good with me. These pretzels look incredible.
These pretzels were delicious! My whole family loved them, I’m sure I will be making them often.
Thank you, Michelle.