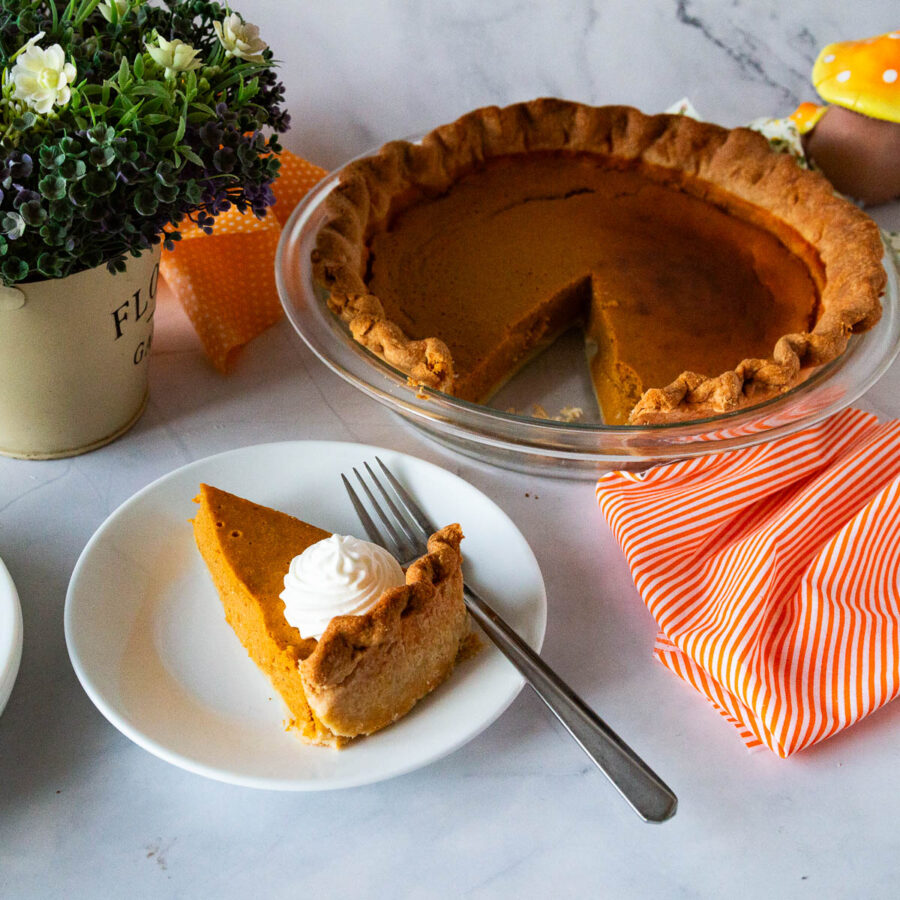
Flaky Pie Crust with Shortening


Pie crust shortening is known for its tender, flaky texture, perfect for sweet and savory pies. Shortening’s high fat content prevents gluten formation, resulting in a consistently tender dough. Shortening’s high melting point makes the dough easy to handle and less prone to shrinkage during baking.

Pie crust is the foundation of many beloved desserts and savory dishes, celebrated for its flaky, tender texture and buttery flavor. It’s the perfect vessel for a wide range of pie fillings, from sweet fruits and rich custards to savory meats and vegetables. The popularity of pie crust lies in its versatility and the comforting, nostalgic feelings it evokes—every bite of a well-made pie recipe is a trip down memory lane.
When it comes to making pie crust, the choice between butter and shortening can significantly impact the final product.
- Butter: Butter is prized for its rich flavor and ability to create exceptionally flaky layers. The water content in butter evaporates during baking, creating steam that puffs up the dough, resulting in a light, airy texture. However, butter can be challenging to work with as it softens quickly, making the dough more difficult to handle, especially in warm kitchens.
- Shortening: Shortening, on the other hand, is all about ease and consistency. It has a higher melting point than butter, making the dough more manageable and less likely to melt or become sticky. Shortening yields an incredibly tender crust due to its 100% fat content, which coats the flour particles and inhibits gluten formation. While it lacks the distinct flavor of butter, it produces a reliably tender and flaky crust.
Many bakers opt for a combination of butter and shortening to harness the best qualities of both fats. The butter provides flavor and flakiness, while the shortening ensures tenderness and ease of handling. This hybrid approach often results in a pie crust that is both flavorful and perfectly textured, making it a favorite choice for pie enthusiasts.
Why is this the best recipe?
- Flakiness: The use of cold shortening creates a flaky texture, as the shortening melts during baking, leaving behind layers of tender, airy dough. This flakiness is one of the most desired qualities in a pie crust.
- Tenderness: Shortening has a high fat content without water, which means it prevents gluten formation better than butter, resulting in a more tender crust that melts in your mouth.
- Ease of Use: This recipe is straightforward and doesn’t require special techniques or equipment. The ingredients are common, and the method is simple, making it accessible for both novice and experienced bakers.
- Versatility: The pie crust is versatile enough to be used for both sweet and savory pies. The addition of sugar is optional, allowing you to customize the dough based on the type of pie you’re making.

Ingredients and substitutes
- All-Purpose Flour: Provides the crust’s structure. The gluten in the flour forms a network that holds the dough together. Whole wheat flour (for a heartier crust), gluten-free flour blend (for a gluten-free option).
- Salt: Enhances the crust’s flavor. Sea salt, kosher salt (adjust quantity slightly as they have different saltiness levels).
- Sugar (Optional): Adds a slight sweetness and helps with browning. Honey or maple syrup (reduce liquid in the recipe slightly), or omit entirely for savory pies.
- Vegetable Shortening: Creates a tender, flaky texture by inhibiting gluten formation and providing a stable fat that is easy to work with. Any solid vegetable fat, such as Crisco, Shortbrite, Dalda, etc, works well. Butter (for more flavor and flakiness), lard (for a very flaky crust with a slightly different flavor), and margarine (for a non-dairy option). My personal preference is half butter and half shortening. If you don’t have vegetable shortening, you can make an all-butter pie crust.
- Ice Water: Helps bind the dough together without melting the fat, ensuring a flaky texture. Cold milk or buttermilk (adds richness), cold vodka (evaporates during baking for an extra flaky crust).

Step-by-step: Pie crust with shortening
- Mix Dry Ingredients: In a large bowl, whisk together the flour, salt, and sugar (if using).
- Cut in Shortening: Add the cold, cut-up shortening to the flour mixture. Using a pastry cutter, two knives, or your fingers, cut the shortening into the flour until the mixture resembles coarse crumbs with some pea-sized pieces remaining.
- Add Ice Water: Sprinkle the ice water over the flour mixture, one tablespoon at a time, while gently tossing the mixture with a fork or your hands. Continue adding water until the dough starts to come together, but is not sticky. It should hold together when pressed.

- Form the Dough: Divide the dough into two equal parts. Flatten each portion into a disc, wrap in plastic wrap, and refrigerate for at least 1 hour or up to 2 days. This allows the gluten to relax and the shortening to firm up, making the dough easier to roll out.
- Roll Out the Dough: On a lightly floured surface, roll out one disc of dough to fit your pie pan. Start from the center and work your way out, keeping the dough as circular as possible. If the dough cracks or breaks, patch it together by pressing gently.
- Transfer to Pie Pan: Carefully lift the rolled-out dough and place it into the pie pan, gently pressing it into the bottom and sides. Trim the excess dough, leaving about a 1-inch overhang.

- For a Single-Crust Pie: After fitting the dough into the pie plate, trim the excess dough, leaving about a 1-inch overhang.
- Fold the edges under and crimp as desired. Chill for at least 30 more minutes before baking. This helps prevent shrinkage and maintains the crust’s shape during baking.
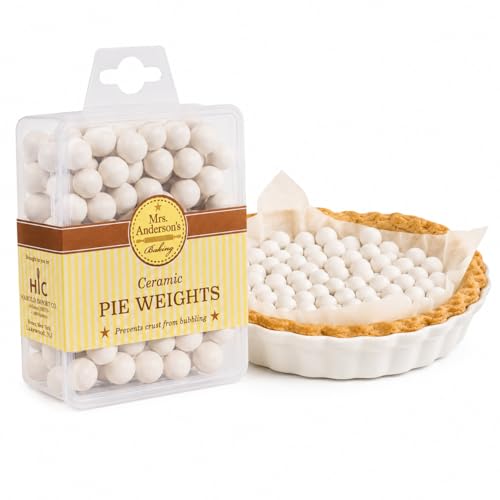
- If the recipe calls for a pre-baked crust, prick the bottom and sides with a fork to prevent puffing, then line with parchment paper and fill with pie weights or dried beans.
- Bake for 15 minutes for a partially baked crust; add the filling, and bake until done.
- For a prebaked pie crust, bake for 15 minutes with pie weights, then remove the pie weights and bake for another 15 to 20 minutes until lightly golden.

- For a Double-Crust Pie: Roll the first dough, line the pan, trim the edges, and keep chilled.
- Roll out the second disc of dough in the same manner.
- Fill the bottom crust with your desired filling, then place the second rolled-out dough on top.
- Trim the excess dough, leaving about a 1-inch overhang. Fold the edges under and crimp as desired to seal.
- Cut a few slits in the top crust to allow steam to escape. Bake at 375°F (190°C) for about 45-55 minutes or until the crust is golden brown and the filling is bubbly.

How to Blind Bake a Pie Crust
- Prepare the Dough: Roll out your chilled pie dough on a lightly floured surface to about 1/8 inch thickness. Carefully transfer the rolled-out dough to your pie pan, gently pressing it into the bottom and sides. Leave a slight overhang of dough around the edges.
- Trim and Crimp the Edges: Trim the excess dough, leaving about a 1-inch overhang. Fold the overhang under itself and crimp the edges using your fingers or a fork to create a decorative border.
- Chill the Dough: Place the prepared pie crust in the refrigerator for at least 30 minutes to firm up. This helps prevent shrinking during baking.
- Preheat the Oven: Preheat your oven to 375°F (190°C). Place a baking sheet in the oven to preheat as well. The hot baking sheet helps set the bottom crust quickly.
- Line with Parchment Paper: Remove the chilled pie crust from the refrigerator. Line the inside of the crust with parchment paper or aluminum foil, making sure the paper or foil extends up the sides and covers the edges.
- Add Pie Weights: Fill the lined crust with pie weights, dried beans, or uncooked rice. This prevents the crust from puffing up and helps it maintain its shape.
- Bake the Crust: Place the pie pan on the preheated baking sheet in the oven. Bake for 15-20 minutes, or until the edges of the crust start to turn light golden brown.
- Remove Weights and Paper: Carefully remove the pie pan from the oven. Lift out the parchment paper or foil along with the pie weights. Be cautious as the weights will be hot.
- Bake Until Lightly Golden: Return the crust to the oven and bake for an additional 5-7 minutes, or until the bottom of the crust looks dry and is just starting to turn a light golden color. This ensures the bottom crust is partially baked and won’t get soggy when you add the filling.
- Cool the Crust: Remove the pie crust from the oven and let it cool slightly on a wire rack before adding your filling. The crust is now ready to be filled and baked according to your pie recipe.


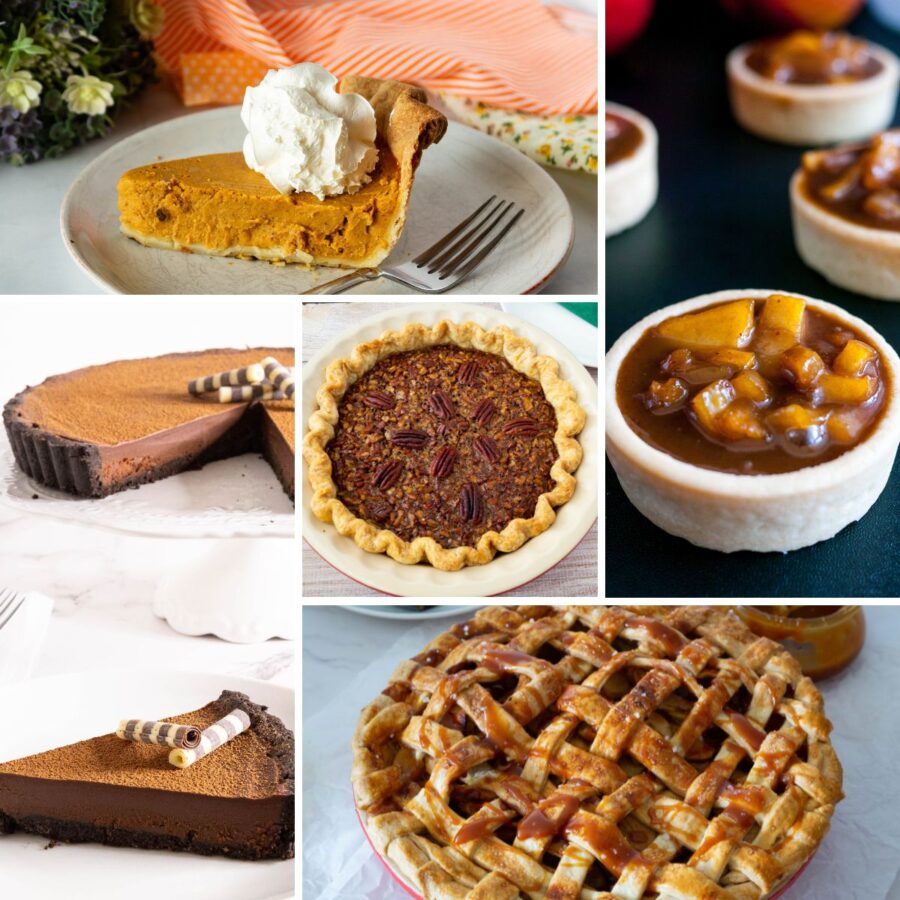
- Buttercream Basics – Frosting 101
- Recipe for Double Pie Crust
- Best EVER Homemade Fondant
- Comfort in a Crust: Chicken Pot Pie with Pie Crust Recipe
- Discover the Secret to Bakery-Style Frosting
Frequently asked questions
Yes, you can make the dough ahead of time and refrigerate it for up to 2 days or freeze it for up to 3 months. Thaw frozen dough in the refrigerator overnight before using.
Overworking the dough can develop too much gluten, leading to a tough crust. Handle the dough as little as possible and mix just until it comes together.
Not enough fat in the dough can also cause toughness. Ensure you’re using the correct amount of shortening or butter and that it’s cold.
Chill the dough thoroughly before rolling it out and again before baking.
Avoid stretching the dough when fitting it into the pie pan. Gently press it into place.
Use pie weights when blind baking to keep the crust from puffing up and shrinking.
Use the edge of your pan to help support the crimp. Cut the excess pastry so that when you fold it, it sits on top of that edge.
So, once you crimp it, it stays on that edge all through baking.
As a result, when baked, you get a perfect crimp.
Patch small cracks with extra dough by pressing a small piece into the crack. For larger cracks, moisten the edges slightly with water and press the dough together.
Yes, you can substitute butter for shortening. Butter adds a richer flavor and creates a flakier crust, but it can be harder to work with because it softens quickly. Use the same amount by weight and keep everything cold.
Underbaking the crust can lead to sogginess. Make sure to bake the crust long enough, especially if blind baking.
Using a hot baking sheet can help set the bottom crust quickly, reducing the chances of it becoming soggy.
Roll the dough around the rolling pin and unroll it over the pie plate. Alternatively, fold the dough in quarters, place it in the pie pan, and unfold it.
If your dough is too crumbly and won’t come together, add a bit more ice water. Add one tablespoon at a time until the dough holds together when pressed.
Yes, you can freeze pie crust made with shortening. Freezing is a great way to prepare ahead of time and ensure you always have a ready-to-use crust for your baking needs. Shortening-based crusts freeze well because the fat helps maintain a good texture after thawing, ensuring your crust remains flaky and tender.
To freeze your pie crust, first prepare the dough according to your recipe. Shape the dough into a disk or fit it into a pie dish, then wrap it tightly in plastic wrap or aluminum foil. For extra protection, you can place the wrapped dough in a resealable plastic bag to prevent freezer burn.
When you’re ready to use the frozen crust, remove it from the freezer and let it thaw in the refrigerator for several hours or overnight. This gradual thawing process helps maintain the texture of the dough and makes it easier to work with. Avoid thawing at room temperature, as this can cause the dough to become too soft and difficult to handle.
If you’re freezing the pie crust unbaked, you can bake it directly from the freezer; just add a few extra minutes to the baking time. If you’ve already baked the crust, thaw it at room temperature before filling and serving. Freezing is a convenient option that can save time and ensure you have a delicious, homemade pie crust ready whenever you need it.
Pie Crust with Shortening
Pie crust shortening is known for its tender, flaky texture, perfect for sweet and savory pies. Shortening's high fat content prevents gluten formation, resulting in a consistently tender dough. Shortening's high melting point makes the dough easy to handle and less prone to shrinkage during baking.
Video
Ingredients
- 2 ½ cups (310 g) All-purpose flour
- ½ tsp Salt
- 1 tbsp Sugar optional
- 1 cup (200 g) chilled Vegetable shortening I use half butter and half shortening
- 4 – 6 tbsp (60 ml) Chilled water
Method
- Mix Dry Ingredients: In a large bowl, whisk together the flour, salt, and sugar (if using).2 ½ cups All-purpose flour, ½ tsp Salt, 1 tbsp Sugar
- Cut in Shortening: Add the cold, cut-up shortening to the flour mixture. Using a pastry cutter, two knives, or your fingers, cut the shortening into the flour until the mixture resembles coarse crumbs with some pea-sized pieces remaining.1 cup chilled Vegetable shortening
- Add Ice Water: Sprinkle the ice water over the flour mixture, one tablespoon at a time, while gently tossing the mixture with a fork or your hands. Continue adding water until the dough starts to come together, but is not sticky. It should hold together when pressed.4 – 6 tbsp Chilled water
- Form the Dough: Divide the dough into two equal parts. Flatten each portion into a disc, wrap in plastic wrap, and refrigerate for at least 1 hour or up to 2 days. This allows the gluten to relax and the shortening to firm up, making the dough easier to roll out.
- Roll Out the Dough: On a lightly floured surface, roll out one disc of dough to fit your pie pan. Start from the center and work your way out, keeping the dough as circular as possible. If the dough cracks or breaks, patch it together by pressing gently.
- Transfer to Pie Pan: Carefully lift the rolled-out dough and place it into the pie pan, gently pressing it into the bottom and sides. Trim the excess dough, leaving about a 1-inch overhang.
- For a Single-Crust Pie: After fitting the dough into the pie pan, trim the excess dough, leaving about a 1-inch overhang. Fold the edges under and crimp as desired. Chill for at least 30 more minutes before baking. This helps prevent shrinkage and maintains the crust's shape during baking.– If the recipe calls for a prebaked crust, prick the bottom and sides with a fork to prevent puffing, then line with parchment paper and fill with pie weights or dried beans. – Bake for 15 minutes for a partially baked crust; add the filling, and bake until done. – For a prebaked pie crust, bake for 15 minutes with pie weights, then remove the pie weights and bake for another 15 to 20 minutes until lightly golden.
- For a Double-Crust Pie: Roll the first dough, line the pan, trim the edges, and keep chilled. Roll out the second disc of dough in the same manner. – Fill the bottom crust with your desired filling, then place the second rolled-out dough on top. – Trim the excess dough, leaving about a 1-inch overhang. Fold the edges under and crimp as desired to seal. – Cut a few slits in the top crust to allow steam to escape. Bake at 375°F (190°C) for about 45-55 minutes or until the crust is golden brown and the filling is bubbly.
Notes
-
- Keep Everything Cold: Cold ingredients are crucial for a flaky crust. Use chilled flour, shortening, and water. You can even chill your bowl and utensils before starting. This prevents the fat from melting into the flour too soon.
-
- Don’t Overwork the Dough: Handle the dough as little as possible. Overmixing or over-kneading can develop too much gluten, making the crust tough instead of tender. Mix just until the dough comes together.
-
- Use a Light Touch: When rolling out the dough, use a light touch to avoid compressing the dough too much. Roll from the center outwards, rotating the dough frequently to maintain an even thickness.
-
- Chill the Dough: After mixing, chill the dough for at least 1 hour before rolling it out. This relaxes the gluten and firms up the fat, making the dough easier to handle and less likely to shrink during baking.
-
- Proper Rolling Technique: Flour your work surface and rolling pin lightly to prevent sticking. If the dough starts to soften or stick, return it to the fridge for a few minutes. Roll out the dough to about 1/8 inch thickness for an even bake.
-
- Use Pie Weights for Blind Baking: When pre-baking (blind baking) a pie crust, use pie weights or dried beans to keep the crust from puffing up and shrinking. Line the crust with parchment paper before adding the weights.
-
- Seal the Edges: For double-crust pies, seal the edges well to prevent leaks. You can use a fork or your fingers to crimp the edges. For single-crust pies, folding the overhanging dough under itself creates a sturdy edge.
-
- Ventilation: If making a double-crust pie, cut slits or create a decorative pattern in the top crust to allow steam to escape. This prevents the filling from becoming too watery and helps the crust bake evenly.
-
- Egg Wash for a Golden Finish: For a beautifully golden and shiny crust, brush the top with an egg wash (a beaten egg mixed with a tablespoon of water or milk) before baking.
-
- Monitor Baking Temperature: Start baking your pie at a higher temperature (around 425°F / 220°C) for the first 15 minutes to set the crust, then reduce the temperature to 375°F / 190°C to finish baking. This helps achieve a crisp bottom crust and evenly cooked filling.
-
- Preventing Soggy Bottoms: To avoid a soggy bottom crust, bake your pie on the lower rack of the oven. You can also preheat a baking sheet in the oven and place your pie pan on it for extra heat on the bottom.
-
- Let It Rest: Allow the pie to cool completely before cutting it. This helps the filling set properly and prevents it from running out when sliced.
Equipment you will need


Nutrition
Tried this recipe?
Mention @veenaazmanov_kitchen or tag #veenaazmanovkitchen!


Don’t lose this recipe! Save it for Later!
📌 Save this Recipe for later on Pinterest so you can easily find it again.
⭐ Add Veena Azmanov Kitchen to your Google Preferred Sources.
It helps Google show you more of our recipes.
📧 Subscribe for new recipes delivered to your inbox.
🎥 Follow us for more recipes


About time I said how AWESOME this recipe is as I have used it a million times. I always double it for covered pies and have more than enough which is good since my kids walk by and take little bits of the dough!
Thank you so much for the lovely feedback, Sarah. Happy holidays to you.
Hello again. I made your wonderful dough and it is perfect. I rolled the dough to about 1/8″ thick for the bottom and 1/4″ thick for my mini pie maker pies, then cut an x in the tops before baking.. They came out, perfect, the bottom crust was flakey and the tops rose and browned once again to perfection. I tried so many and yours is 100 stars. Thank you so much. I am now going to try your other recipes.
Thank you so much for the lovely feedback, Larry. I am so happy you enjoyed this recipe.
Hello, you are right, I must have been sleeping when I read this, again thanks, I tried it and when cutting the pie maker circles I cut the dough a little thicker and the tops rose to perfection making a perfect round browned top. Again, thanks for very much for sharing.
Larry
Thank you, Larry
I made this and loved it for my mini pie maker, really perfect. I made the small batch and then noticed that the butter was the same amount for the 1X and the 2X double batch. Was that correct. I will double the butter just in case when I make it. Again thanks for sharing.
Hey Larry, I just checked the butter and shortening amounts do change when you hit 2X. Thanks Perhaps you were looking at the notes section.
Pastry Day 7 Done
Pastry Day 7 DONE
Cindy
You write recipes well! Mama and I used to make the most incredible shortening crusts. Then Crisco changed the formula. Can’t tell you how many dough balls I trashed as the texture was awful. Now I use half water half unflavored vodka. Works amazingly well! And, unless making a savory crust, we always put at least a tsp of good vanilla into the water measurement. Takes the crust over the top!
“Pastry Day 7 DONE”
Pastry – Day 7 – Done
Pastry Day 7 Done